Storage and Logistics
Camp Storage
We store our gear in four shipping containers and two trailers, which live in Reno, Nevada and come to playa with us every year.
| ID and Name | What is it? | What's it for? | Where is it stored? (*) *Location Details |
| FT1 - the bike fort |
20' Shipping Container (Deck on top) |
Camp bikes | A |
| FT2 - the tool fort |
20' Shipping Container (Deck on top) |
Tools and supplies | A |
| FT3 - the canteen | 20' Shipping Container |
New for 2026 - Public and private camp furnishings
On playa: snacks and meal grab-and-go |
A |
| FT4 - Habitat | 20' Shipping Container | New for 2026 - Tents and shade structures | A |
| GTM - the pillow fort | 24' Bumper Pull Trailer |
Public camp furnishings
On playa: air conditioned nap & sex space |
A |
| The food fort | 24' Bumper Pull Trailer | Commercial kitchen | B |
| The Gayflower (retired) | 53' Semi Trailer | Water tanks, showers, and restrooms | C |
| The Empire Fort (retired) | 25' Semi Trailer | Storage | C |
Bike Fort
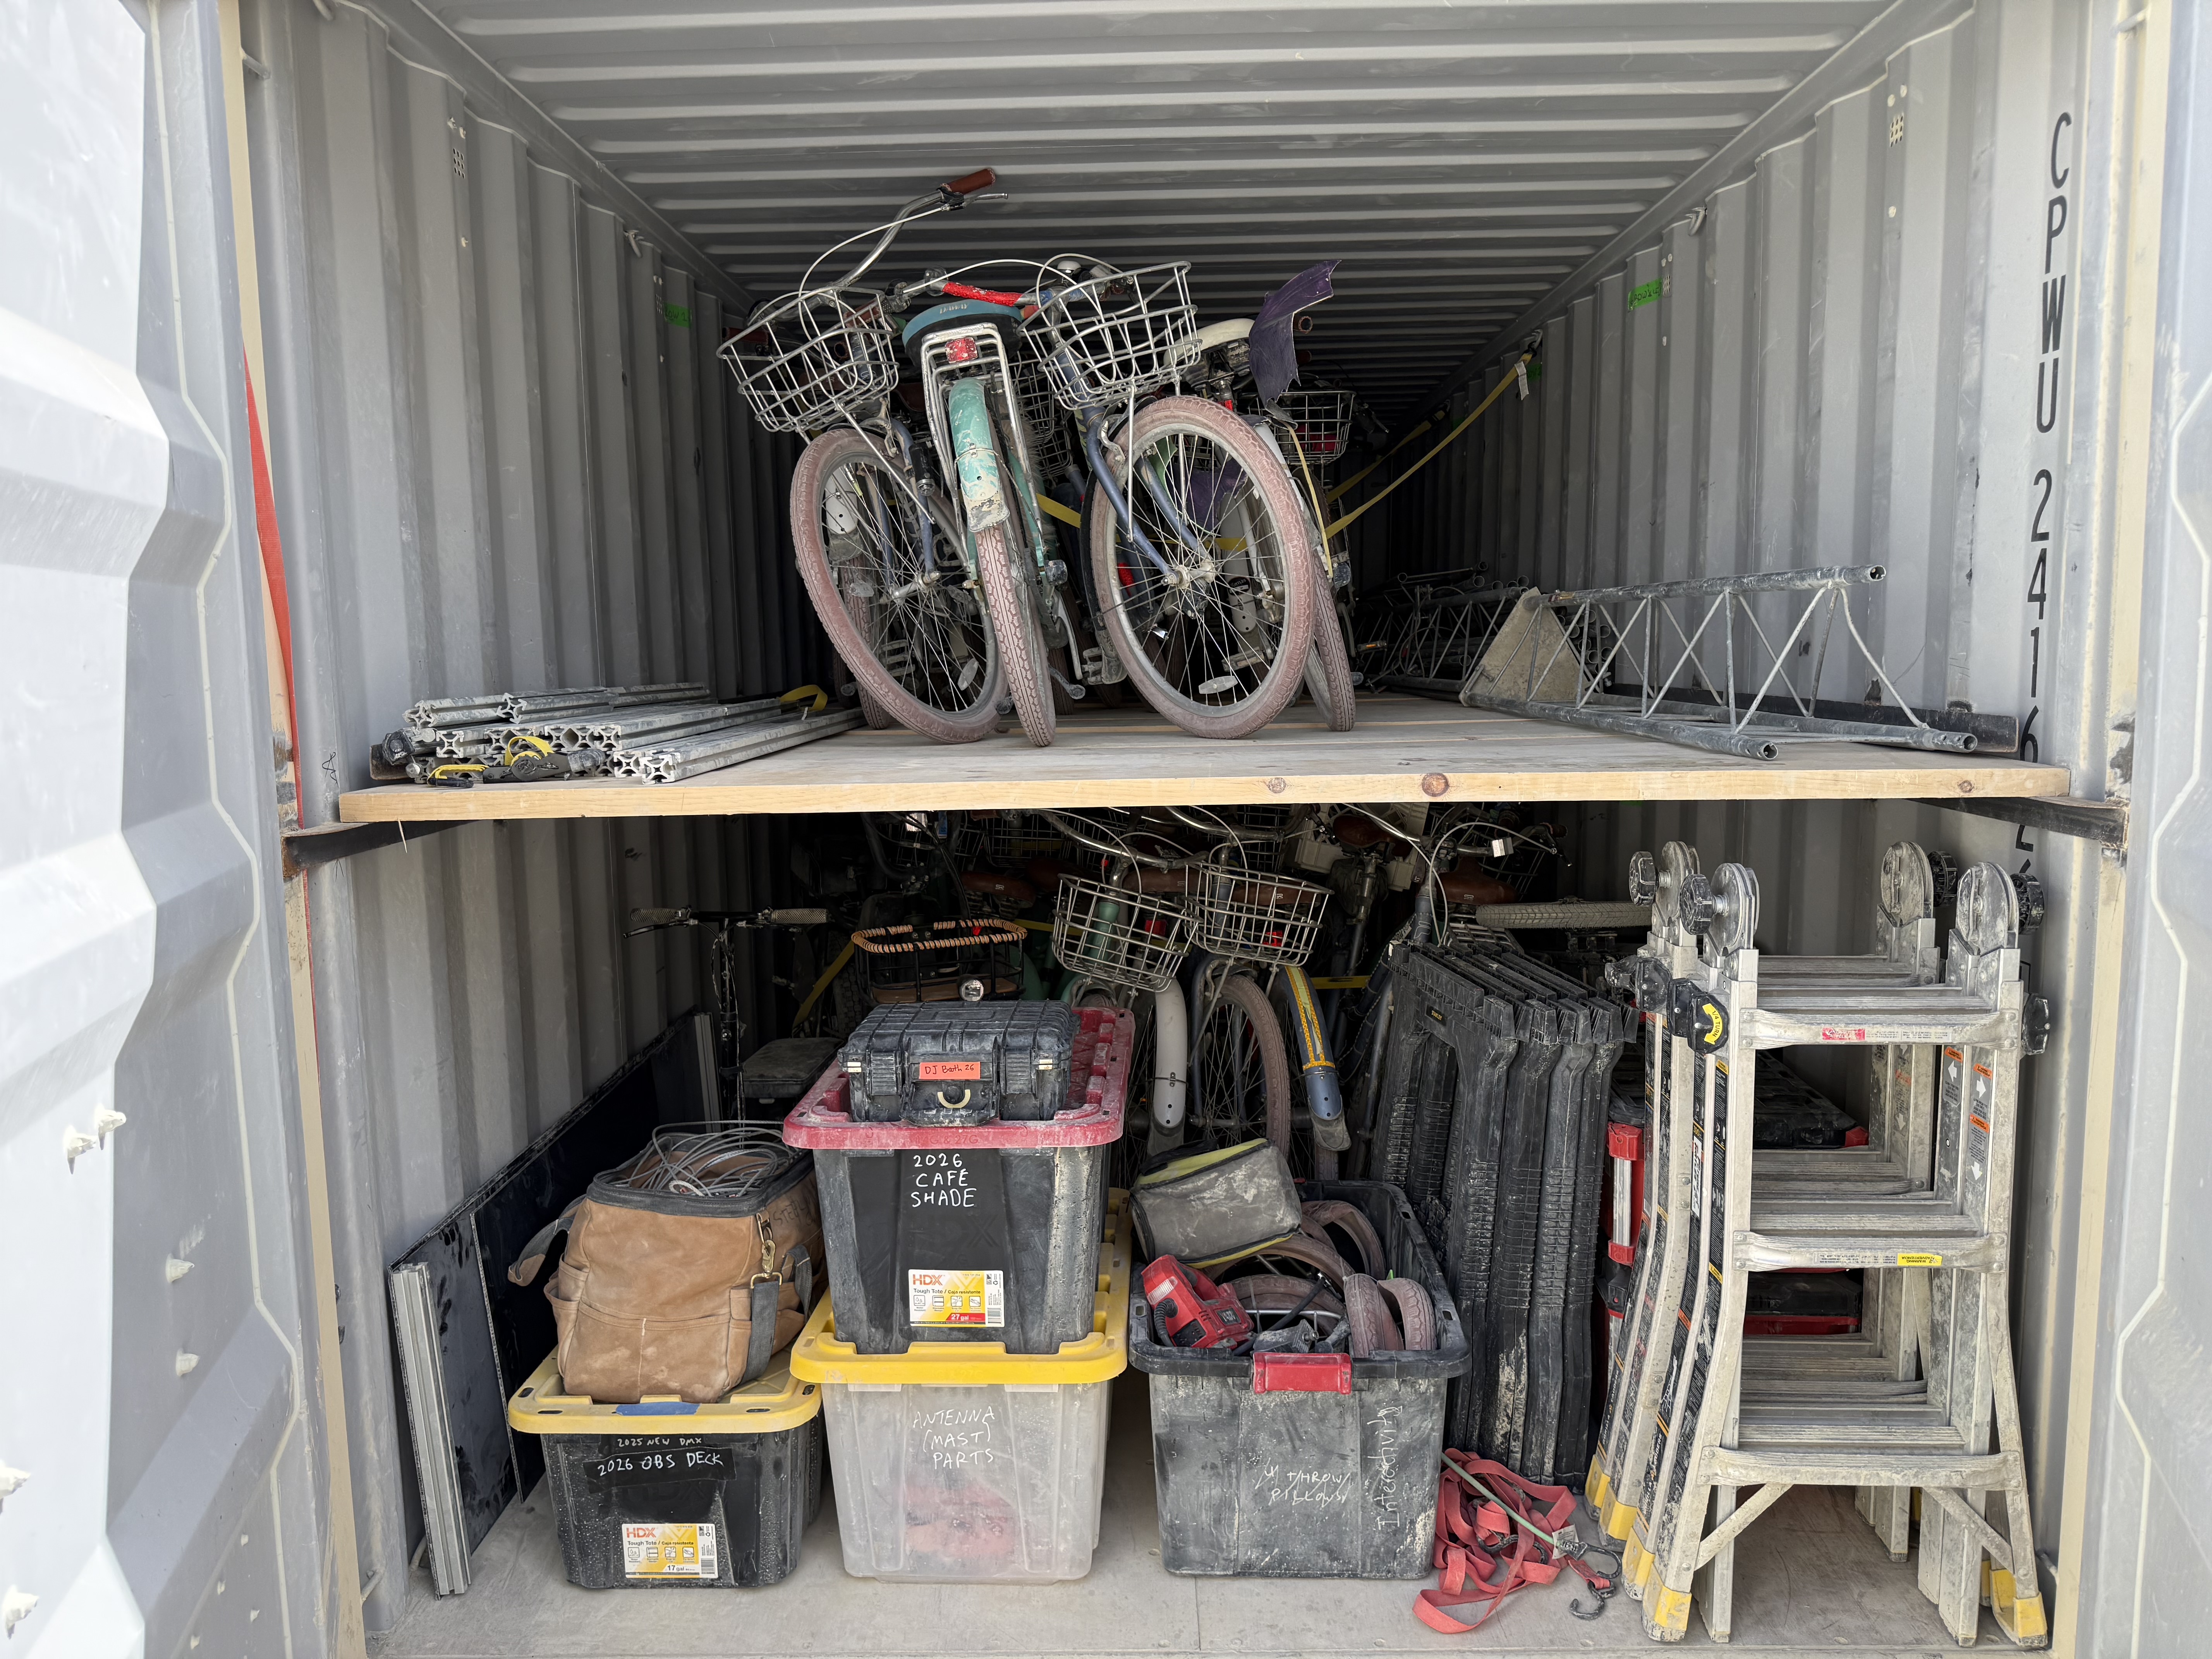 The Bike Fort stores about 50 camp bikes on two levels. The deck between the levels is made of wood planks which can be taken out and used to construct utility tables behind the bar using four sawhorses, also stored in the Bike Fort.
For simplicity, literally everything bike related is stored here: tools, spare parts, camper bikes that we are storing for them, and a bike trailer for getting ice.
The Bike Fort and Tool Fort have plywood decking on top to create an observation deck. The observation deck uses special 1-3/8" pipes (different size than the rest of our shade) to create a frame with steel wire guardrails. There is a 53' wide shade that goes between the observation decks providing shade for the Turtle Café, and two ladders for getting up and down. These are all stored in the bike fort.
Always be careful not to mix the observation deck pipes and fittings with the camp habitat pipes and fittings; they are different thicknesses!
Also stored in the bike fort in 2026:
- An antenna mast which might be used for a turtle sign (tbd)
- The 2025 DJ booth, which has been disassembled and would take some work to reassemble and use
Once the bikes have been removed from the Bike Fort on playa, it will have room to store things like empty totes that won't be needed during the event.
Tool Fort
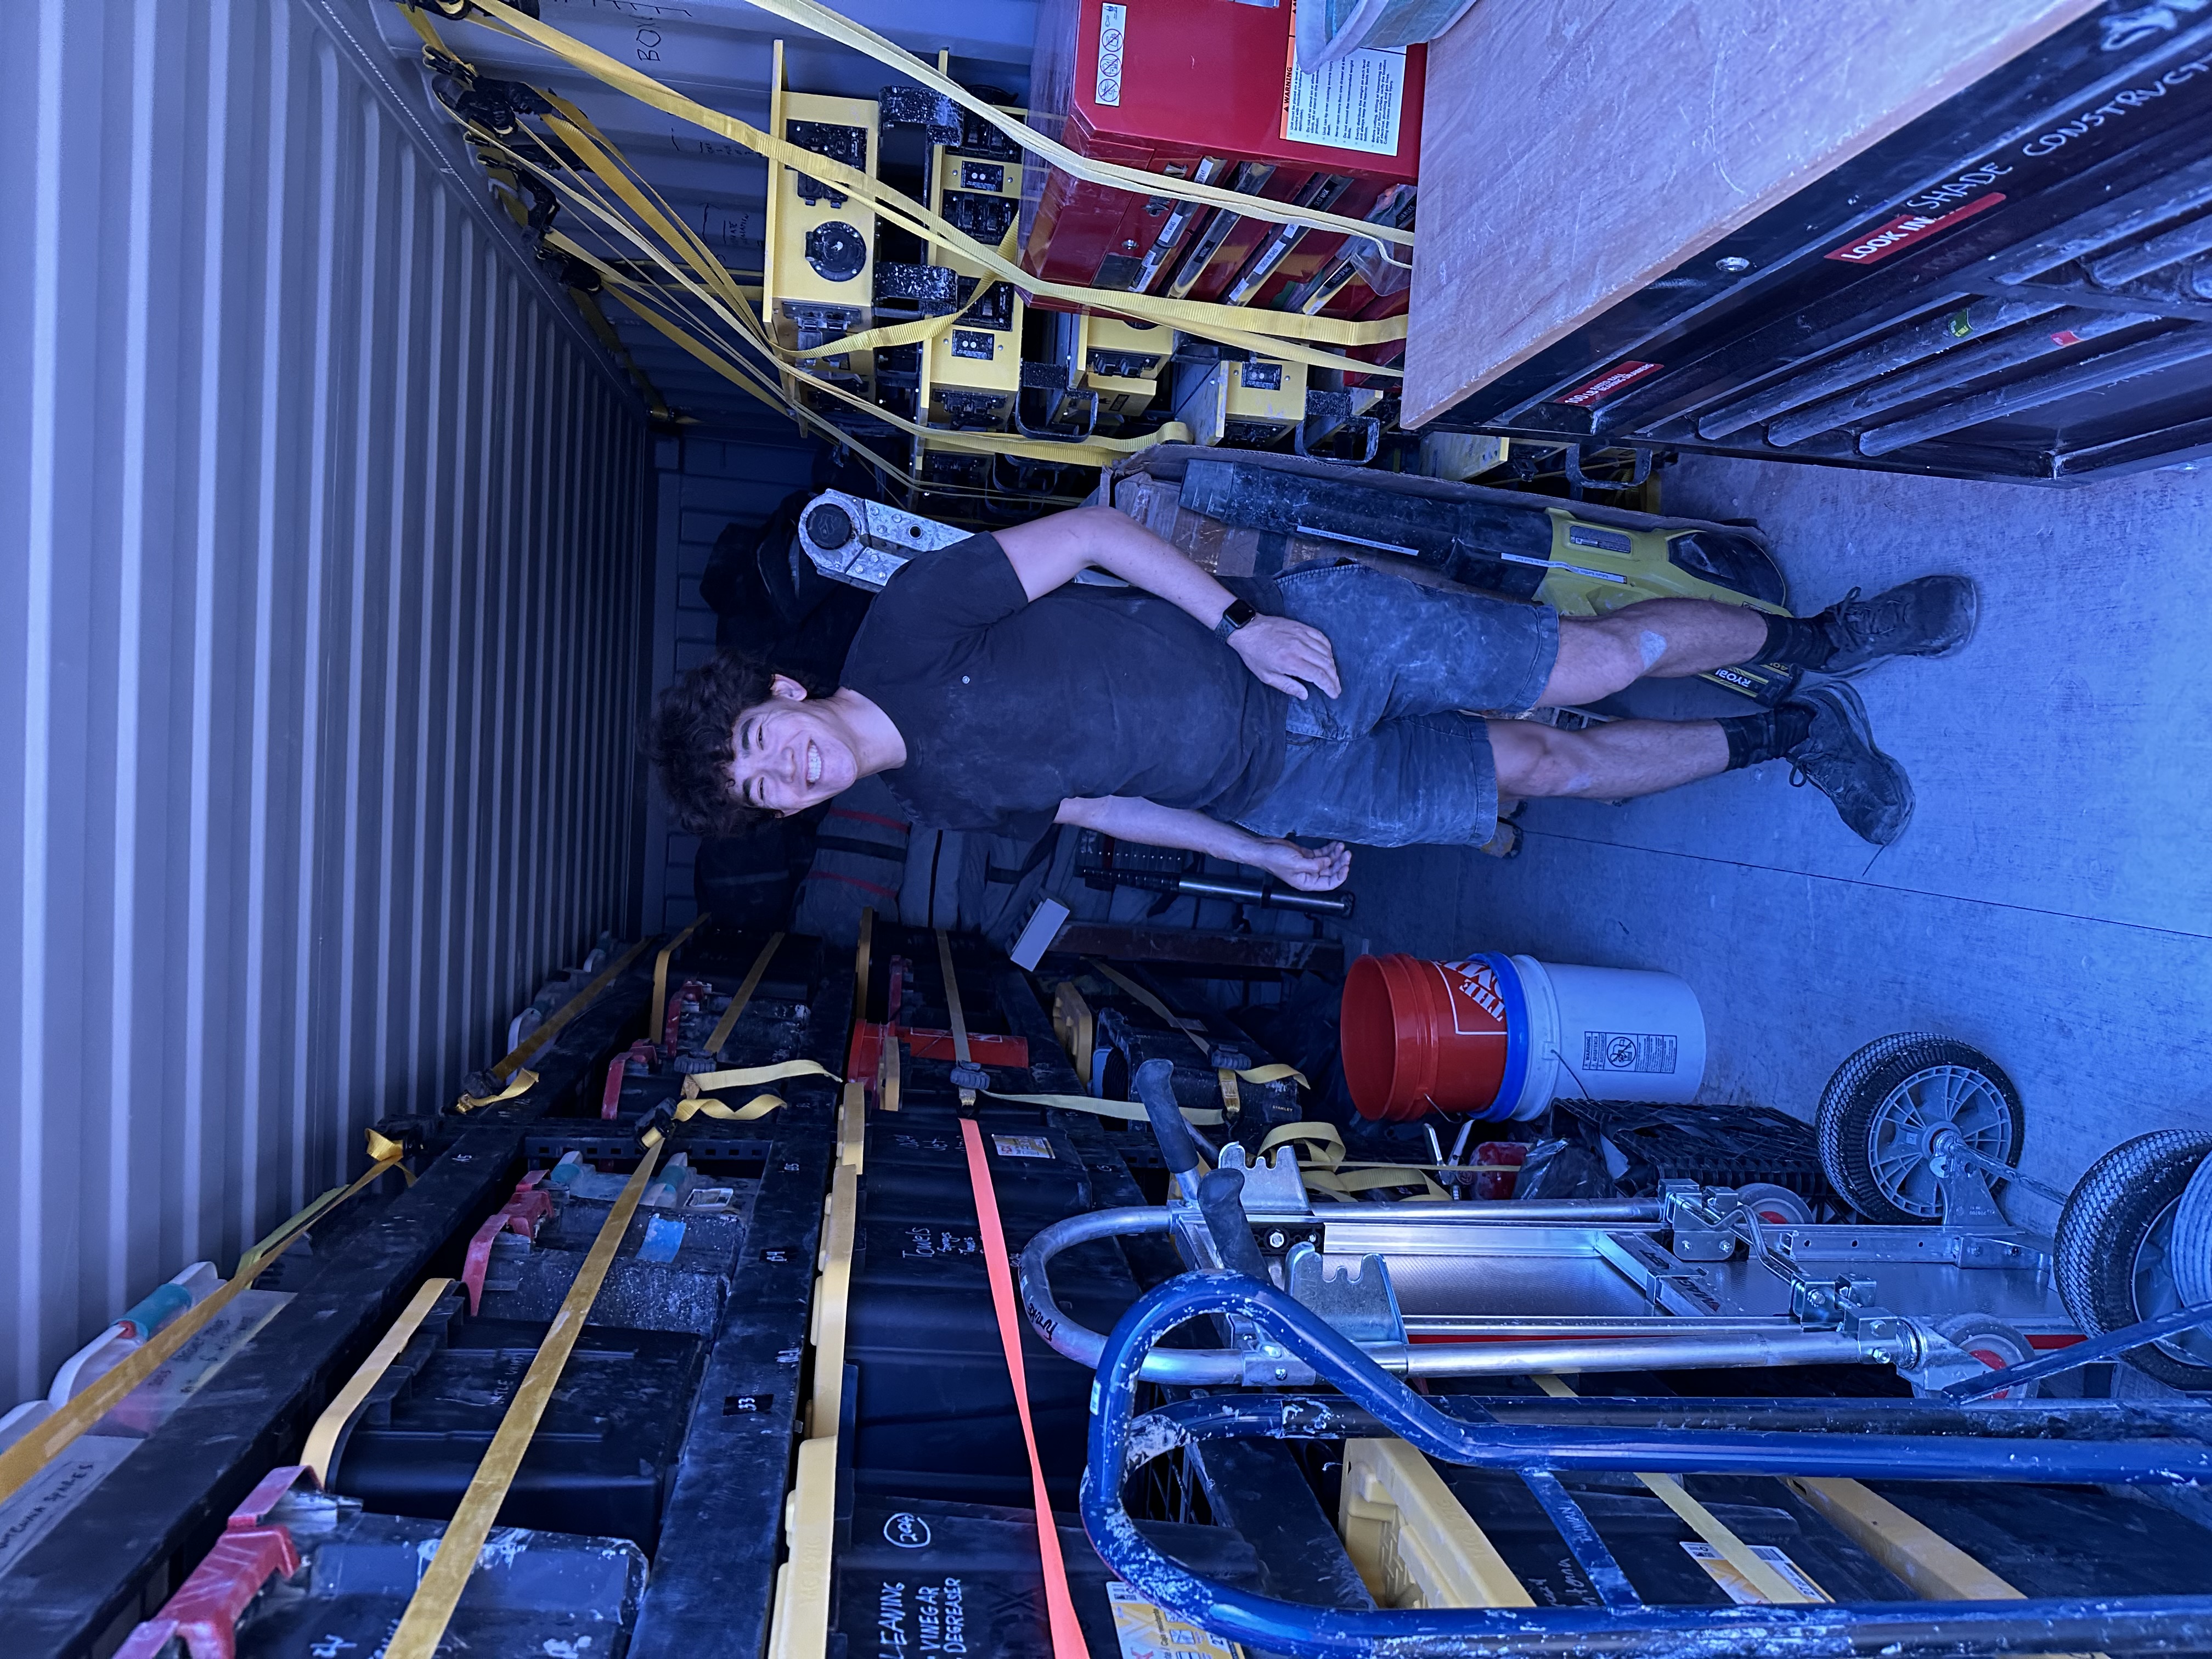
Our famous tool fort stores everything that we need access to grab and use on playa. It has hundreds of items on shelves on the left and in drawers on the right. Here are the major categories of items you'll find there:
- First aid kits, narcan, and defibrillator
- A huge selection of tools of every type
- Chargers for all the power tools
- Plumbing equipment
- Lights
- Our village electrical distribution system consisting of 24 spider boxes and tons of 50 amp cables to connect them
- Supplies (consumables)
- Camper comfort items if someone forgot something crucial
The tool fort is actively used throughout build week, event week, and strike. It should be plugged into 120V for lighting and tool chargers.
Keep the aisle of the tool fort free and clear at all times, so it is easy to access anything.
Canteen
New for 2026!
During event week, the canteen will be set up as a place for campers to pick up grab-and-go meals and snacks, and cook their own more elaborate snacks. There will be a glass-front refrigerator, metro shelving with snacks, and tables set up for meal prep with a microwave oven.
The canteen has a double shower curtain that can be hung in front allowing easy entrance without too much dust getting in, so that the big container doors do not have be opened and closed all the time. We will install an air conditioner to keep it cooler so that the fridge doesn't struggle.
Outside of event week, the canteen stores a lot of gear that is set up around camp.
This gear includes things like:
- Turtle café tables and chairs
- Turtle café bar and minibar
- The new shower
- Camper cubbies
- Folding tables and benches
- Burn barrels
- Propane grill
- The big whiteboard
Only store gear in the canteen that is completely taken out during event week, so that we can free space for food and snack prep.
The canteen also contains ten crates full of extension cords (for no logical reason, they just fit).
Canteen - Rear Storage Area
Anything the camp owns that is not going to be used on playa in any given year is stored in the back of the canteen, behind the extension cords. In 2026 that mainly includes:
- Extra audio and lighting gear
- Desert HIIT workout equipment
Habitat
New for 2026!
Everything needed to set up the entire camper living area:
- EMT structure:
- Poles
- Footers and connectors
- Bungies, climbing hangers, and ratchet straps
- Tarps and shade mesh
- Lag screws
- Shiftpods
- Cots
- Camp chairs and stools
- Welcome mats
- Hammocks
- Camper power points
Other tents are also stored here:
- The high-peak tent in front
- 20' and 16' Lotus Belle tents in the back rear
The Pillow Fort
During event week the pillow fort is set up as an air conditioned nap/sex area.
Only store gear in the pillow fort that is completely taken out during event week, so that we can set it up properly without moving a lot of stuff.
Contents:
- Pillow fort furnishings
- DJ gear and lighting
- Wicker chairs
- Rugs and cushions for Lotus Belle tent
Where is it?
The detailed Where Is It? spreadsheet helps you track down exact locations down to shelf and bin, especially of specific tools and items in the Tool Fort.
Camp Supplies
What we call "supplies" are anything consumable that we stock up on before each burn to have on hand: things like batteries, towels, cleaning supplies, and so forth. This does not include anything used by the food team.
- Google Sheets: Camp Supplies
Turtle Truck
Quick pick...
 |
We rent a truck in San Francisco to make camp possible.
|
Turtle Truck reservation form
To use the Turtle Freight service reserve your space using the form: https://forms.gle/pCYA8FRLh4WReAbT9
Plan in advance!
MOOP, MOOP, MOOOOOOOP...
While we’re happy to transport your item, please make sure you think about the MOOP.
Who is demooping your item prior to being loaded on the truck? Don’t bring unnecessary MOOP to playa!
Loading the truck
The truck will leave from San Francisco, with a stop in Reno. Make sure you bring your items during the loading time.
| In San Francisco | In Reno |
|
Tip: If you plan to be in Reno on Saturday before the event or earlier, join us while we load the truck! |
Bring it home
Your items will surely love the hot breeze of Black Rock desert but they will definitely want to return to their forever home which, I can assure you, is not the Freight’s team garage!
Have you thought about how you will return your items home (or dispose of them)?
Please keep in mind that the truck will not be able to bypass the traffic of the Exodus, also we will arrive in Reno way after the Turtle Bus! We will also have to dispose of the garbage. Bottom line, if you plan to leave Reno or San Francisco right after you step outside of the bus, please make some arrangements with a local Turtle in advance to take care of your items.
Typical schedule
Here's a typical schedule based on 2024:
Before the event
| Friday | Saturday |
|
|
After the event
| Monday After Temple Burn | Tuesday after the event | Wednesday after the event |
|
|
|
Freight for camp items
If you need to bring equipment for the camp, contact the freight team (Alexandre Sartel, Jorge Ortiz, Alejandro Robles).
Logistics for the Truck team
Show
Truck Rental Companies
These two companies are reliable and happy to rent to Burners. However they have limited availability so you have to make a reservation in March or April.
- Hengehold Trucks (Company selected for 2024)
- Doherty's Truck & Auto Rental
Road guides (to be printed)
- Guide to safe pull-outs along CR447: Here
- Trash and Recycling facilities: Here
- In 2024, we dumped the trashes at Sage Transfer station (1390 E. Commercial Row, Reno NV)
Templates
Link to Manifesto, Intake form, etc...
Financials
Rental 2024: Box Truck 15ft with Ramp
- 13 days, 800 miles (including CDW 200USD): 3626 USD
- Truck wash: 200 USD
- Gas: 250 USD
- Trash station: 180 USD
Tool Fort

Tool Fort Details
A 20-foot long shipping container.
- Stored during the year at Location A.
- Stores tools! Mostly things needed to build and strike the camp.
- Also camp supplies, easily accessible on shelves and in drawers
- Room in the back for shiftpods
- Electrical distribution equipment like 50amp cables and Spider Boxes
- Accessible, on request, during the year for Reno Work Weekends
Guide to LTL Shipping
What Is LTL and Why Do I Need It?
LTL stands for Less Than Truckload. If you've only ever shipped with UPS or FedEx, think of LTL as the middle ground between parcel shipping and hiring an entire semi-truck. Your shipment shares trailer space with other shippers' freight, and you pay for the portion of the truck you use.
You typically need LTL when your shipment is too big or heavy for parcel carriers. The rough threshold is anything over about 150 pounds, larger than about 108 inches in length, or more than a few boxes. If you've got one or two pallets of product sitting in your garage, you're squarely in LTL territory.
The experience is very different from dropping a box at a UPS Store. A driver will come to your location with a truck, load your pallets (usually with a liftgate), and your freight will pass through one or more terminals before reaching the destination warehouse. The whole process takes anywhere from two to seven business days depending on distance.
Step 1: Get Your Supplies
Pallets
You need standard GMA pallets — these are 48" x 40", the universal size that carriers, warehouses, and forklifts are built around.
Avoid painted pallets (often proprietary to companies like CHEP or PECO and technically aren't yours to take) and any pallet that smells of chemicals.
Get new 4-way entry heat-treated (HT stamped) pallets for heavy loads (Uline sells them in five packs)
Wrapping and Securing Materials
- Stretch wrap (pallet wrap): This is non-negotiable. You need at least one roll of 18" or 20" wide, 80-gauge stretch film. Available at Home Depot, Lowe's, U-Haul, Walmart, or Amazon for about $15–$25 per roll. Get a roll with a built-in handle or buy a separate stretch wrap dispenser — wrapping by hand without one is miserable.
- Packing tape and a tape gun: Standard 2" or 3" clear or brown packing tape for sealing individual boxes. A tape gun costs about $10 and will save your sanity.
- Ratchet straps For heavy loads band/strap the load to the pallet with ratchet straps; at least 2-3 cross bands
- Corner boards (edge protectors): These are L-shaped cardboard or plastic strips that go on the corners of your pallet stack before wrapping. They prevent the stretch wrap from crushing your boxes at the edges and add structural rigidity. You can find them at U-Haul, packing supply stores, or Amazon. Around $1–$2 each; you need at least four.
- Cardboard sheets or slip sheets: Useful to place between layers of boxes on the pallet and on top as a cap. You can cut up large cardboard boxes for this.
Optional But Helpful
- A box cutter or utility knife.
- A tape measure.
- A bathroom scale or luggage scale (you'll need an approximate weight).
- Shipping labels and a printer.
- "Do Not Stack" or "Fragile" stickers if your freight can't bear weight on top (available on Amazon for a few dollars).
Step 2: Build Your Pallet Properly
This is the most important step. A badly built pallet can get damaged in transit, and if the carrier determines your packaging was inadequate, your freight claim will be denied. LTL freight gets handled by forklifts, moved through busy terminals, and stacked next to other freight. It is not treated gently.
The Golden Rules
- Nothing should overhang the pallet edges. Overhanging items get crushed by forklifts and other freight. If your boxes are slightly too big, use a larger pallet or rearrange.
- Stack in columns, with heavier boxes on the bottom. Interlock layers like bricks if possible (alternate box orientation each layer) for stability.
- Fill gaps. Empty space inside the stack leads to collapse. Use void fill (crumpled paper, air pillows, foam) inside boxes, and fill gaps between boxes on the pallet with cardboard or foam.
- Make it flat on top. A flat top surface means other freight can safely be stacked on yours during transit (unless you pay for non-stackable, which costs more). If you absolutely cannot have anything placed on top, use a plywood cap and mark it clearly.
- Wrap it like your livelihood depends on it — because it might.
Step-by-Step Palletizing
- Place the pallet on a flat surface in your garage.
- Arrange your heaviest, sturdiest boxes in the first layer, covering as much of the pallet surface as possible.
- Place a cardboard sheet on top of the first layer.
- Stack the next layer, interlocking if you can. Continue until you've stacked everything. Try to stay under 48" in total height (pallet + boxes) if possible. Most carriers accept up to about 72"–84" total, but taller pallets cost more and are harder to manage.
- Place corner boards on all four vertical edges, running from the pallet deck to the top of the stack.
- Place a cardboard cap sheet on top of the stack.
- Begin wrapping with stretch film at the base. Anchor the film to the pallet itself — wrap it around and through the pallet deck boards a few times so the load is locked to the pallet, not just sitting on it. This is the step most beginners skip, and it's the most important.
- Work your way up to the top, overlapping each pass by about half the film width. Pull the film tight as you go — it should be taut, not loose.
- Wrap back down to the base. Do at least 3–4 full passes. If the pallet feels wobbly or you can shift boxes by pushing, add more wrap.
- Secure the film end by pressing it against itself.
You should be able to tilt the pallet slightly and have nothing shift. If you can push the top layer sideways, you haven't wrapped enough.
Step 3: Measure and Weigh Your Shipment
Carriers price LTL based on several factors, and you'll need to provide accurate measurements when booking.
What you need:
- Total weight of each pallet, including the pallet itself (a standard wood pallet weighs about 35–45 lbs). If you don't have a floor scale, weigh yourself on a bathroom scale, then weigh yourself holding individual boxes. Add them up. Round up to the nearest 10 lbs.
- Dimensions of each pallet: length x width x height (including the pallet). Measure the widest, longest, and tallest points.
- Number of pallets (sometimes called "handling units").
- Freight class — this is a classification system (classes 50 through 500) that LTL carriers use to categorize freight. It's based on density, stowability, handling, and liability. Denser, easy-to-handle freight gets a lower class and costs less. For most general merchandise, you're probably looking at class 70–125.
How to Determine Freight Class
The simplest method is to calculate your shipment's density:
Density = Weight (lbs) ÷ Cubic feet
Cubic feet = (L × W × H in inches) ÷ 1,728
Then use this rough density-to-class mapping:
| Density (lbs/ft³) | Freight Class |
|---|---|
| 50+ | 50 |
| 35–50 | 55 |
| 30–35 | 60 |
| 22.5–30 | 65 |
| 15–22.5 | 70 |
| 13.5–15 | 77.5 |
| 12–13.5 | 85 |
| 10.5–12 | 92.5 |
| 9–10.5 | 100 |
| 8–9 | 110 |
| 7–8 | 125 |
| 6–7 | 150 |
| 5–6 | 175 |
| 4–5 | 200 |
| 3–4 | 250 |
| 2–3 | 300 |
| 1–2 | 400 |
| <1 | 500 |
If you're shipping dense items like hardware, canned goods, or electronics in retail packaging, you'll likely land around class 70–100. Lighter, bulkier items like pillows, lampshades, or unassembled furniture will be class 150 or higher.
Get this right. If you book at class 70 and the carrier inspects and reclassifies your freight to class 125, they will adjust the price upward — sometimes dramatically — and send you an additional invoice.
Step 4: Get Quotes and Book the Shipment
Freight Brokers and Marketplaces (Recommended for Beginners)
You don't need to call individual trucking companies. Freight broker platforms aggregate rates from multiple carriers and make the process much easier. These are the most beginner-friendly options:
- Freightquote (by C.H. Robinson) — freightquote.com — One of the most well-known. Enter your details, get instant quotes from multiple carriers, and book online. Very user-friendly.
- FreightCenter — freightcenter.com — Similar marketplace with good customer support.
- GoShip — goship.com — Stripped-down, self-service platform. Great for simple residential pickups.
- uShip — uship.com — Marketplace where carriers bid on your shipment. Can get competitive rates.
- Freightos — freightos.com — Another comparison tool.
What You'll Need to Provide When Getting Quotes
- Pickup zip code (your home).
- Delivery zip code (the warehouse).
- Number of pallets.
- Weight per pallet.
- Dimensions per pallet.
- Freight class (some platforms will calculate this for you).
- Pickup accessorials — this is critical. You need to specify:
- Residential pickup: Your home isn't a commercial location, so carriers charge extra. Expect $50–$150 added to the rate.
- Liftgate at pickup: Unless you have a loading dock (you don't — you have a garage), the driver needs a hydraulic liftgate to lower from the truck bed to ground level so you can roll or carry the pallet on. This typically adds $50–$100.
- Limited access: Some carriers lump residential and limited access together; some charge separately.
- Delivery accessorials: If the destination is a commercial warehouse with a dock, you likely don't need a liftgate or any special services at delivery. Confirm with the receiving warehouse.
What It Costs
LTL pricing varies wildly based on distance, freight class, weight, and current market conditions. That said, for one or two pallets of general merchandise shipping across a few states, here are rough ballpark ranges (as of recent years):
| Scenario | Estimated Cost |
|---|---|
| 1 pallet, 300 lbs, class 100, 500 miles | $150–$350 |
| 1 pallet, 500 lbs, class 70, 500 miles | $150–$300 |
| 2 pallets, 1,000 lbs total, class 85, 1,000 miles | $350–$700 |
| Cross-country (2,500+ miles), 2 pallets | $500–$1,200+ |
Add $100–$250 on top for residential pickup + liftgate. These are estimates — always get actual quotes.
Step 5: Prepare the Bill of Lading (BOL)
The Bill of Lading is the single most important document in freight shipping. It's a legal contract between you (the shipper), the carrier, and the receiver. Most broker platforms will generate one for you when you book, but you should understand what's on it.
A BOL includes:
- Shipper name and address (you).
- Consignee name and address (the warehouse).
- Description of freight: What are you shipping? Be specific but not excessively detailed. "Consumer electronics in boxes" or "Assorted household goods" is fine. "Stuff" is not.
- Number of handling units (pallets).
- Weight.
- Freight class.
- Special instructions — note if the freight is fragile, needs to stay upright, or cannot be stacked.
- PO number or reference number — the receiving warehouse may require you to include a specific PO number or delivery reference. Ask them before booking.
Print at least three copies. The driver will take one, you keep one, and you should have a spare. When the driver picks up, both of you will sign the BOL. Check the pallet count and note any pre-existing damage before signing. If there's any issue with the freight at that point, write it on the BOL.
Step 6: The Pickup — What to Expect
Here's what pickup day looks like:
- Timing: Carriers will give you a pickup window, usually a range like 12:00–5:00 PM. It is not Amazon — they will not give you a precise time. You need to be home and available for that entire window. If you need a tighter window (called an "appointment"), you can request it, but it usually costs extra.
- Location: Have your pallets staged in the garage or driveway, as close to where the truck will park as possible. The driver is not going to navigate through your house.
- The truck: A large box truck or sometimes a smaller straight truck will arrive. The driver will lower the liftgate.
- Loading: In most cases, the driver will bring a pallet jack and roll the pallet onto the liftgate. However, you should confirm at booking whether pickup includes "driver assist" or if you're responsible for getting the freight to the truck. For residential pickups, drivers generally help, but don't assume — clarify when booking.
- Paperwork: The driver will present the BOL. Review it, make sure the pallet count and details are correct, note any existing damage, and sign. Keep your copy.
- The driver leaves. Your freight is on its way.
After Pickup
Your freight will travel to the carrier's local terminal, where it's sorted and consolidated with other freight heading the same direction. It may pass through one or more intermediate terminals (called "cross-docking"). Each transfer is a point where damage can occur, which is why good palletizing is so important.
Most brokers and carriers provide a tracking number or PRO number. Tracking updates in LTL are not as detailed as UPS tracking — you'll typically see "picked up," "in transit," "at terminal," and "out for delivery."
Transit time depends on distance. Generally expect two to five business days for regional shipments and four to seven for cross-country.
Step 7: Delivery and Receiving
Coordinate with the receiving warehouse. Most commercial warehouses require a delivery appointment — the carrier will call the warehouse to schedule one. Make sure the warehouse knows to expect your freight and has any reference numbers they need.
If there's visible damage at delivery, the warehouse should note it on the delivery receipt before signing. This is critical for filing a claim later.
Key Differences from Parcel Shipping (UPS, FedEx)
| Parcel | LTL |
|---|---|
| Drop off or schedule a pickup for boxes | Driver comes with a truck and loads pallets |
| Detailed tracking updates throughout the day | Basic milestone tracking |
| Delivery in 1–5 days, very reliable | 2–7 days, somewhat less precise |
| Insurance/claims straightforward | Claims process is more complex and slower |
| Simple pricing by weight and zone | Pricing by class, weight, distance, and accessorials |
| Damage is relatively rare | Damage is more common — packaging quality matters enormously |
| No special paperwork needed | Requires a Bill of Lading |
| Price: $10–$100+ per box | Price: $150–$1,200+ per shipment |
Common Mistakes to Avoid
Underestimating weight or misclassifying freight. Carriers routinely weigh and re-measure freight at terminals. If your actual shipment doesn't match what you booked, you'll get a reweigh or reclass invoice — which is always more expensive than if you'd booked correctly.
Not specifying residential pickup or liftgate. If you book a standard commercial pickup and the driver shows up at a house with no dock, the shipment may be refused or you'll get hit with surprise accessorial charges.
Wrapping the pallet poorly. A pallet that falls apart in transit is your problem, not the carrier's. They will deny damage claims for insufficiently packaged freight.
Not confirming delivery requirements with the warehouse. Many warehouses require appointment scheduling, specific labeling, or PO numbers on the BOL. If your freight shows up without the right information, the warehouse may refuse it, and you'll pay for redelivery or storage.
Skipping insurance or declared value. Basic carrier liability for LTL freight is very low — often $0.10 to $0.25 per pound. That means if your 300 lb pallet of electronics worth $5,000 is destroyed, the carrier's default liability is only $30–$75. If your freight is valuable, either purchase additional freight insurance through the broker or through a third-party provider like Shipsurance or Falvey. It typically costs 1–3% of the declared value.
Not inspecting at delivery. Once the delivery receipt is signed "clear" (no damage noted), your ability to file a claim drops dramatically. Always inspect — or make sure the receiving warehouse inspects — before signing.
Quick Checklist
- [ ] Obtain pallets (48" x 40" standard GMA)
- [ ] Get stretch wrap, tape, corner boards
- [ ] Pack individual boxes tightly with void fill
- [ ] Build the pallet: heavy on bottom, no overhang, interlock layers
- [ ] Wrap the pallet thoroughly, anchoring film to the pallet base
- [ ] Measure and weigh each pallet
- [ ] Calculate freight class from density
- [ ] Get quotes from a freight broker platform
- [ ] Specify residential pickup and liftgate
- [ ] Confirm delivery requirements with the warehouse (appointments, PO numbers)
- [ ] Consider freight insurance for valuable goods
- [ ] Print BOL (3 copies)
- [ ] Stage pallets in garage/driveway on pickup day
- [ ] Be available for the entire pickup window
- [ ] Inspect and sign BOL at pickup, noting any issues
- [ ] Track the shipment and coordinate delivery with the warehouse
- [ ] Confirm the warehouse inspects freight and notes any damage at delivery