# Burning Man Infrastructure

A complete guide to all the physical infrastructure of the Future Turtles at Burning Man. **Some pages require you to be logged in. Please log in to the wiki for the full experience.**

# Electrical Grid

How we power our camp (and some neighboring camps, too!)

# On Playa Electrical Grid

On playa we rent a large 56 kW (70 kVA) generator that has ample power for our needs and all the camps in our hub. In 2024 and 2025 we received a Multiquip DCA-70SSIU4F generator.

In 2025 [maximum measured usage](https://docs.google.com/spreadsheets/d/1Pd0VLnkLG8Vytoqfuhh_y9QaMgCGAOru96jLaVcyGLw/edit?gid=1524611809#gid=1524611809) was only about 35% of the capacity of the generator. We should be fine even if our usage increases next year.

[![IMG_4768.jpg](https://wiki.futureturtles.com/uploads/images/gallery/2024-09/scaled-1680-/HTf4T6GOKf2wa6tx-img-4768.jpg)](https://wiki.futureturtles.com/uploads/images/gallery/2024-09/HTf4T6GOKf2wa6tx-img-4768.jpg)

<details id="bkmrk-to-learn-more-about-"><summary>Expand for learning resources about big generators at Burning Man</summary>

[Brad Templeton's Guide to Burning Man Power Grids with Big Generators](https://www.templetons.com/brad/burn/generators.html)

[Electrical Systems training course at Burning Man Hive](https://hive.burningman.org/posts/electrical-systems)

and join the [Burning Man Generators](https://www.facebook.com/groups/1627137627565692) group on Facebook.

Our own [Rainbow Village Electrical Training (course homepage)](https://wiki.futureturtles.com/books/burning-man-infrastructure/page/rainbow-village-electrical-training-2026 "Rainbow Village Electrical Training 2026")

</details>Our big rented generator outputs **three phase power**. The three phases are called U, V, and W. Any one of its phases can be combined with Neutral, also called Ø, to get 120 Volts AC. You can also combine any two phases together, say U and V, to get 207 Volts AC. (We need this in the kitchen fort for the compressor that runs the walk-in refrigerator).

The amount of power coming out of the generator is so high that we don't use those cables with multiple conductors inside a single sheath - we have five separate insulated cables which are loosely banded together. This is called Banded Cables:[![bandedcable.png](https://wiki.futureturtles.com/uploads/images/gallery/2024-09/scaled-1680-/bandedcable.png)](https://wiki.futureturtles.com/uploads/images/gallery/2024-09/bandedcable.png)  
These bring all three phases to **distribution boxes** around our camp. Here is what the rental distribution boxes look like:

[![image.png](https://wiki.futureturtles.com/uploads/images/gallery/2026-03/scaled-1680-/kTJNznNf2E6TDKU1-image.png)](https://wiki.futureturtles.com/uploads/images/gallery/2026-03/kTJNznNf2E6TDKU1-image.png)

In 2025 and 2026 we use three of these distribution boxes strategically located throughout the hub. The distribution box's job is to take that three-phase power - all five cables - as input, and break it down into **50 Amp L14-30 California Twist Lock** (also known as CS63xx) outputs. Technically the male plug is [CS6365](https://atielectrical.com/products/pro-grip-locking-device-plug-50a-125-250v?variant=30769738383408) and the female is [CS6364](https://atielectrical.com/products/pro-grip-locking-device-connector-50a-125-250v?variant=30769738317872).

The [twist lock cables](https://atielectrical.com/products/spider-box-locking-cable?variant=28923048624176) look like this:

![61cEKsSk7ML._AC_SL1500_.jpg](https://wiki.futureturtles.com/uploads/images/gallery/2024-09/scaled-1680-/61cekssk7ml-ac-sl1500.jpg)

Those only have four conductors, not five. They only carry two of the three phases. The distribution box splits up the phases so that 1/3 of the outputs get UV, 1/3 get VW, and 1/3 get UW.

It is critical to keeping the generator running well that we maintain approximately equal loads on each of the three phases U, V, and W. This is called *load balancing*. During the burn week, we check the load (in amps) on each of the three phases at least twice a day. If one phase is overloaded, we will move some of the load over to an underloaded phase by changing which 50 amp plug is plugged into which outlet on the distribution box.

A very simple distribution box has one three phase input, six 50 amp outputs, and some breaker switches to turn on and off the outputs and prevent fires if someone draws more than 50 amps. However, in 2024, Generator World, our generator vendor, brought us, at no extra charge, some amazingly incredible distribution boxes that had 12 outputs instead of 6, a dozen regular 120V household plugs for convenience, and built-in digital meters on the back that made it really easy to do load balancing.

Each of the 50 amp outputs from the distribution box can be fed, via a single 50-amp cable, into a **Spider Box**. A spider box takes the 50 amp cable as input, and contains a whole bunch of household-style electrical outlets that you can actually plug things into.

*[![Untitled.png](https://wiki.futureturtles.com/uploads/images/gallery/2024-09/scaled-1680-/untitled.png)](https://wiki.futureturtles.com/uploads/images/gallery/2024-09/untitled.png)Spider Box*

Our camp owns 20 [<span class="link-annotation-unknown-block-id-1416640783" style="border-bottom: 0.05em solid; border-color: rgba(55,53,47,.4); opacity: 0.7;">RhinoBox RB-300AE</span>](https://atielectrical.com/products/rhinobox-e-series-50a-120-240v-with-gfci-protection-and-nema-3r?variant=37985131233461) Spider Boxes *([TurtleBox Manual.pdf](https://wiki.futureturtles.com/attachments/1)*), so we place these near where a lot of power is needed. In many cases, instead of plugging appliances directly into the spider box, we end up using some outdoor-rated extension cords and power strips to further distribute power.

A Spider Box has numerous safety features including breakers that flip in case you draw too much power or a short is detected, and GFI switches that flip if current leaves the box and doesn't return because it went elsewhere to shock someone. This makes them completely safe to use outside, in the rain, and with faulty equipment without risk of shock or fire.

#### 2026 Layout (Plan as of March)

[![Screenshot 2026-03-06 at 4.58.11 PM.png](https://wiki.futureturtles.com/uploads/images/gallery/2026-03/scaled-1680-/qvP1iKkPNd2bWYg6-screenshot-2026-03-06-at-4-58-11-pm.png)](https://wiki.futureturtles.com/uploads/images/gallery/2026-03/qvP1iKkPNd2bWYg6-screenshot-2026-03-06-at-4-58-11-pm.png)

<details id="bkmrk-expand-to-see-our-la"><summary>Expand to see our layouts in previous years</summary>

**2025:** (Hi res: [Electric 2025.pdf](https://wiki.futureturtles.com/attachments/41))

**[![Screenshot 2025-09-26 at 11.38.38 AM.png](https://wiki.futureturtles.com/uploads/images/gallery/2025-09/scaled-1680-/X8c5SJVpMfIX560X-screenshot-2025-09-26-at-11-38-38-am.png)](https://wiki.futureturtles.com/uploads/images/gallery/2025-09/X8c5SJVpMfIX560X-screenshot-2025-09-26-at-11-38-38-am.png)**

**2024:** The following figure shows our 2024 electrical layout in purple. Thick lines show five banded cables leading to # distribution boxes. Thin lines show 50-amp cables leading to $ spider boxes. 2 and 3 designate "hard twofers" and "hard threefers" used to split five banded cables. Y indicates a 50-amp y-splitter. We always let 8-bit Bunny and Gender Blender lay out their own cable inside their camp however they see fit so those cables are not shown connected.

[![Electrical2024.jpg](https://wiki.futureturtles.com/uploads/images/gallery/2024-09/scaled-1680-/electrical2024.jpg)](https://wiki.futureturtles.com/uploads/images/gallery/2024-09/electrical2024.jpg)

</details>## Important Links

- Google Sheets: [Future Turtles Generator Usage in Amps](https://docs.google.com/spreadsheets/d/1Pd0VLnkLG8Vytoqfuhh_y9QaMgCGAOru96jLaVcyGLw/edit?gid=818171830#gid=818171830) *Historical data on how much power we draw*
- Google Sheets: [AC Distribution Equipment Schedule](https://docs.google.com/spreadsheets/d/1lk9rTBhz5S9zQsZBZfVBd9uLi5uOZ-PVDatuwNXotRY/edit?gid=19682633#gid=19682633) *Detailed list of distribution equipment that we own and rent*
- Google Sheets: [Fuel Consumption](https://docs.google.com/spreadsheets/d/1ABOnTZv1gp-0xcVXlzstKvgESLizHfukVTPv4_T9QYg/edit?usp=sharing) *How much fuel we've consumed per day on the big generator*
- Google Doc: [Future Turtles Electrologgggg 2025](https://docs.google.com/document/d/1L25ksqGuu7nOhFwPayaRfVtFs2FN60vXg6SQJ2K050k/edit?usp=sharing) *The template we use as a checklist and daily log book*
- *[Rainbow Village Electrical Training 2026](https://wiki.futureturtles.com/books/burning-man-infrastructure/page/rainbow-village-electrical-training-2026 "Rainbow Village Electrical Training 2026") The class we run for people maintaining the grid on playa*

# Backup Plans

In three years running big generators we have had outages and they were always caused by one of two things:

- Air filter clogged after dust storms. Blowing out the air filter with a leaf blower, or replacing it with a new one, fixed it right up.
- Fuel running out. This was a big problem in 2022 when BRC Petrol skipped many days of fuel delivery. We also "ran out" of fuel once in 2024 because the fuel level indicator showed empty even though there was still plenty of fuel tricking the generator into shutting down when it didn't have to.

In 2022 we had paid for a backup generator to be on playa that could be swapped in in an emergency, but realized that the truth was it would take so long to get it, it just wasn't worth it to pay for this.

Meanwhile we have the following plan for emergencies to keep a few things going in case of a problem:

- We can plug the kitchen into the generator that it used to get to playa to keep the refrigerators going
- If we need to host a party or event, we can plug the public area lights and sound system into a single spider box and plug that into the RV's generator
- We had a Honda eu-2200 small generator which could be moved around to provide a little bit of emergency backup power at spot locations; this has not been run or checked for a couple of years and may not work.

# Solar and Renewables

We often get asked when we're moving to solar power or why we insist on using a big smelly noisy generator when the sun is free, etc. etc.

Unfortunately right now there is very little solar equipment available to rent, and what is available to rent, would be far away. For the amount of power we use, it might take an extra truck from, say, Los Angeles, to bring in all that equipment. That truck alone would consume more fuel than we expect to consume with our generator over the course of a week. That doesn't help the environment. And buying new solar equipment just to use for one week a year would be both insanely expensive and equally bad for our carbon impact. The heavy batteries we would need to store power during the day and make it available at night only have a ten year lifespan and using them for 10 weeks total before sending them to a landfill is an environmental disaster.

Although the Burning Man organization has been encouraging camps to try small solar projects and thus incrementally move over, the truth is once we have a big generator in place, it is almost free to add a little bit more load to that generator, both from a carbon emissions perspective and from a financial perspective. For example, we considered investing in solar panels for the roof of our kitchen trailer, but whatever we spent on that, the net result would be just reducing the load on our generator by a tiny fraction and saving a few dollars in diesel fuel, while the cost and effort of getting those solar panels would be significant.

In short, solar power is great if you can use the panels, batteries, and inverters year-round, say, at your house in Las Vegas, but not so great in the remote playa conditions where it continues to be very very carbon-efficient to use diesel fuel. If you are tempted to spend money on solar infrastructure that will only get used once a year at Burning Man, it would be far far better for the environment to use that money for solar infrastructure in houses and permanent locations where it can work all 52 weeks a year. As we continue to grow our HUB on playa to include more and more camps, who all benefit from a single large efficient generator, we are actually reducing emissions and noise on playa, but we do not believe that the technology is there yet to minimize carbon emissions through solar at Burning Man. That said, we recognize that many small camps with low power needs can make solar work for them, we applaud camps that are experimenting with this technology and figuring out ways to make it work, and we'll jump on the bandwagon as soon as it is carbon-effective.

# Vendors

## Generator World, Inc

Provides the rental generator along with distribution boxes and the banded cables connecting it all.

Email: <generatorworldinc@gmail.com>

Contact: Shaz Nawaz (307) 461-9318 or Krystal Nawaz (916) 668-0605

They have always provided excellent service and Shaz is a long time burner (worked on Entheos and Titanic's End) and genuinely nice fun guy.

## BRC Fuel Program

We get fuel for our generators delivered (hopefully daily) by [BRC Petrol](https://fuelprogram.burningman.org) during the event. They charge about $7 per gallon.

- [Customer portal for BRC Petrol](https://fuelprogram.burningman.org)

The generators use dyed diesel. For 2025 we have already applied for fuel delivery. [Fuel Consumption Logs](https://docs.google.com/spreadsheets/d/1ABOnTZv1gp-0xcVXlzstKvgESLizHfukVTPv4_T9QYg/edit?gid=0#gid=0)

## Small Generator Repair

We received a recommendation for [RepairIT](https://repairitnv.com/) for small generator repair and maintenance (e.g. for our Honda's) but have not tried them.

# Rainbow Village Electrical Training 2026

Welcome to the class homepage for **2026 Rainbow Village Electrical Training!**

**Syllabus:** In this class, we're going to learn about the Volkswagen-sized generator that powers our entire hub at Burning Man. You'll learn how to run it and maintain it safely, how to connect the heavy duty electrical cables that make power available throughout our 3.6 acre territory, and about all the different types of safety mechanisms that will hopefully keep us safe out there. You'll also learn how to do daily maintenance.

The course meets twice over [Zoom](https://us06web.zoom.us/j/89411607597?pwd=C8sEO8KvMnty1I2wE6gKIY2b8VOtVo.1&jst=2) and once in person. (Zoom Meeting ID - 89411607597 <span class="kma42e">Passcode: 684171)</span>

- on Sunday April 12 at 12:00 noon PDT / 3:00pm EDT / 7:00pm UTC 
    - Here's a [recording of the zoom call](https://us06web.zoom.us/rec/share/HAKRosaVdHdN5sKbeXtQBtem2PsA4-eS-Dfvan9ofo41ZwV-VTf0yHWaHx06s12H.JC6lNqrtMCiCXNI6) (Passcode: 5y#uiG7C)
- on Sunday April 26 at 12:00 noon PDT / 3:00pm EDT / 7:00pm UTC
- on Playa, Thursday of Build Week, August 27, at 11:00am PDT (playa time)

If you complete all three courses you will be permitted to work on our system at Burning Man and will be given one or more shifts running through the maintenance checklist to keep everything working efficiently and safely. You will also serve as the representative of your camp dealing with electricity-related issues.

[![image.png](https://wiki.futureturtles.com/uploads/images/gallery/2026-03/scaled-1680-/kTJNznNf2E6TDKU1-image.png)](https://wiki.futureturtles.com/uploads/images/gallery/2026-03/kTJNznNf2E6TDKU1-image.png)

<div id="bkmrk-class-materials">**Class Materials**</div><div id="bkmrk--1"></div><div id="bkmrk-class-materials-will">Class Materials will be made available after the zoom classes.</div><div id="bkmrk--2"></div><div id="bkmrk--3"></div><div id="bkmrk-archived-2025-class-"><details><summary>Archived 2025 Class Materials</summary>

<div>  
</div><div id="bkmrk--4"></div><div id="bkmrk-here-are-archived-ma">Here are archived materials from last year</div><div>  
</div><div id="bkmrk--5"></div><div id="bkmrk-session-1%3A">Session 1:  
</div><div id="bkmrk--6">  
</div><div id="bkmrk-https%3A%2F%2Fus06web.zoom">[https://us06web.zoom.us/rec/<wbr>share/<wbr>lVLppjGDhPab5RYbiIswg72O8Ddcos<wbr>ICKkDfNweLf\_<wbr>I38mHQw6T26RDh4dtkU\_dY.<wbr>x8ktCybcgvOrEnE0</wbr></wbr></wbr></wbr></wbr>](https://us06web.zoom.us/rec/share/lVLppjGDhPab5RYbiIswg72O8DdcosICKkDfNweLf_I38mHQw6T26RDh4dtkU_dY.x8ktCybcgvOrEnE0)</div><div id="bkmrk-passcode%3A-qtdt%2A8f2">Passcode: qtdt*8f2</div><div id="bkmrk--7">  
</div><div id="bkmrk-session-2%3A">Session 2:</div><div id="bkmrk--8">  
</div><div id="bkmrk-https%3A%2F%2Fus06web.zoom-1">[https://us06web.zoom.us/rec/<wbr>share/SsB9ld8eHOhMyJqft\_<wbr>Kt87ia4vP0WUb\_<wbr>aKI6WKYnv0fMCf7M9WbtCYPH9qGrhS<wbr>Pb.bRUJ4g0Xnjlr5kTA</wbr></wbr></wbr></wbr>](https://us06web.zoom.us/rec/share/SsB9ld8eHOhMyJqft_Kt87ia4vP0WUb_aKI6WKYnv0fMCf7M9WbtCYPH9qGrhSPb.bRUJ4g0Xnjlr5kTA)  
Passcode: .9GgV.5k</div><div id="bkmrk--9">  
</div><div id="bkmrk-here-are-the-slides%3A">Here are the slides:</div><div id="bkmrk--10">  
</div><div id="bkmrk-https%3A%2F%2Fdocs.google.">[https://docs.google.com/<wbr>presentation/d/1WMFf-<wbr>5ssJLqa9s-bui1b-nnXz4jcCdVa/<wbr>edit?usp=sharing&amp;ouid=<wbr>110707166434719313340&amp;rtpof=<wbr>true&amp;sd=true</wbr></wbr></wbr></wbr></wbr>](https://docs.google.com/presentation/d/1WMFf-5ssJLqa9s-bui1b-nnXz4jcCdVa/edit?usp=sharing&ouid=110707166434719313340&rtpof=true&sd=true)</div><div id="bkmrk--11">  
</div><div id="bkmrk-as-pdf%3A-turtle-hub-e">Download PDF: [Turtle Hub Electrical Training.zip](https://wiki.futureturtles.com/attachments/42)</div><div id="bkmrk--12"></div><div id="bkmrk-this-is-the-log-form">This is the log form from last year: [Future Turtles Electrologgggg 2025.pdf](https://wiki.futureturtles.com/attachments/44)</div></details></div><div id="bkmrk--13"></div>

# Water and Sanitation

# Water, Fresh and Otherwise

A summary of camp water and plumbing. (Updated post burn 2025)

[This template](https://docs.google.com/document/d/1NeuYrVeSMg0rhwfQshS03Fg_U6AcVFkzh_6H8mg6_U0/edit?usp=sharing) is used to keep a daily log by the water team on playa.

[2025 Usage Spreadsheet](https://docs.google.com/spreadsheets/d/199gQxSA1Fs1P9-NxyX0no8HZ01__TuI5faWmzGYIidY/edit?usp=sharing)

## Fresh Water 

#### Plan for 2026

In 2026 we say **fare thee well** to ye olde Gayflower so fresh and grey water will depend on SSS.

2026 Order Plan:

<table border="1" id="bkmrk-item-amount-notes-tw" style="border-collapse: collapse; width: 100%;"><colgroup><col style="width: 28.4852%;"></col><col style="width: 28.1393%;"></col><col style="width: 43.4908%;"></col></colgroup><thead><tr><td>item</td><td>amount</td><td>notes</td></tr></thead><tbody><tr><td>Two (2) 500-Gallon Fresh Tanks</td><td>  
</td><td>SSS charges the same for 2 500 tanks as they would for 1 1000 tank and it's safer. Also allows us to get a tank to empty before they fill it so they are always filling the full 500</td></tr><tr><td>Fresh Water</td><td>2500 Gallons</td><td>That's a lot

</td></tr><tr><td>Two (2) 250-Gallon Grey Tanks</td><td>  
</td><td>Double what we had in previous years, but then again, we don't have Gayflower

</td></tr><tr><td>Grey Water</td><td>1750 Gallons</td><td>They can come daily and empty one of the tanks each day  
  
**SSS charges a lot more than United for grey water service so we use United for this**

</td></tr><tr><td>Motorcoach RV fills</td><td>2 fills (Build Team RV)</td><td></td></tr></tbody></table>

See [2025 Usage Spreadsheet](https://docs.google.com/spreadsheets/d/199gQxSA1Fs1P9-NxyX0no8HZ01__TuI5faWmzGYIidY/edit?usp=sharing) for the calculations we used to arrive at this schedule.

#### Usage, 2025:

Kitchen (metered) 493 gallons  
Ice machine (metered) 58.2 gallons, **note,** this was just to fill the ice machine tank when we discovered it was kaput so we made zero ice  
Canteen filler / drinking water refills (metered) 524 gallons  
Gayflower (inferred): 1215 gallons

#### Sources:

<table border="1" id="bkmrk-tank-capacity-%28gal%29%C2%A0" style="border-collapse: collapse; width: 99.881%;"><colgroup><col style="width: 19.9987%;"></col><col style="width: 13.3325%;"></col><col style="width: 14.8418%;"></col><col style="width: 20.8792%;"></col><col style="width: 30.9415%;"></col></colgroup><thead><tr><td class="align-center">Tank</td><td class="align-center">Capacity (gal)   
</td><td class="align-center">Refills Available?</td><td class="align-center">Used in 2024</td><td class="align-center">Used in 2025</td></tr></thead><tbody><tr><td>Gayflower Tanks</td><td class="align-right">2310</td><td class="align-center">No</td><td class="align-right">1000 for kitchen  
454 for showers</td><td class="align-right">**1290**</td></tr><tr><td>Build Team RV</td><td class="align-right">176</td><td class="align-center">Yes</td><td class="align-right">251 for build RV</td><td>2 refills ordered

resulted in about 75 gal remaining

</td></tr><tr><td>SSS Tank</td><td class="align-right">500</td><td class="align-center">Yes</td><td class="align-right">600 for canteens</td><td class="align-right">Preordered 1 refill

**1000**

</td></tr><tr><td>  
</td><td>  
</td><td>  
</td><td class="align-right">**2305 total**  
6.2 gal per camper day</td><td class="align-right">**2290 total**</td></tr></tbody></table>

<details id="bkmrk-gayflower-tanks---de"><summary>Gayflower Tanks - Details</summary>

As of 2025 the Gayflower has 7 brand new IBC totes that hold 330 gallons each so we will have a capacity of 2,310 gallons.

The totes are filled in [Gerlach](https://burningman.org/event/preparation/playa-living/water/) for about $0.50 per gallon by Empire Storage and Rental (Andy "Fixxer" Owens) who store the Gayflower.

- *Do not use other water sources in the area such as Empire or other wells. They usually have sulphuric water due to the hot springs which doesn't taste great.*

The gayflower tanks are directly plumbed to provide showers, toilets, and sinks in the Gayflower, however, there is also an option to hook up hoses. In 2024 we used the bright green hose to fill the tank in the Food Fort.

</details><details id="bkmrk-build-team-rv-fresh-"><summary>Build Team RV Fresh Water - Details</summary>

The build team RV has a large fresh tank which holds 176 gallons of water.

We usually fill that in Reno at the GSR RV Resort (where we stay for one night before driving in.)

We can also get it refilled on playa by pre-ordering from Sierra Site Services.

</details><details id="bkmrk-sss-tank---details-w"><summary>SSS Tank - Details</summary>

We can rent a 500 gallon tank from Sierra Site Services which comes with a pump and 15' hose. They bring it and fill it up, and they can come back to refill it.

In **2024** this tank was only used for canteen filling.

In **2025** this tank was used for kitchen and canteen filling.

</details>There are other vendors besides Sierra Site Services, but we had terrible experiences with Meco in 2023 and SSS has been absolutely amazing.

## Waste Water

<p class="callout info">"Grey Water" refers to water from sinks and showers which has come in contact with humans and is unsafe to reuse or evaporate. "Black Water" refers to water from toilets which is even worse.</p>

<table border="1" id="bkmrk-tank-capacity-%28gal%29%C2%A0-1" style="border-collapse: collapse; width: 100%;"><colgroup><col style="width: 20%;"></col><col style="width: 20%;"></col><col style="width: 20%;"></col><col style="width: 20%;"></col><col style="width: 20%;"></col></colgroup><thead><tr><td class="align-center">Tank</td><td class="align-center">Capacity (gal)   
</td><td class="align-center">Pumpouts Available?</td><td class="align-center">Used in 2024 (est)</td><td class="align-center">2025 Plans</td></tr></thead><tbody><tr><td>Gayflower Black Tanks</td><td class="align-right">1250</td><td class="align-center">No</td><td class="align-right">600</td><td>  
</td></tr><tr><td>Gayflower Grey Tanks</td><td class="align-right">1250</td><td class="align-center">No</td><td class="align-right">1100</td><td>  
</td></tr><tr><td>Build Team RV Black</td><td class="align-right">100</td><td class="align-center">Yes (flag a truck)</td><td class="align-right">150</td><td> </td></tr><tr><td>Build Team RV Grey</td><td class="align-right">100</td><td class="align-center">Can be sump pumped to Gayflower</td><td class="align-right">200</td><td>  
</td></tr><tr><td>SSS Tank</td><td class="align-right">250</td><td class="align-center">Yes</td><td class="align-right">1000

mostly from kitchen and neighbors

</td><td>We have preordered 100 gallons in pumpouts</td></tr><tr><td>  
</td><td>  
</td><td>  
</td><td class="align-right">2850 total</td><td>  
</td></tr></tbody></table>

<details id="bkmrk-gayflower-grey-and-b"><summary>Gayflower Grey and Black Tanks - Details</summary>

Under the floor of the Gayflower are 10 (ten) 250 gallon tanks. The ones on the driver side are all plumbed together and hold black water from the toilets. The ones on the passenger side are all plumbed together and hold grey water from showers and sinks.

During the week we could use a sump pump or water bug to pump excess grey water from somewhere else (kitchen, RV) into the Gayflower since it has so much capacity. In 2024 we pumped this into the grey water side, but in 2025 we should pump it into the black water side since that side has so much more capacity.

As of 2025 there are water level sensors connected to these tanks so you can read their *approximate* level. We didn't have any way to test them in advance so we'll see how well they work!

</details><details id="bkmrk-rv-tanks-the-build-t"><summary>RV Tanks</summary>

The Build Team RV has two tanks, probably about 100 gallons each, for grey and black water.

You can theoretically flag down a USS truck at Burning Man which will pump them out for some cash (in 2024 we didn't see many of those trucks)

You can also sump pump excess *grey* water to the Gayflower.

After the burn you can dump them at the [GSR](https://maps.app.goo.gl/L5tbnd4WtnatRBn79) in Reno (if we're staying there), the [TA Travel Center](https://maps.app.goo.gl/LkFsSpAaGB2sRnG17) in Sparks, or at the Loves in Fernley.

</details><details id="bkmrk-sss-grey-water-tank-"><summary>SSS Grey Water Tank - Details</summary>

We can rent a 250 gallon grey water tank from SSS which is a low cube. They will come and pump this out during the week (if paid in advance).

In 2024 was used primarily for the kitchen, but some neighboring camps who had not made arrangements for grey water also dumped their grey water in there. We filled it 4 times.

In 2025 it will again be used exclusively for the kitchen.

</details>
## Vendors

Sierra Site Services  
Office: 888-458-8777   
Mobile: 530-957-5049   
Contact: Michelle Haley &lt;[<span class="link-annotation-unknown-block-id--1814934815" style="border-bottom: 0.05em solid; border-color: rgba(55,53,47,.4); opacity: 0.7;">michelle@sierrasiteservices.com</span>](mailto:michelle@sierrasiteservices.com)&gt; and they have an office on playa.

United Site Services  
Email: [<span class="gI"><span class="qu yKyxu" role="gridcell" tabindex="-1" translate="no"><span class="go">burningmanorders@unitedsiteservicesinc.com</span></span></span>](mailto:burningmanorders@unitedsiteservicesinc.com) and [<span class="gI"><span data-hovercard-id="kristina.retzloff@unitedsiteservicesinc.com" data-hovercard-owner-id="13">kristina.retzloff@unitedsiteservicesinc.com</span></span>](mailto:kristina.retzloff@unitedsiteservicesinc.com)  
Contact: Kristina Retzloff  
Direct Line: 208-906-0399  
Office: 800-864-5387

# Moving Water in Camp (updated 2026)

Every year we've been getting better and better at figuring out how to easily move water, clean and dirty, around in the camp.

## Fresh Water Well Pumps

We use the [Harbor Freight 1HP Well Pumps.](https://www.harborfreight.com/1-hp-stainless-steel-shallow-well-pump-and-tank-with-pressure-control-switch-950-gph-63407.html) ([Manual](https://wiki.futureturtles.com/attachments/6)).

In 2026 we are expecting two 500-gallon fresh water tanks from Sierra Site Services, and they will bring two of these pumps, one for each tank.

We also own a spare.

These pumps seem to work really well, and they have their own bladder so that the pump doesn't have to flip on and off frequently. Basically, they will maintain pressure in a pressurized water system, supplying water to the food fort, shower, and sinks.

[![image.png](https://wiki.futureturtles.com/uploads/images/gallery/2024-09/scaled-1680-/image.png)](https://wiki.futureturtles.com/uploads/images/gallery/2024-09/image.png)

<p class="callout info">**Pro Tip:** When delivered, our pump was not primed. To prime it, you have to open a little nut and pour in some water until it overflows. We did this using a plastic bag with the corner cut off.</p>

<p class="callout warning">**Pro Tip:** Do not run this kind of pump dry for more than 10 seconds.</p>

<p class="callout info">**Pro Tip:** The tank must be pressurized to 23 psi which can be done with a bicycle pump.</p>

<p class="callout info">**Pro Tip:** Use backflow preventers both before and after the pump so that the pump stays primed.</p>

NEVER use this tank for anything other than potable water.

## Fresh Water Connections

The fresh water tanks (from Sierra Site Services) will be located close to the service road (fire lane). From there a hose will bring fresh water over to the hub between the food fort and the shower. We will set up a Y-adapter, with one side supplying water to the food fort, and the other side supplying water to the shower/sinks.

The [Shower](https://wiki.futureturtles.com/books/burning-man-infrastructure/page/shower-2026 "Shower 2026") has a five-way manifold which splits up the water for two handheld showers, two sinks, and a canteen filler.

## Grey Water Plan

The grey water tanks (from USS) are located by the service road, too.

![qi-1014-hauling.jpg](https://wiki.futureturtles.com/uploads/images/gallery/2024-09/scaled-1680-/qi-1014-hauling.jpg)
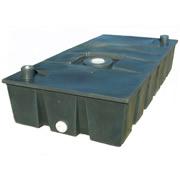
The new shower system comes with a black tote which serves as a grey water "hub". All the grey water in camp drains into it via gravity, and it has a pump which pushes that grey water out to the USS tank.

[![1AAF84E1-DD85-480A-BD04-3D963F221392_1_105_c.jpeg](https://wiki.futureturtles.com/uploads/images/gallery/2026-05/scaled-1680-/3kGErQsZDnK1kJju-1aaf84e1-dd85-480a-bd04-3d963f221392-1-105-c.jpeg)
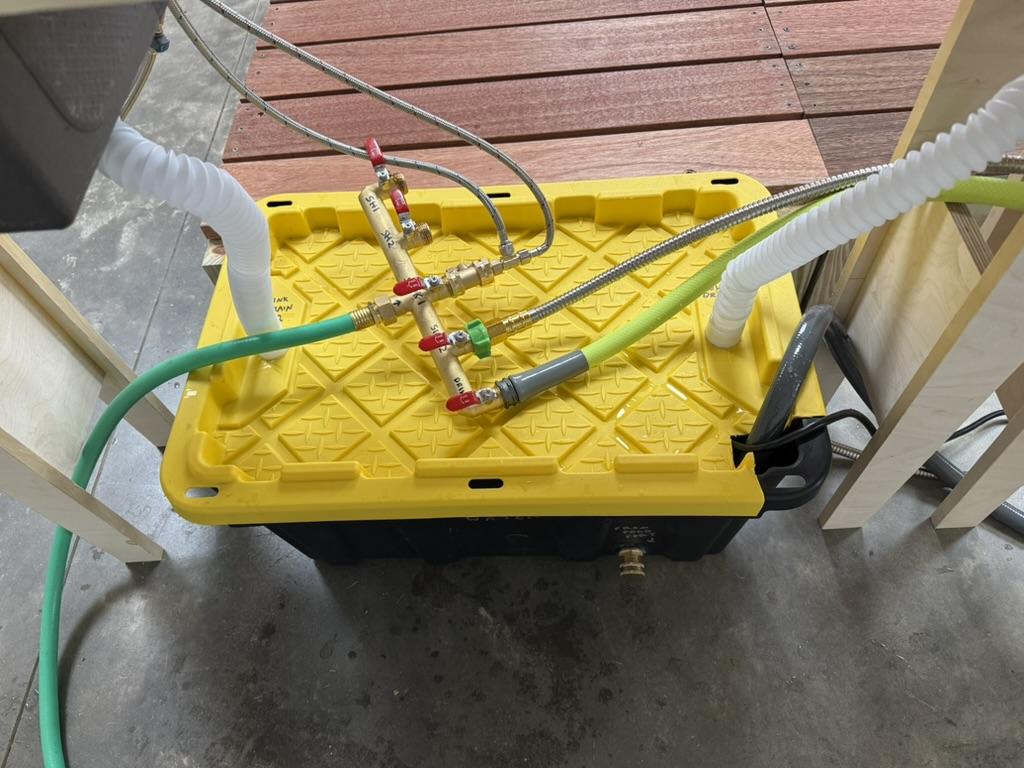
](https://wiki.futureturtles.com/uploads/images/gallery/2026-05/3kGErQsZDnK1kJju-1aaf84e1-dd85-480a-bd04-3d963f221392-1-105-c.jpeg)

There are two inputs on the top of the black tote (through the yellow lid) which are connected to the sink drains above it.

There are also three garden hose attachments at the bottom. Two are connected to the shower drains and one can be connected to the food fort grey water output.

Inside the tote is a yellow water bug pump that goes on and off automatically to pump water across the camp to the USS grey water tanks.

## Previous Years (no longer relevant)

We have two of the [Harbor Freight 3/4 HP Submersible Sump Pumps](https://www.harborfreight.com/34-hp-submersible-sump-effluent-pump-with-heavy-duty-snap-action-float-switch-5400-gph-58029.html) ([Manual](https://wiki.futureturtles.com/attachments/7))

[![58029_W3.jpg](https://wiki.futureturtles.com/uploads/images/gallery/2024-09/scaled-1680-/58029-w3.jpg)
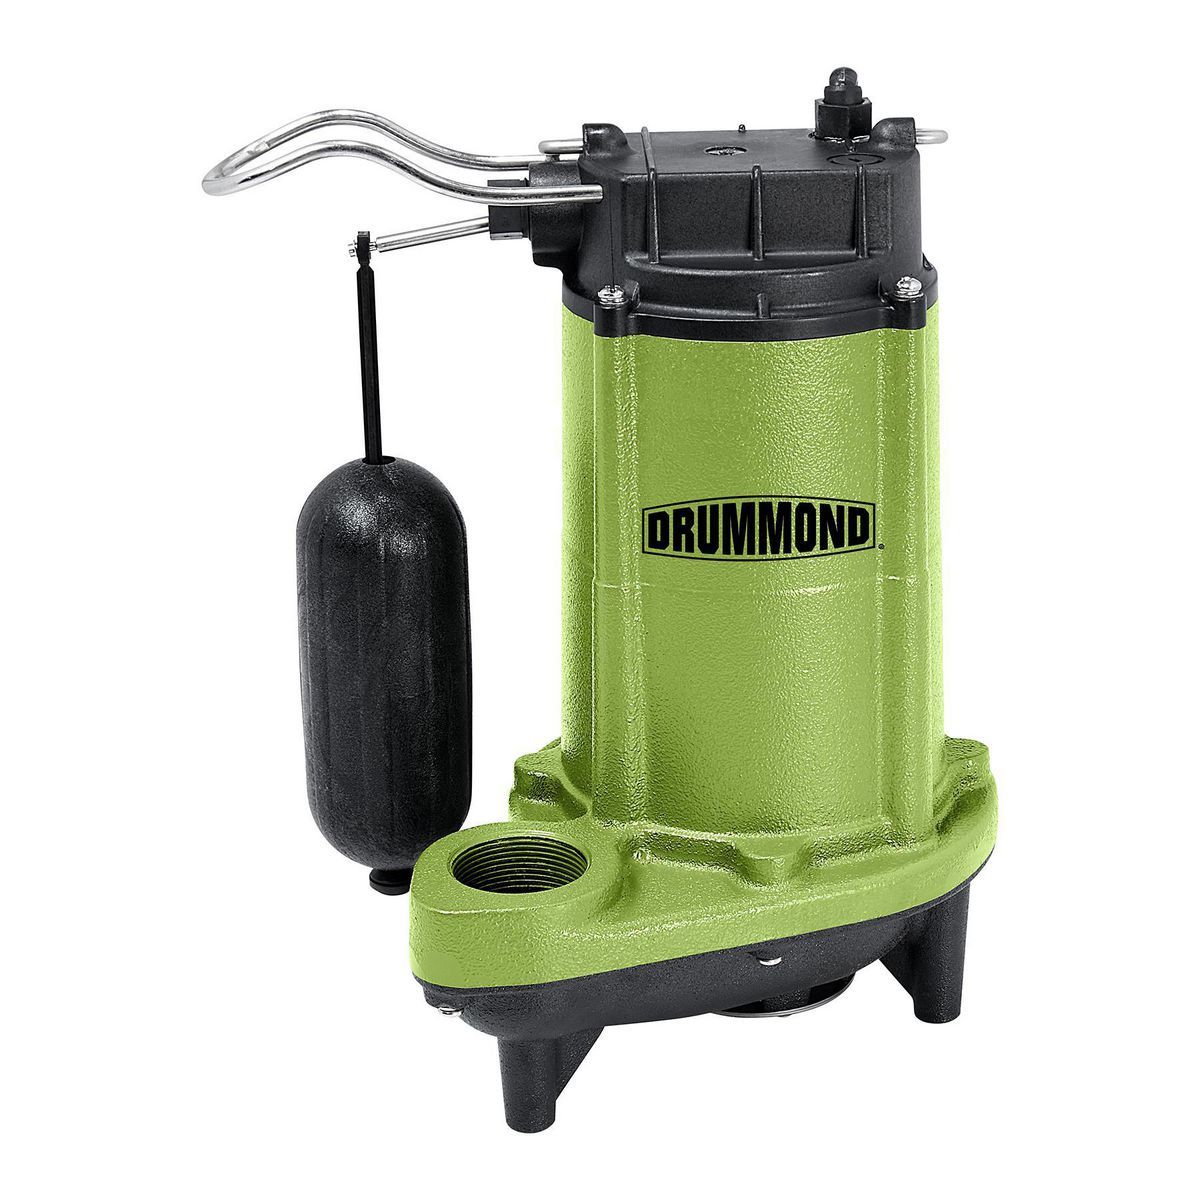
](https://wiki.futureturtles.com/uploads/images/gallery/2024-09/58029-w3.jpg)These were intended to move grey water around camp quickly, say, from the kitchen to the gayflower. They pump water into a thick red 2" hose that looks like this:

![Screenshot 2024-09-09 at 4.05.21 PM.png](https://wiki.futureturtles.com/uploads/images/gallery/2024-09/scaled-1680-/screenshot-2024-09-09-at-4-05-21-pm.png)We have about 50' of this hose.

There are two problems with this method of pumping grey water. The first is that the sump pump is meant to sit in a bucket that fills up with grey water causing the ball to float which turns on the pump. That means it never pumps the bottom *n* inches of water which can be a lot depending on the size of the bucket you put it in. The second is that those 2" hoses fill up with grey water and once the bucket is empty, they stay filled up with grey water... there is no way to cause the pump to push out the remaining contents all the way to wherever you're going. This means there is a manual step, after pumping grey water, involving walking the red hose from the source to the destination to gravity-force out all the water.

The grey water tank provided by Sierra is low-slung and looks like this:

![qi-1014-hauling.jpg](https://wiki.futureturtles.com/uploads/images/gallery/2024-09/scaled-1680-/qi-1014-hauling.jpg)With this tank, it's not a big problem to hand-caress the grey water from the hose into the tank. However, if you are trying to move grey water up to the Gayflower, where the tanks are probably 5' off the ground, it's not so easy.

For the last mile, we have these little Water Bug Style Pumps:

![Screenshot 2024-09-09 at 4.24.32 PM.png](https://wiki.futureturtles.com/uploads/images/gallery/2024-09/scaled-1680-/screenshot-2024-09-09-at-4-24-32-pm.png)  
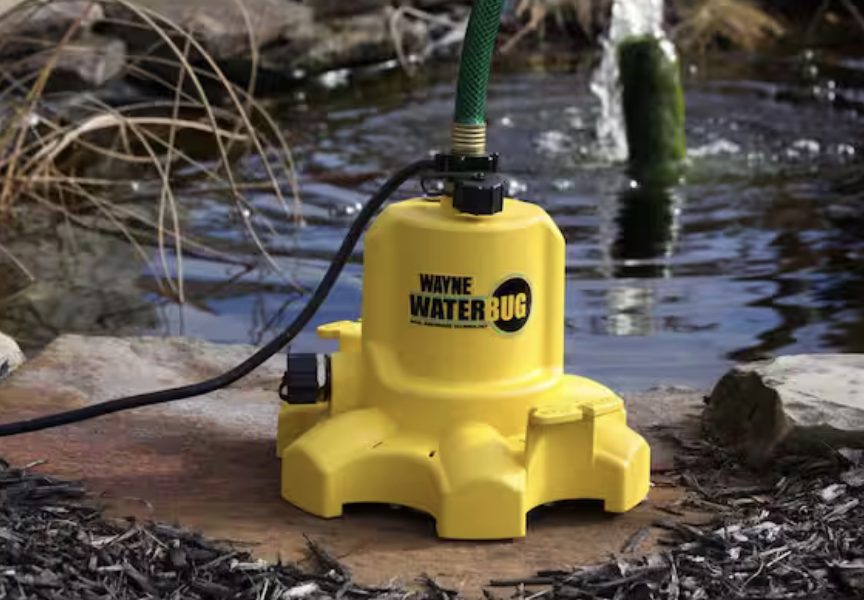
That can be completely submersed in water and it will suck up virtually everything and pump it up through a narrow hose, which gets the last little bits of water up and out. It's slow, though, compared to the big sewer pumps.

**New For 2025,** we bought a new [Milwaukee cordless pump](https://www.milwaukeetool.com/Products/2771-20):

[![image.png](https://wiki.futureturtles.com/uploads/images/gallery/2025-07/scaled-1680-/C5eV5ENB1h6fNOaF-image.png)
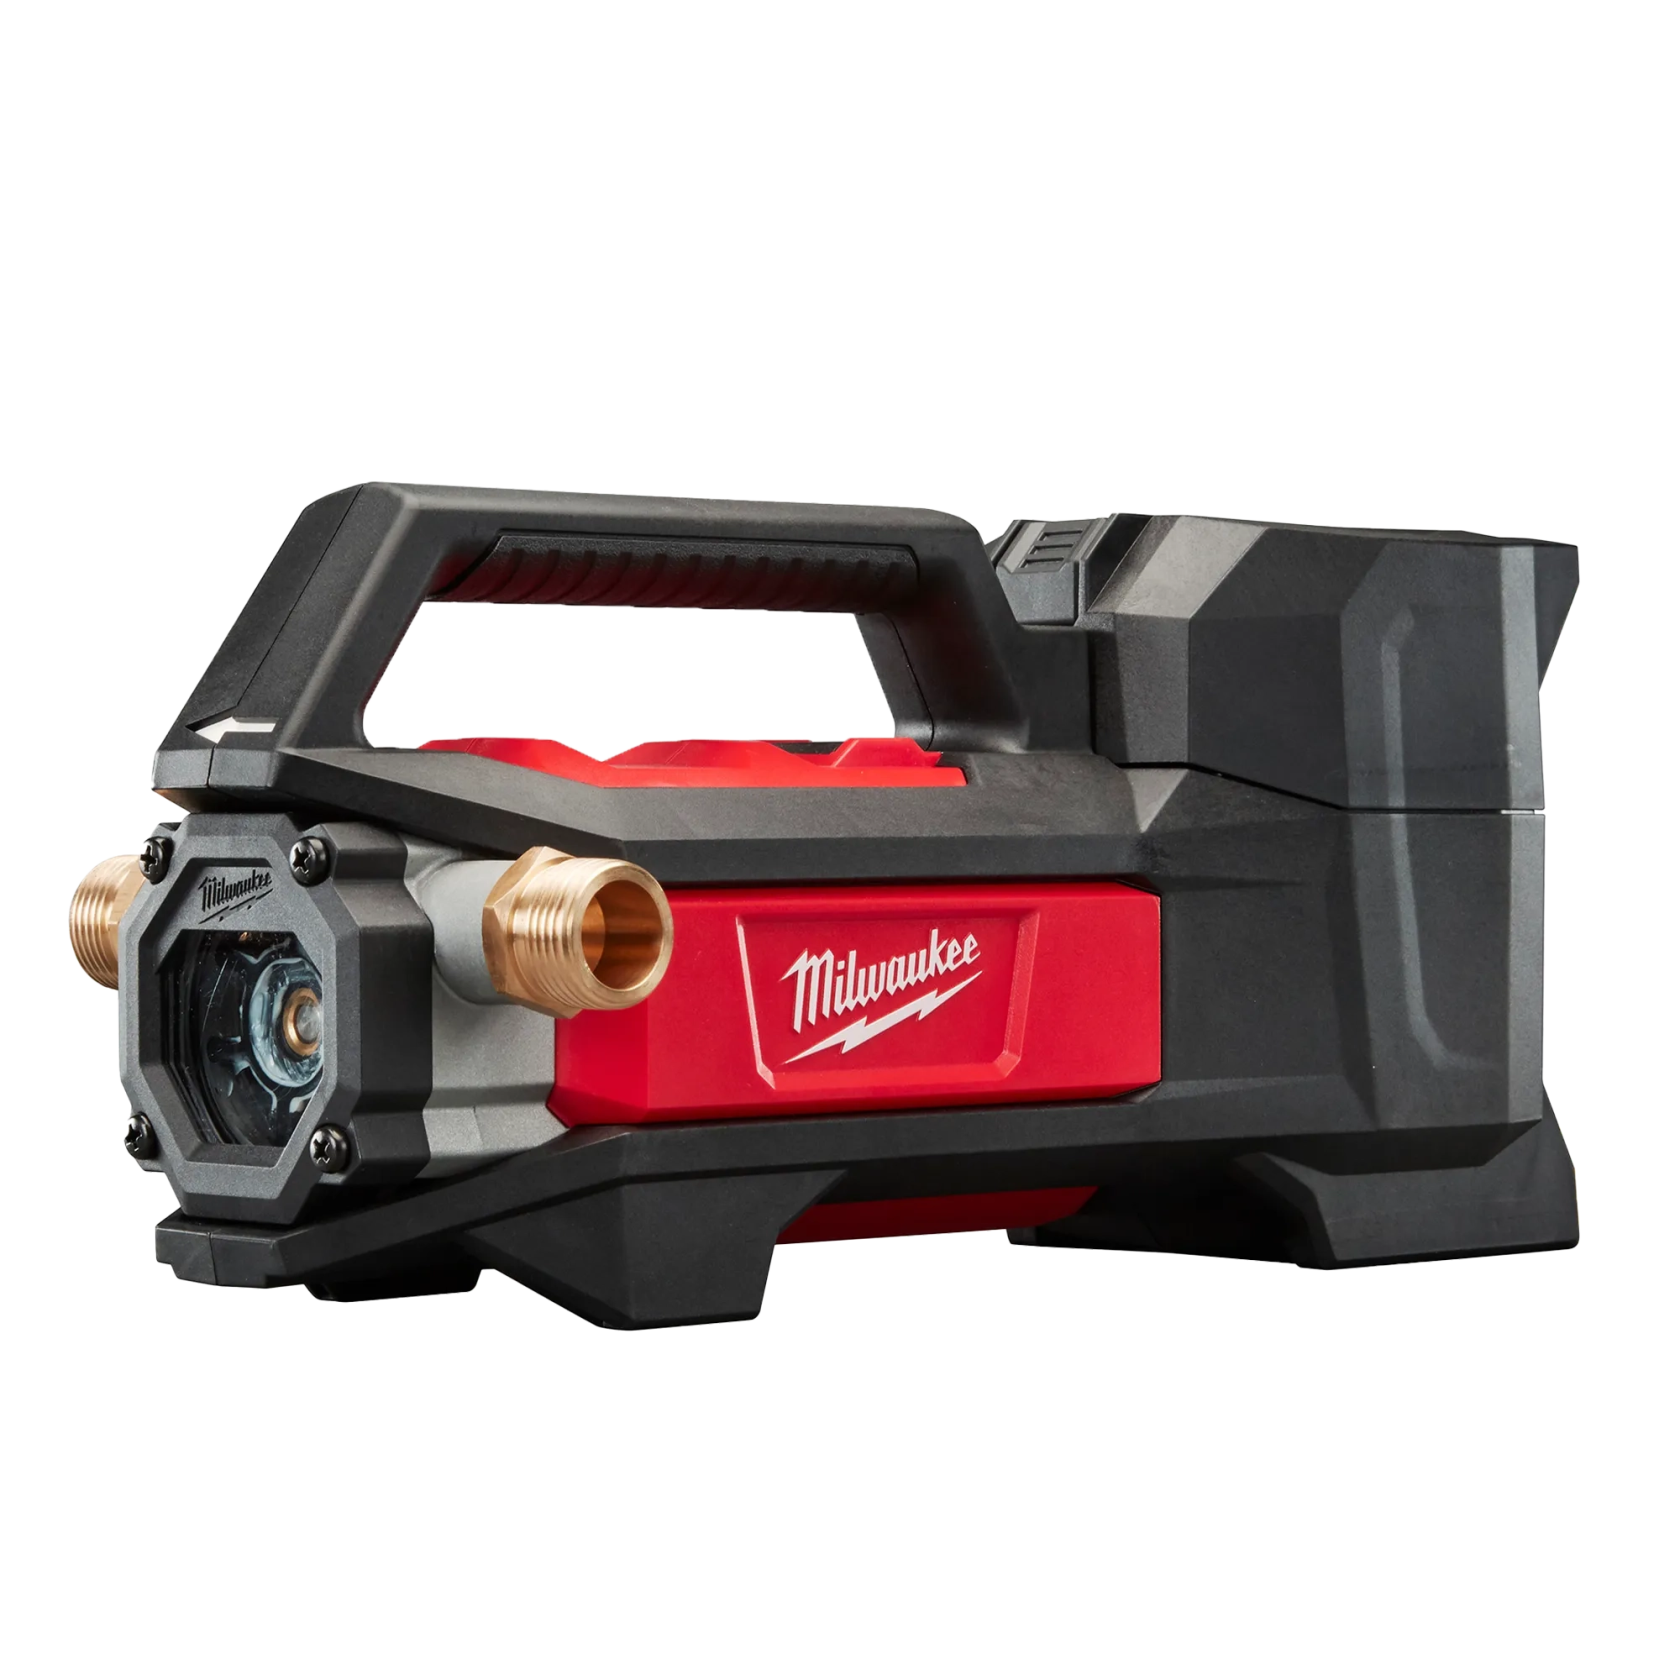
](https://wiki.futureturtles.com/uploads/images/gallery/2025-07/C5eV5ENB1h6fNOaF-image.png)

This is a hand-sized pump that runs off the same chargers and batteries as our impact drivers. It uses garden hose fittings. We used this in 2025 to pump grey water from the food fort to the SSS grey water tank whenever the food fort fills up and it worked really well! Because it was so portable it was easy to move it to the Gayflower and move some grey water there, too.

# The Kitchen Fort Water System

The kitchen fort, delivered in 2023, is a marvel in camp automation, allowing us to bring a commercial-quality working kitchen to playa and start using it without any setup. However, we're still learning about the best way to hook it up to water.

## Fresh Water

There are two separately plumbed fresh water systems: one for sinks and one for the ice maker. The inlet for each of these systems is on the passenger side, front. They are 3/4" garden hose inlets:

[![Final Exterior Pics Joel Spolsky June14 (10).jpg](https://wiki.futureturtles.com/uploads/images/gallery/2025-04/scaled-1680-/6jr4nmjSv6cW3Rit-final-exterior-pics-joel-spolsky-june14-10.jpg)
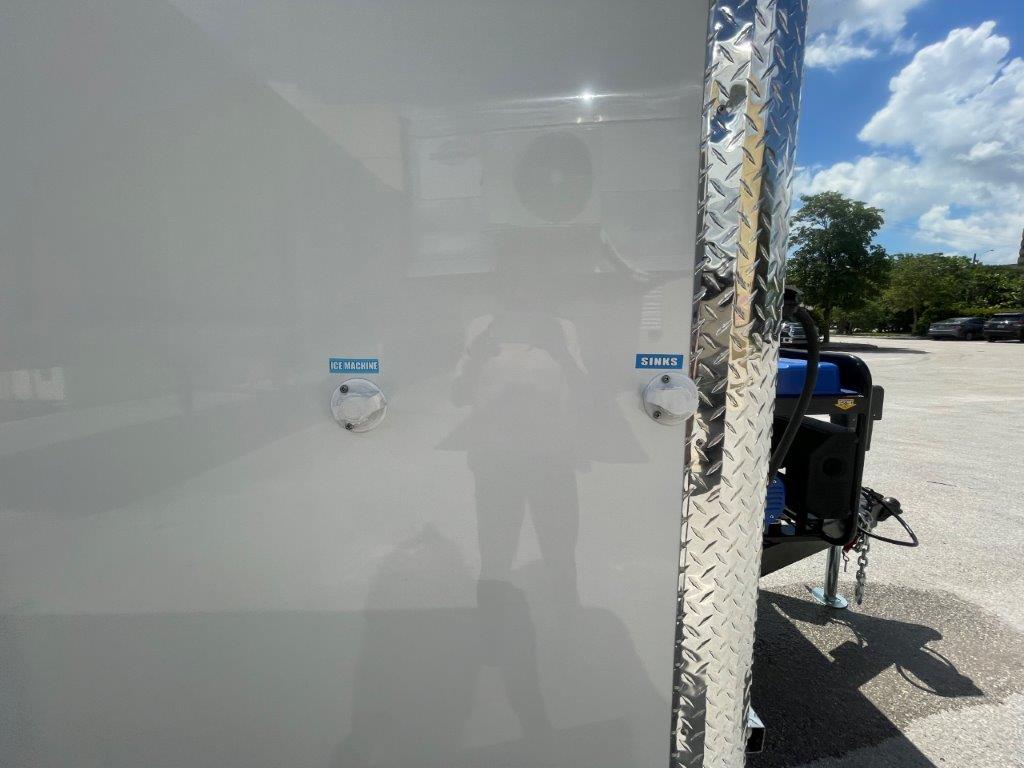
](https://wiki.futureturtles.com/uploads/images/gallery/2025-04/6jr4nmjSv6cW3Rit-final-exterior-pics-joel-spolsky-june14-10.jpg)

**We no longer use the ice machine** as of 2025, as so much of it was lost in the war.

The fresh water system is laid out like this:

<div drawio-diagram="22"><img src="https://wiki.futureturtles.com/uploads/images/drawio/2024-09/drawing-1-1725919077.png" alt=""/></div>

Each one has:

- a hose attachment outside for connecting water to the system
- two tanks, per system, under the bottom of the trailer to store water.

<p class="callout danger">These tanks have an opening at the top, allowing air in and out so they can fill and empty. This opening also means that if you overfill them with a hose, the excess water just starts to pour out onto the ground without warning.</p>

- a little Shur-Flo pump inside the trailer that can pump water up from the tanks to pressurize the system
- a shut off valve inside the trailer that connects or disconnects the tanks and pump. Here's what the shut off valves look like:

[![IMG_1722.png](https://wiki.futureturtles.com/uploads/images/gallery/2025-04/scaled-1680-/W7VIhKNQFRqKWOf7-img-1722.png)
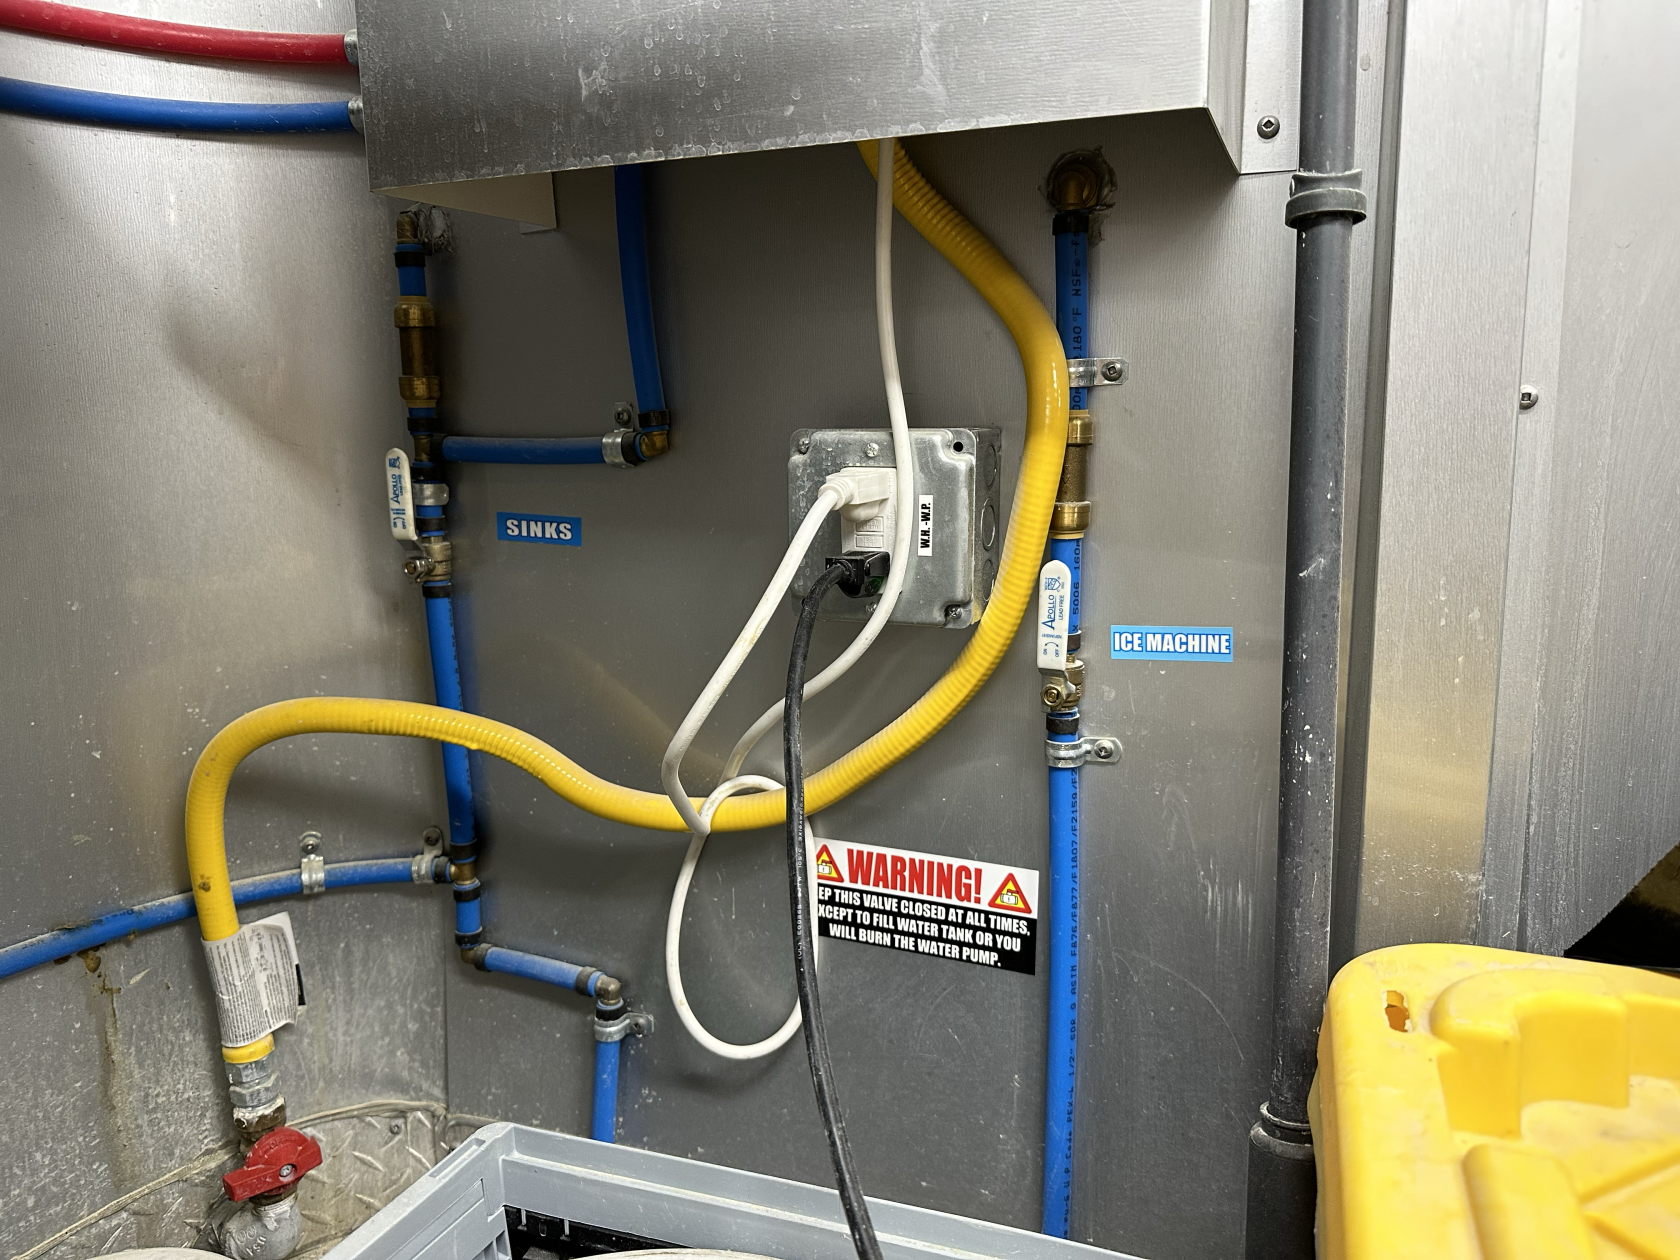
](https://wiki.futureturtles.com/uploads/images/gallery/2025-04/W7VIhKNQFRqKWOf7-img-1722.png)

### Running the system off tanks

In 2023/24 we ran the food fort by filling its tanks. Here's how that works:

1. Open the valve inside
2. Connect the hose, outside
3. Turn on the hose until the tank is full
4. Remove the hose
5. Close the valve inside
6. The pump will pump water up from the tank into the food fort system

You need to do this for both the sinks and the ice maker, separately.

We thought this was a nice idea because it got the water team involved every once in a while and avoided the risk of the kitchen using up all of our camp water by mistake. In reality someone had to fill the tanks once or twice per day, and in particular the ice machine's running out of water probably caused it to dump the water it had instead of just producing a lot of ice.

### Running the system without tanks

In 2025 we started running the system without using its tanks. Here's how that worked:

1. Close the valves inside
2. Unplug the pump(s)
3. Connect the hose, outside
4. Turn on the hose outside
5. The external water pressure should provide water inside the food fort.

The way we set this up:

- The SSS 500 gallon tank is set up next to the fire lane. It comes with a pump and a 15' hose. As of 2026, there will be two of these so we can switch back and forth.
- from the output of that hose, supplied by SSS, we'll connect 
    - to a hose splitter with shutoff valves
    - to two smaller hoses
- each of those hoses goes through a check valve (to prevent backwash)
- and also through a water meter (so we can monitor usage) 
    - one hose goes into the food fort main water (not ice maker! ice maker is dead!)
    - the other goes around to the shower system where it provides water for drinking, showering, and the sinks.

## Ice Maker (RIP)

The ice maker system is just like the fresh water system, with its own tanks and pump and shut off valve. In 2023 and 2024 we were underwhelmed by the amount of ice this system could produce (it was nothing close to what it should have been able to produce based on specs) and overwhelmed by the amount of clean but undrinkable water that it dumped on the ground through an open spout under the trailer as a part of it's too-frequent "clean" cycle. In 2025 we want to give it one last chance by keeping it connected to pressurized water so it never runs out of water to see what it can produce.

<p class="callout danger">**2025 Spoiler Alert.** One thing we found was that the Ice Maker does *not* actually have a shut-off valve to bypass the tank. The Ice Maker **must** use the 50 gallon tank. Another thing we learned is that the Ice Maker was damaged probably due to not being properly winterized, and, for all intents and purposes, is no longer useful</p>

## Grey Water - 2026 Plan

We are going to try a system where the grey water goes, via gravity, through a hose to the shower grey water tote, where it joins with water from the showers etc. and is then pumped off to the main grey water tanks automatically.

## Grey Water - 2025 Plan

There are grey water tanks under the kitchen which fill up about once a day. In. 2024, we pumped this water across about 100' to a grey water tank supplied by SSS.

The waste spout of these tanks is a 1.5" ID threaded outlet. It is probably about 9" above the ground.

[![IMG_5853(1).JPG](https://wiki.futureturtles.com/uploads/images/gallery/2025-04/scaled-1680-/aSCR1oIgkWr6J25h-img-58531.JPG)
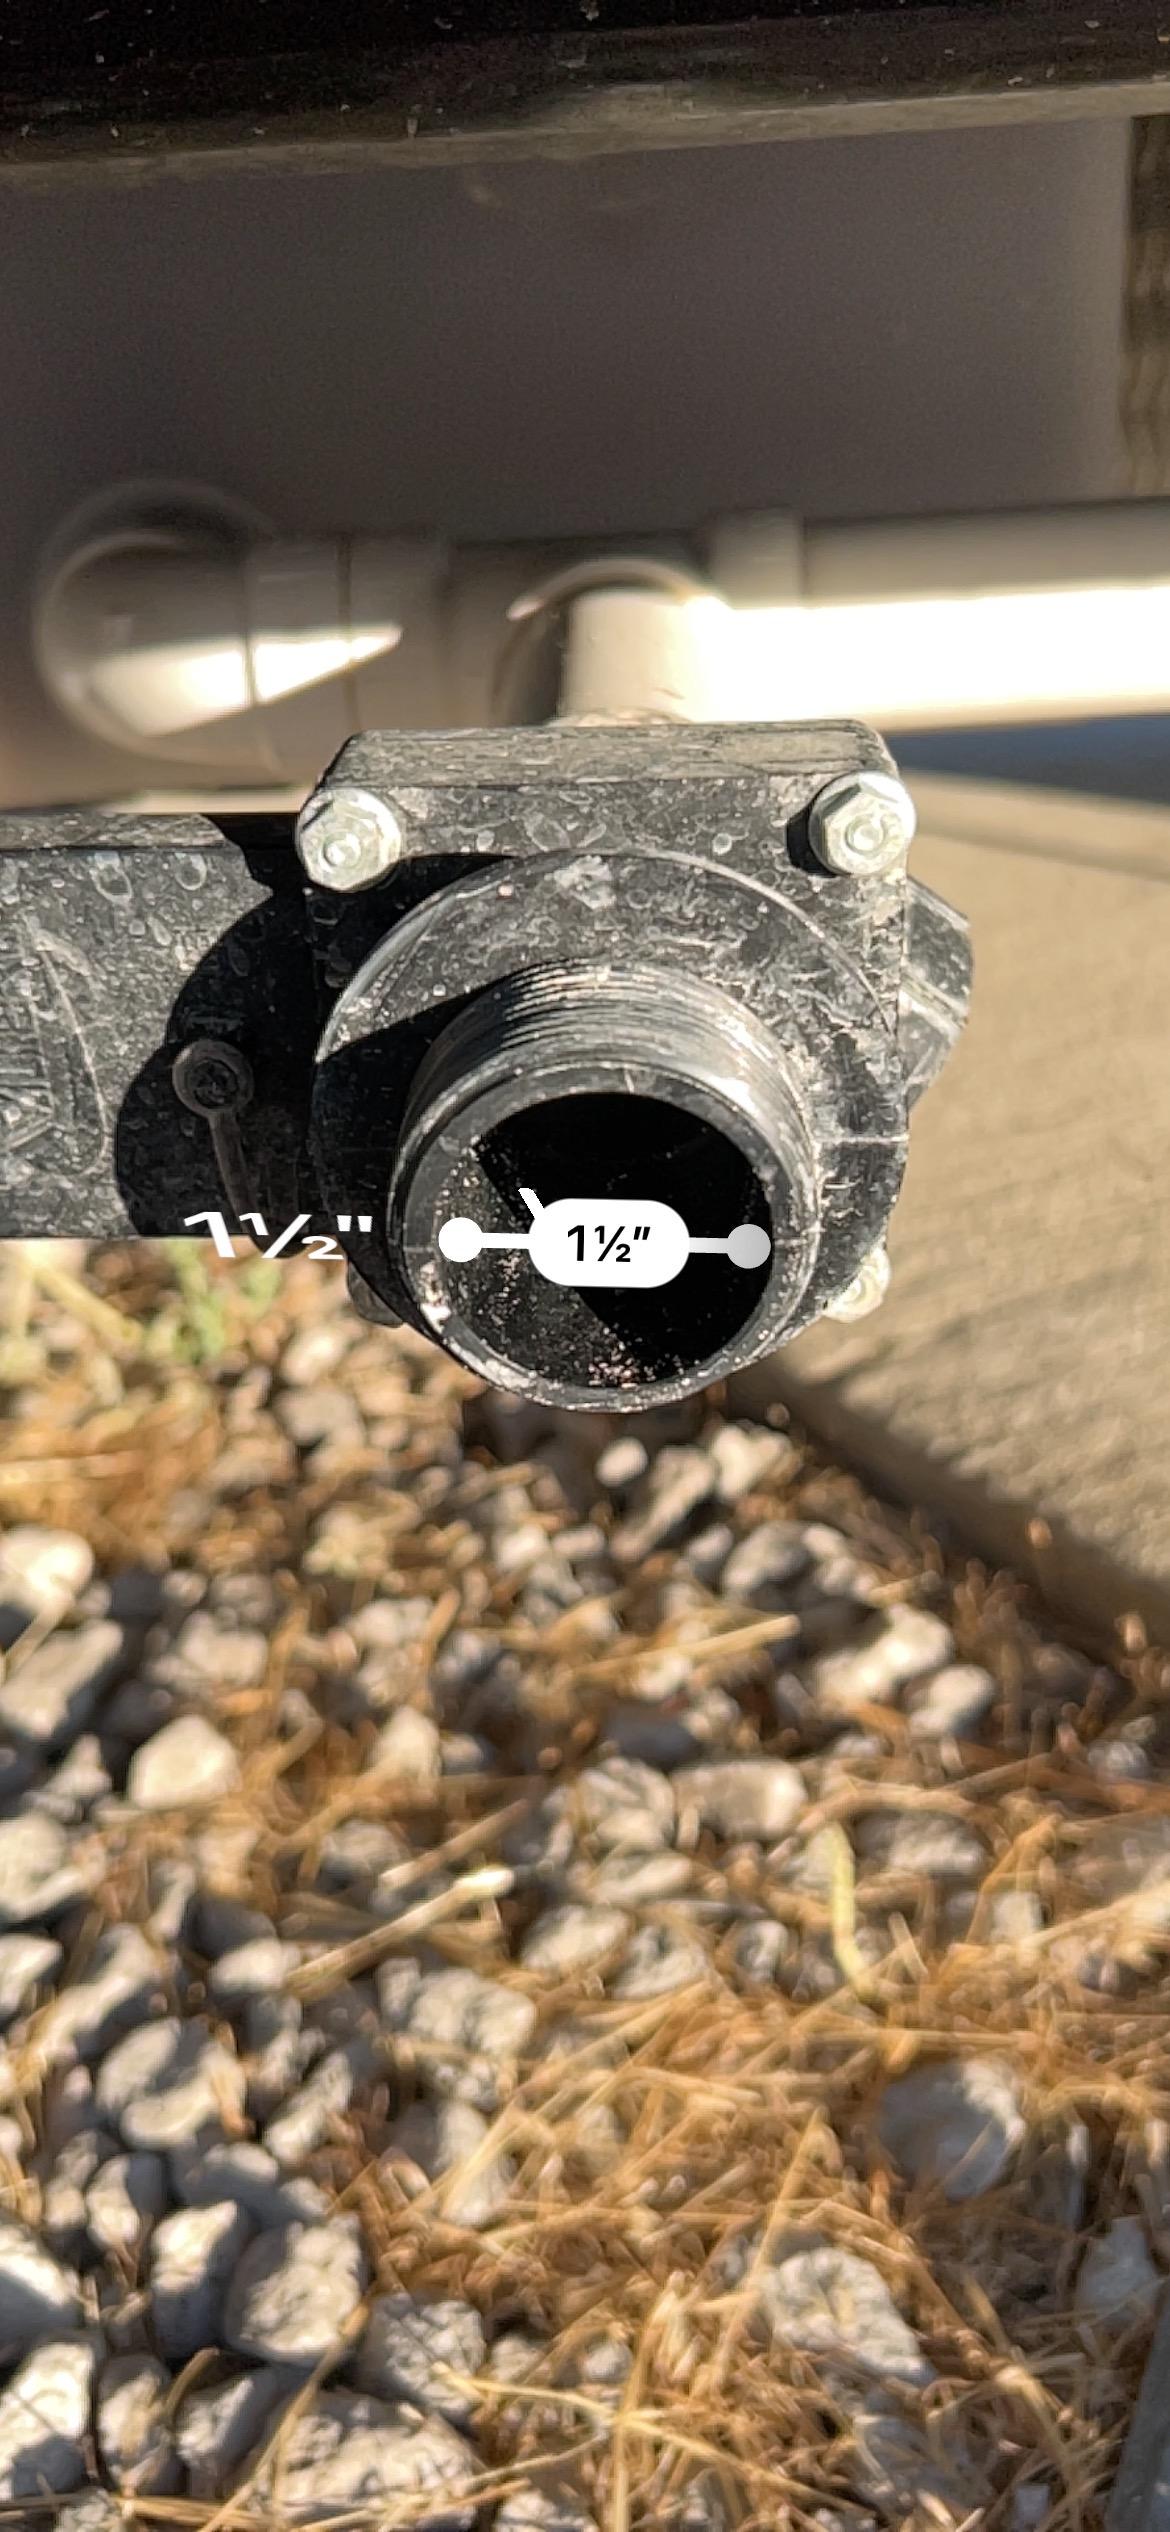
](https://wiki.futureturtles.com/uploads/images/gallery/2025-04/aSCR1oIgkWr6J25h-img-58531.JPG)

For 2025 the official plan will be to put the SSS tank right next to the kitchen, and it will be exclusively used for kitchen grey water. The SSS tank is about 17½" high with input from the top:

[![Picture1.jpg](https://wiki.futureturtles.com/uploads/images/gallery/2025-04/scaled-1680-/xU279Wiehhea5rzu-picture1.jpg)
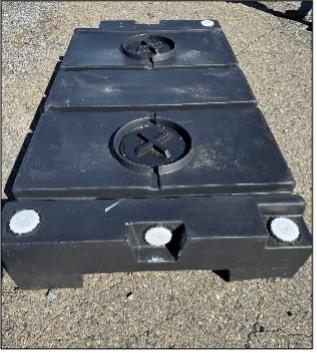
](https://wiki.futureturtles.com/uploads/images/gallery/2025-04/xU279Wiehhea5rzu-picture1.jpg)

To pump the water from the Food Fort tanks to the SSS tank, we connect a Valterra T01-0094VP or Valterra T01-0091VP to the 1.5" outlet, and then from there a small length of garden hose, to a transfer pump that can pump the grey water up to the SSS tank on demand. We use a [Milwaukee cordless transfer pump](https://www.homedepot.com/p/Milwaukee-M18-18-Volt-1-4-HP-Lithium-Ion-Cordless-Transfer-Pump-Tool-Only-2771-20/300510172) which runs on the same batteries as our impact drivers; with that connected it takes about 10 minutes to completely empty the food fort.

# Shower 2026

Starting in 2026, we have a new shower / sink system.

[![044C6341-4C9C-445E-80E1-DC75B6238213_1_105_c.jpeg](https://wiki.futureturtles.com/uploads/images/gallery/2026-05/scaled-1680-/8UEbsZMGNhEwLMp3-044c6341-4c9c-445e-80e1-dc75b6238213-1-105-c.jpeg)
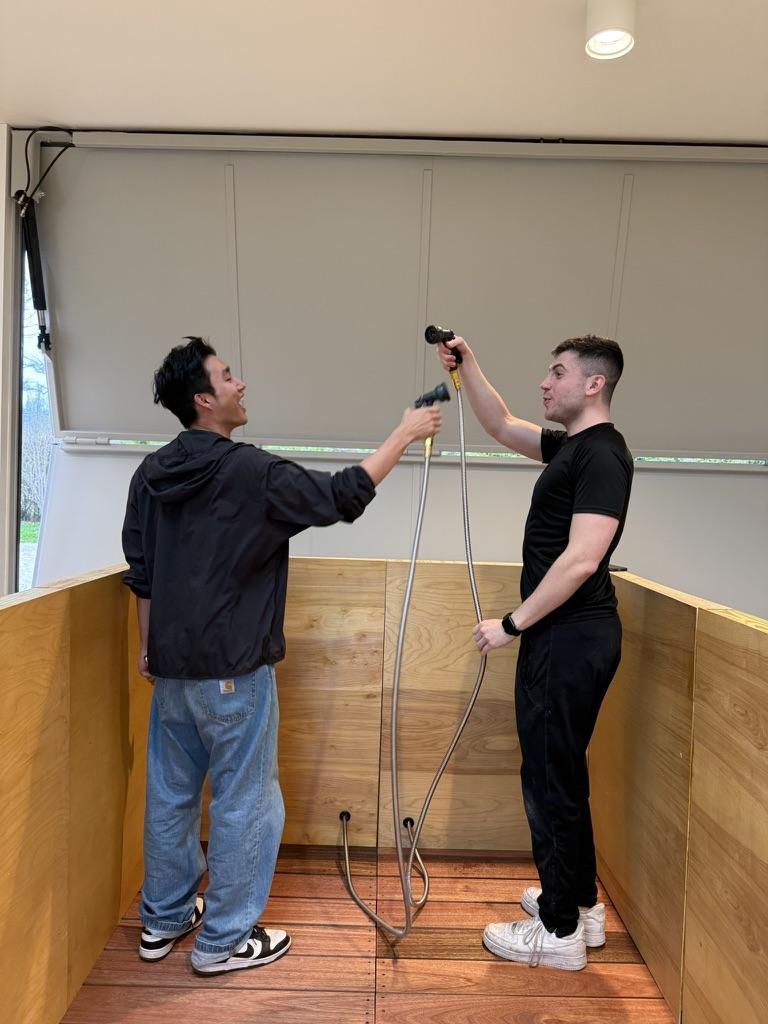
](https://wiki.futureturtles.com/uploads/images/gallery/2026-05/8UEbsZMGNhEwLMp3-044c6341-4c9c-445e-80e1-dc75b6238213-1-105-c.jpeg) [![CE26DA84-48DB-441E-A6F4-90AAE4471473_1_105_c.jpeg](https://wiki.futureturtles.com/uploads/images/gallery/2026-05/scaled-1680-/bzBNa6UveZLqDZFi-ce26da84-48db-441e-a6f4-90aae4471473-1-105-c.jpeg)
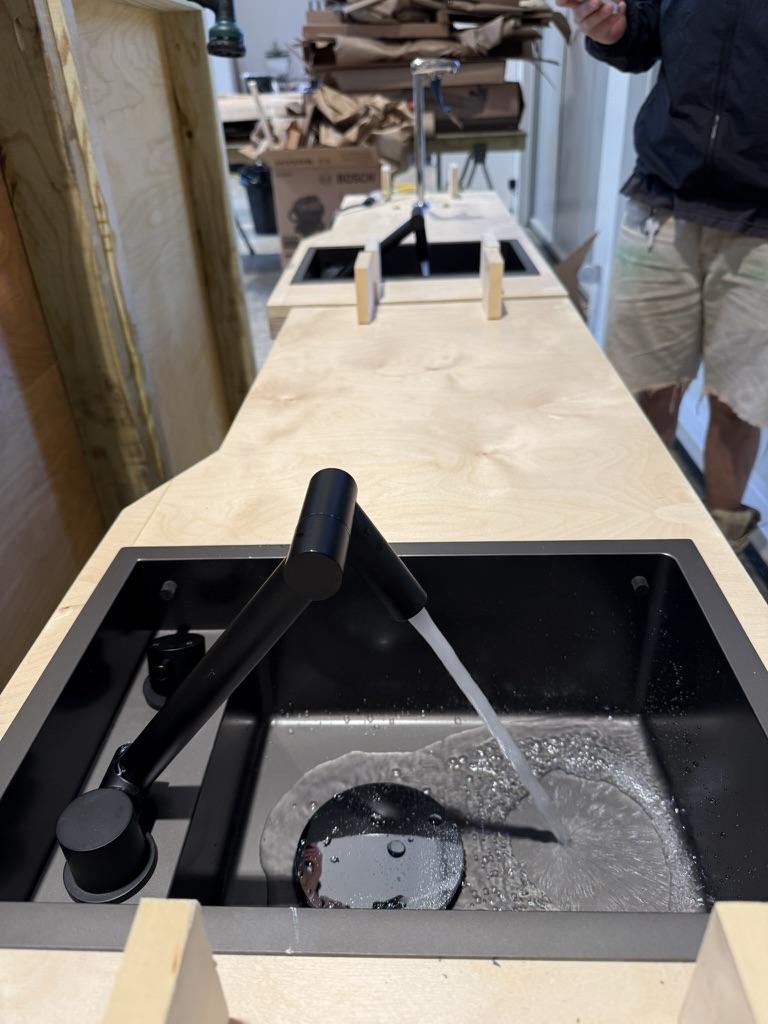
](https://wiki.futureturtles.com/uploads/images/gallery/2026-05/bzBNa6UveZLqDZFi-ce26da84-48db-441e-a6f4-90aae4471473-1-105-c.jpeg)

Complete instructions for assembly and disassembly are in the technical reference PDF.

[Turtle Shower Tech Ref.pdf](https://wiki.futureturtles.com/attachments/60)

# Sanitation

## 2026

In 2026 we are using United Site Services for porto-potties, grey water removal, and RV pumpouts for the build RV.

**THREE PEOPLE** from the build team, Joel, Gary, and Viv, are listed on the USS contract as authorized representatives. One of them will have to go to the USS office on playa to get vouchers and tell them we're ready for delivery.

United Site Services  
Email: [<span class="gI"><span class="qu yKyxu" role="gridcell" tabindex="-1" translate="no"><span class="go">burningmanorders@unitedsiteservicesinc.com</span></span></span>](mailto:burningmanorders@unitedsiteservicesinc.com) and [<span class="gI"><span data-hovercard-id="kristina.retzloff@unitedsiteservicesinc.com" data-hovercard-owner-id="13">kristina.retzloff@unitedsiteservicesinc.com</span></span>](mailto:kristina.retzloff@unitedsiteservicesinc.com)  
Contact: Kristina Retzloff  
Direct Line: 208-906-0399  
Office: 800-864-5387

# 2025 Water Plan

This is the 2025 water plan.

## Camp Layout

[![Screenshot 2025-06-24 at 12.28.53 PM.png](https://wiki.futureturtles.com/uploads/images/gallery/2025-06/scaled-1680-/0iobn3GHeVcawoh6-screenshot-2025-06-24-at-12-28-53-pm.png)
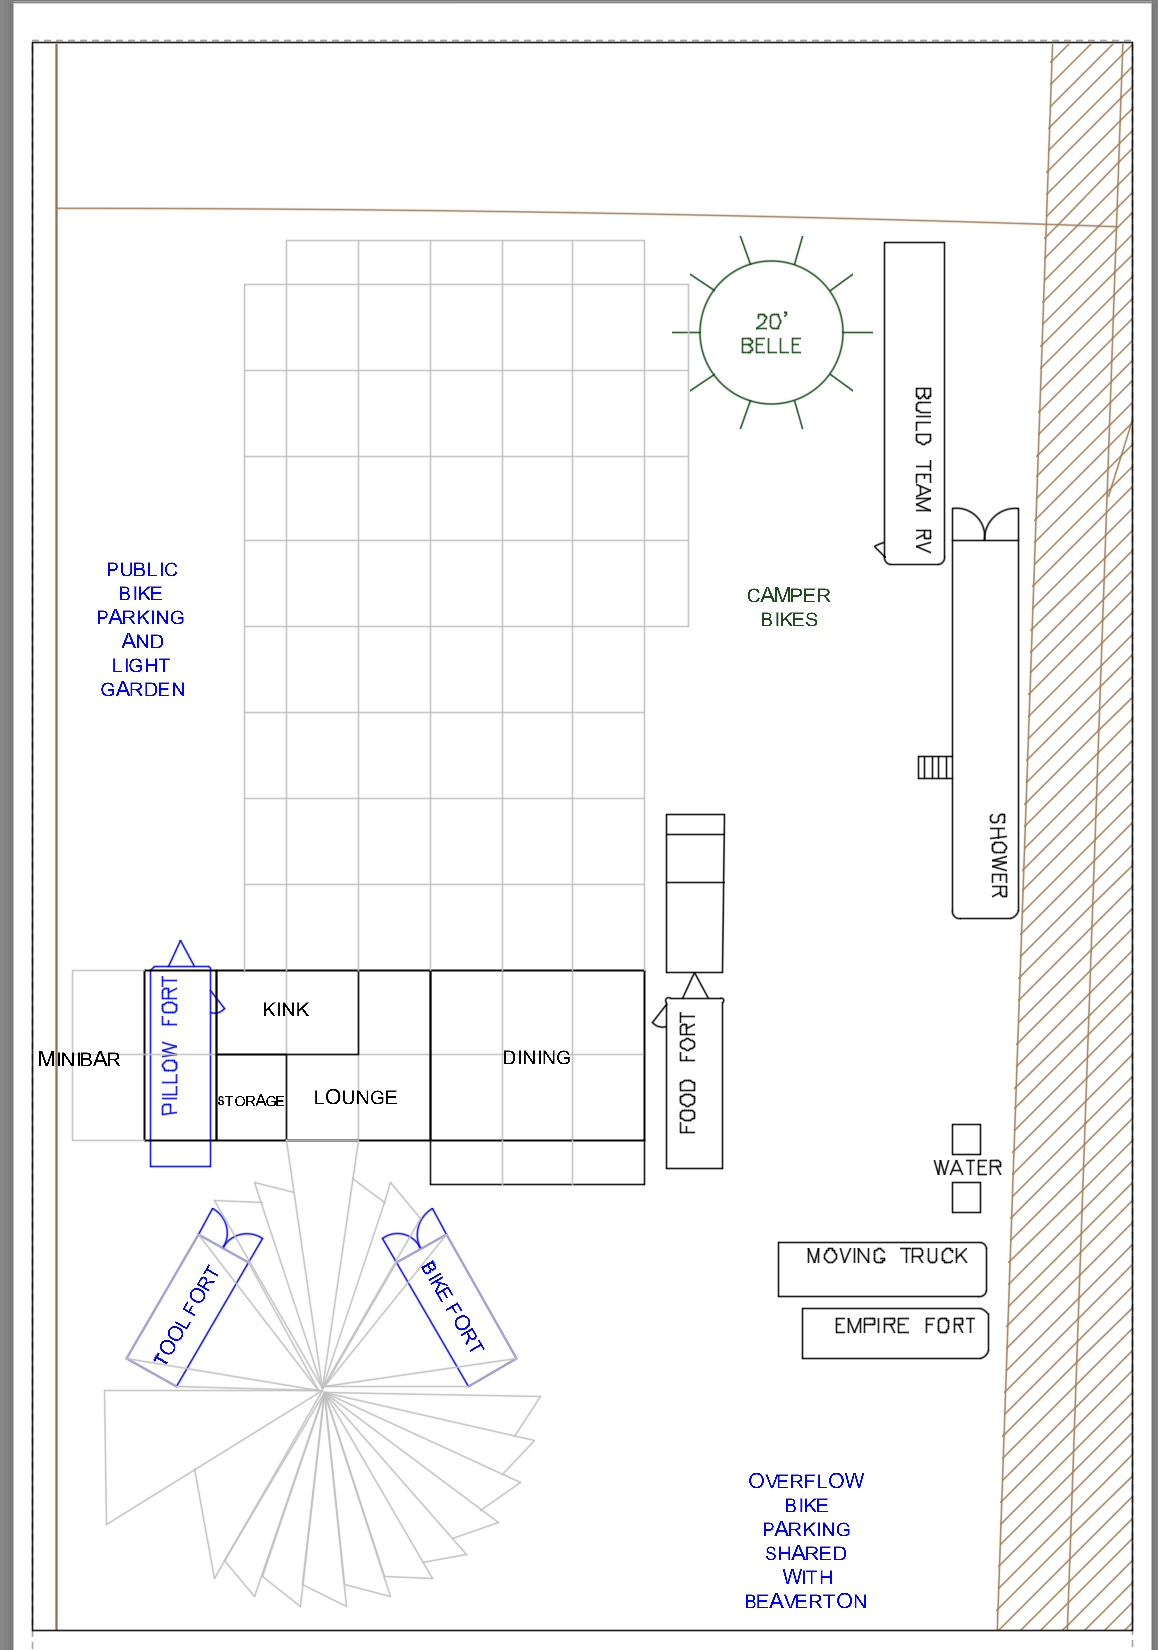
](https://wiki.futureturtles.com/uploads/images/gallery/2025-06/0iobn3GHeVcawoh6-screenshot-2025-06-24-at-12-28-53-pm.png)This year's layout places the Food Fort much closer to the Gayflower, and with its inlets and outlets facing the fire lane. That means pumping between those two locations is closer and Sierra Site Services ("SSS") can easily service everything if needed.

## Food Fort

Read [more details on the Food Fort plumbing](https://wiki.futureturtles.com/books/burning-man-infrastructure/page/the-kitchen-fort-water-system "The Kitchen Fort Water System")

#### Fresh Water

For the **Food Fort** we expect to use 1000 gallons, same as last year. To make this easy, we'll rent a **500 gallon tank** from SSS that will be dedicated to the food fort. We will schedule a **single refill** of this tank on **Wed Aug 27**.

- If the tank is used up before the refill arrives: 
    - We'll warn the food team that they are using too much water
    - We'll provide some temporary water using a hose from the Gayflower to top off the SSS water tank
- If the tank still has water in it on the day when the refill is scheduled: 
    - We'll fill up the Food Fort tanks before refilling, so as to make sure we get all 500 gallons that we paid for

Plumbing:

- From the water tank by the fire lane
- via it's pump
- via a hose over to the food fort
- to a three way splitter 
    - One goes to the Food Fort Sink Inlet (we have short hoses, 1'-2', ideal for this)
    - One goes to the Food Fort Ice Inlet (we have short hoses, 1'-2', ideal for this)
    - One goes to a canteen filling station (via filter) which we set up in the dining room
- ALL THREE outputs here have INDIVIDUAL water meters so we can track usage.

#### RV

We scheduled RV water refill for August 22 and 27.

#### Grey Water

We also expect to generate 1000 gallons of grey water from the Food Fort. We'll rent a **250 gallon tank** from SSS and put it right next to the Food Fort. We'll schedule **three pumps** of this tank (750 gallons) during the week, on **Mon**, **Wed**, and **Fri,** and we can also leave it full.

During the week, grey water from the food fort will accumulate in its internal tank which holds 104 gallons. On a regular basis, we will use a portable pump to empty that into the SSS tank.

Plumbing:

- From the grey water tank under the food fort
- via a Valterra 1-1/2” FPT x ¾” MGHT adapter
- and a short hose
- to the new Milwaukee rechargeable grey water pump
- all of the above mess is placed in a cement-mixing bin to contain any mess
- and then a long hose
- over to the SSS grey water tanks.

The pump needs to be manually activated to dump the tanks every day.

The ice maker dumps a bunch of semi-clean water out the bottom, too. This does not go into any kind of tank. We have to put a large concrete mixing tub under there to catch this water and regularly pump it out to the SSS tank.

- We can place a water bug in this mixing tub and pump it to the SSS tank. With a little creativity we should be able to use the same hose as we use for the grey water.

The goal is to get the SSS tank as full as possible by the time they come to pump it out, so as to take advantage of all 250 gallons pumping that we paid for.

##### Daily Routine:

1. check available space in SSS tank
2. if room available, pump ice water into it
3. if room still available, pump grey water into it
4. is the SSS tank full and the food fort threatening to be full? Organize a pump operation all the way to the Gayflower **Black** tanks.

## Gayflower 

The Gayflower will come with over 2000 gallons of fresh water which should be enough for showers, toilets, drinking water (canteens), and as emergency backup for food.

It can accommodate 1250 gallons of grey water and 1250 gallons of black water. Last year the grey water tanks were much fuller than the black water tanks. So if we ever have to pump excess grey water from the RV or food fort into the Gayflower, we should pump it into the black water tanks.

We can set up a hose from the Gayflower to provide fresh water for drinking, which can go through a water filter.

<p class="callout info">Our initial plan will be to use SSS water for canteen filling, because it's better located near the food fort.</p>

## 2026 And Beyond

1. Ultimately I'd like to get the SSS usage down to zero and rely solely on the Gayflower. It's way cheaper that way.

# Gayflower 2.0 Cost Estimates

This is an overview of the costs and benefits of using a single trailer for shower, toilets, fresh, and grey water as opposed to using OSS services ([what's OSS, you ask?](https://burningman.org/event/participate/camps/so-you-want-to-camp-at-burning-man/deliveries/outside-services-program/)).

Assumption: 2300 gallons fresh water, 2300 gallons waste water (mostly grey), two toilets, 2025 OSS pricing.

Scenarios:

**OSS + Portos** - using OSS providers with portopotty rental  
**OSS + Ecozoic** - using OSS with Ecozoic toilets  
**Gayflower** - using the Gayflower  
**Water Only** - using a water trailer for fresh and grey water; OSS for everything else

#### **Annual Operating Costs**

<table border="1" id="bkmrk-item-oss%2Bportos-oss%2B" style="border-collapse: collapse; width: 100%;"><colgroup><col style="width: 20.0226%;"></col><col style="width: 13.5868%;"></col><col style="width: 12.9909%;"></col><col style="width: 12.6333%;"></col><col style="width: 12.6351%;"></col><col style="width: 28.2445%;"></col></colgroup><thead><tr><td class="align-center">**Item**</td><td class="align-center">**OSS+Portos**</td><td class="align-center">**OSS+Ecozoic**</td><td class="align-center">**Gayflower**</td><td class="align-center">**Water Only**</td><td class="align-center">**Notes**</td></tr></thead><tbody><tr><td>Potable Tank 1000gal</td><td class="align-right">1500</td><td class="align-right">1500</td><td class="align-right">0</td><td class="align-right">0</td><td>SSS price incl pump and hose</td></tr><tr><td>First Fill 1000gal</td><td class="align-right">1000</td><td class="align-right">1000</td><td class="align-right">0</td><td class="align-right">0</td><td>SSS price $1 first fill</td></tr><tr><td>Addl Fill 1300gal</td><td class="align-right">2275</td><td class="align-right">2275</td><td class="align-right">0</td><td class="align-right">0</td><td>SSS price $1.75 each addl gal</td></tr><tr><td>Grey Tank Rental 250gal</td><td class="align-right">400</td><td class="align-right">400</td><td class="align-right">0</td><td class="align-right">0</td><td>SSS tank rental only</td></tr><tr><td>Grey Water Pump 2300gal</td><td class="align-right">4600</td><td class="align-right">4600</td><td class="align-right">0</td><td class="align-right">0</td><td>SSS price per gallon</td></tr><tr><td>Gerlach Water Fill</td><td class="align-right">0</td><td class="align-right">0</td><td class="align-right">1495</td><td class="align-right">1495</td><td>Gerlach 2025 price 0.65</td></tr><tr><td>Portopotty Rental (2)</td><td class="align-right">2082</td><td class="align-right">9211</td><td class="align-right">0</td><td class="align-right">9211</td><td>United Site price for porto  
Ecozoic prices based on 2024</td></tr><tr><td>Trailer storage Empire</td><td class="align-right">0</td><td class="align-right">0</td><td class="align-right">1200</td><td class="align-right">1200</td><td>Empire Storage and Rental (Temen probably similer)</td></tr><tr><td>Annual trailer DOT inspection</td><td class="align-right">0</td><td class="align-right">0</td><td class="align-right">250</td><td class="align-right">250</td><td>  
</td></tr><tr><td>Round trip OSS delivery</td><td class="align-right">0</td><td class="align-right">0</td><td class="align-right">1350</td><td class="align-right">1350</td><td>  
</td></tr><tr><td>BMORG OSS Fees</td><td class="align-right">0</td><td class="align-right">0</td><td class="align-right">275</td><td class="align-right">275</td><td>  
</td></tr><tr><td>**Total**</td><td class="align-right">**11857**</td><td class="align-right">**18986**</td><td class="align-right">**4570**</td><td class="align-right">**13781**</td><td>  
</td></tr><tr><td>  
</td><td>  
</td><td>  
</td><td>  
</td><td>  
</td><td>  
</td></tr><tr><td>savings over ecozoic</td><td class="align-right">  
</td><td class="align-right">  
</td><td class="align-right">**14,416**</td><td class="align-right">**5,205**</td><td>  
</td></tr></tbody></table>

#### **Build Costs (est)**

<table border="1" id="bkmrk-item-gayflower-water" style="border-collapse: collapse; width: 100%;"><colgroup><col style="width: 27.1752%;"></col><col style="width: 17.2825%;"></col><col style="width: 17.2825%;"></col><col style="width: 38.379%;"></col></colgroup><thead><tr><td class="align-center">**Item**</td><td class="align-center">**Gayflower**</td><td class="align-center">**Water Only**</td><td class="align-center">**Notes**</td></tr></thead><tbody><tr><td>53ft x 102in Dry Van Trailer, Used, Nevada</td><td class="align-right">16000</td><td class="align-right">0</td><td>Price est based on TruckPaper completed auctions</td></tr><tr><td>53ft x 102in Flatbed, Used, Nevada</td><td class="align-right">0</td><td class="align-right">8000</td><td> </td></tr><tr><td>7 IBC Totes, 330, new, delivered Empire (Fresh Water)</td><td class="align-right">4000</td><td class="align-right">4000</td><td>Cary Company</td></tr><tr><td>7 IBC Totes, 330, used (Grey Water), pickup Reno</td><td class="align-right">0</td><td class="align-right">1050</td><td>Nevada Container Supply</td></tr><tr><td>10 Grey Water Tanks, 250 gal each</td><td class="align-right">5790</td><td class="align-right">0</td><td>PolyJohn HT01-0250 at Webstaurantstore</td></tr><tr><td>Fresh Water Hoses and Connectors</td><td class="align-right">2000</td><td class="align-right">2000</td><td> </td></tr><tr><td>Grey Water Hoses and Connectors</td><td class="align-right">2000</td><td class="align-right">2000</td><td> </td></tr><tr><td>Pumps</td><td class="align-right">340</td><td class="align-right">340</td><td>Harbor Freight DRUMMOND 1 HP Stainless Steel Shallow Well Pump plus backup</td></tr><tr><td>Steel hardware and welding</td><td class="align-right">10000</td><td class="align-right">2500</td><td> </td></tr><tr><td>Floor decking</td><td class="align-right">5000</td><td class="align-right">0</td><td> </td></tr><tr><td>Dry Van modifications for doors and utility access</td><td class="align-right">8000</td><td class="align-right">0</td><td>  
</td></tr><tr><td>Interior framing</td><td class="align-right">5000</td><td class="align-right">0</td><td> </td></tr><tr><td>Macerating RV toilets</td><td class="align-right">3000</td><td class="align-right">0</td><td>(two)</td></tr><tr><td>Waterless urinals</td><td class="align-right">600</td><td class="align-right">0</td><td>(two)</td></tr><tr><td>Interior Plumbing Parts</td><td class="align-right">3000</td><td class="align-right">0</td><td>  
</td></tr><tr><td>Sinks, faucets, vanity</td><td class="align-right">3000</td><td class="align-right">0</td><td>  
</td></tr><tr><td>Shower enclosures, shower heads</td><td class="align-right">2500</td><td class="align-right">0</td><td>(two)</td></tr><tr><td>Pond liner secondary containment</td><td class="align-right">3000</td><td class="align-right">3000</td><td>For gayflower, secondary containment is permanently built into trailer.  
For water only, secondary containment consists of external evap ponds that must be set up on playa.</td></tr><tr><td>Lighting and electric</td><td class="align-right">4000</td><td class="align-right">0</td><td>  
</td></tr><tr><td>Parts, not including labor</td><td class="align-right">77230</td><td class="align-right">22890</td><td>  
</td></tr><tr><td>Labor</td><td class="align-right">50000</td><td class="align-right">10000</td><td>how much of this can you get from your campers? How good are you at hiring and supervising construction workers? Where are you going to build it?</td></tr><tr><td>Parts, including labor</td><td class="align-right">127230</td><td class="align-right">32890</td><td>  
</td></tr><tr><td>years to amortize</td><td class="align-right">9</td><td class="align-right">6.3</td><td>  
</td></tr></tbody></table>

# 2026 Remount Shower

Existing condition (spring 2025):

[![shower-large.jpeg](https://wiki.futureturtles.com/uploads/images/gallery/2025-09/scaled-1680-/g651BSLl38ltwBbr-shower-large.jpeg)](https://wiki.futureturtles.com/uploads/images/gallery/2025-09/g651BSLl38ltwBbr-shower-large.jpeg)

Problems:

- galvanized pipe is corroding
- too much weight hanging on ceiling (fell down in 2025)

Plan:

- Mount shower heads from the wall (on the lumbar right above the shower enclosure)
- Replace pipes for shower with PEX-B

**STATUS AS OF FALL 2025**

- **During the fall visit to the Gayflower we took down the existing showers but we didn't have time to put up new ones.**
- **If we want to get the showers working again, we'll need the following parts:**
    - **4x Standard Shower Arm (45° bend, M-M 1/2 pipe)**
    - **About 4x 3/4" - 3/4" - 1/2" reducers (sharkbite or PEX-B)**
    - **A bunch of 3/4" and 1/2" ells (sharkbite or PEX-B)**
- **Everything else we need for this project is already in the Gayflower under the sinks**
- **The condition of the Gayflower is pretty miserable; we might just build a new shower trailer. See #gayflower channel in discord for the latest discussion**

Shopping list:

**qty 4** - [1/2 in. Brass PEX-B Barb x 1/2 in. Female Pipe Thread Adapter 90-Degree Drop-Ear Elbow](https://www.homedepot.com/p/Apollo-1-2-in-Brass-PEX-B-Barb-x-1-2-in-Female-Pipe-Thread-Adapter-90-Degree-Drop-Ear-Elbow-APXDEE12/301541098?MERCH=REC-_-rv_gm_pip_rr-_-n/a-_-1-_-n/a-_-n/a-_-n/a-_-n/a-_-n/a) - mounts the shower on the wall using screws

*or*

**qty 4** - [Sharkbite Max 1/2 in. Push-to-Connect x FIP Brass 90-Degree Drop Ear Elbow Fitting](https://www.homedepot.com/p/SharkBite-Max-1-2-in-Push-to-Connect-x-FIP-Brass-90-Degree-Drop-Ear-Elbow-Fitting-UR334A/326882624) - just a little bit easier to use Sharkbite

**small box** - #8 and #10 wood screws

**qty 4** - [1/2" x Close MIP Brass Hex Nipple Fitting](https://www.homedepot.com/p/Everbilt-1-2-in-x-Close-MIP-Brass-Hex-Nipple-Fitting-802279/207176608) (or alternate 1/2" MIP x 1/2 MIP) which will connect to existing spring-loaded valves

**50' roll** - 1/2" PEX-B

**qty 10 -** [Sharkbite Max 1/2 in. Brass 90-Degree Push-to-Connect Elbow Fitting](https://www.homedepot.com/p/SharkBite-Max-1-2-in-Brass-90-Degree-Push-to-Connect-Elbow-Fitting-UR248A/323676174) - to connect the PEX-B back to the hot water heater

**qty 4 -** [Sharkbite Max 1/2 in. Push-to-Connect Brass Tee Fitting](https://www.homedepot.com/p/SharkBite-Max-1-2-in-Push-to-Connect-Brass-Tee-Fitting-UR362A/325997400) - to create tees to get water to all four shower heads

**box** - [Apollo 1/2 in. and 3/4 in. 2-in-1 PEX Pipe J-Hook Pipe Support Pro Pack (40-Pack)](https://www.homedepot.com/p/Apollo-1-2-in-and-3-4-in-2-in-1-PEX-Pipe-J-Hook-Pipe-Support-Pro-Pack-40-Pack-APXTALON40JR/305454398)

**5 -** [1" x 4" x 8' Premium Kiln Dried Board](https://www.homedepot.com/p/1-in-x-4-in-x-8-ft-Premium-Kiln-Dried-Square-Edge-Whitewood-Common-Board-914681/100023465) - as appropriate to create a nice backboard for mounting the shower heads and PEX. Get it cut in half at Home Depot so it's easier to transport

# Gayflower Repair List and Wish List

[![IMG_1366.jpg](https://wiki.futureturtles.com/uploads/images/gallery/2024-10/scaled-1680-/zTgBLbhzUmqVVWcp-img-1366.jpg)](https://wiki.futureturtles.com/uploads/images/gallery/2024-10/zTgBLbhzUmqVVWcp-img-1366.jpg)

## Introduction

The Gayflower is an absolute marvel, but it is not particularly robust or fancy. So we always have a ton of improvements we'd like to make to get it better and better! This chart summarizes those plans.

<table border="1" id="bkmrk-priority-project-sta" style="border-collapse: collapse; width: 100%; height: 919.4px;"><colgroup><col style="width: 11.323%;"></col><col style="width: 53.4259%;"></col><col style="width: 35.2512%;"></col></colgroup><thead><tr style="height: 29.8px;"><td style="height: 29.8px;">**Priority**  
</td><td style="height: 29.8px;">**Project**  
</td><td style="height: 29.8px;">**Status**  
</td></tr></thead><tbody><tr style="height: 80.2px;"><td style="height: 80.2px;">**DONE**</td><td style="height: 80.2px;">**Fix Leaks Around Fresh Water Pump**  
The main green fresh water pump has a few little drips. There is a second leak on the thin brass fitting where water goes off to the swamp cooler.  
</td><td style="height: 80.2px;">[COMPLETED spring 2025](https://wiki.futureturtles.com/books/burning-man-infrastructure/page/gayflower-spring-2025-plan "Gayflower: 2024 water system and 2025 potential improvements")

</td></tr><tr style="height: 80.2px;"><td style="height: 80.2px;">**DONE**</td><td style="height: 80.2px;">**Replace IBC Totes With New**  
The four IBC totes in the back were used for fruit juice concentrate and cause the water to smell poorly. One of the three IBC totes in the front (the rearmost one) has a broken shutoff valve.  
</td><td style="height: 80.2px;">[COMPLETED spring 2025](https://wiki.futureturtles.com/books/burning-man-infrastructure/page/gayflower-spring-2025-plan "Gayflower: 2024 water system and 2025 potential improvements")</td></tr><tr style="height: 63.4px;"><td style="height: 63.4px;">**DONE**</td><td style="height: 63.4px;">**Seal Waste Line at Second Urinal**

We haven't been able to use the second urinal because the waste line leaks.

</td><td style="height: 63.4px;">[COMPLETED spring 2025](https://wiki.futureturtles.com/books/burning-man-infrastructure/page/gayflower-spring-2025-plan "Gayflower: 2024 water system and 2025 potential improvements")</td></tr><tr style="height: 29.8px;"><td style="height: 29.8px;">**DONE**</td><td style="height: 29.8px;">**Leaks around sink bases**

</td><td style="height: 29.8px;">COMPLETED Fall 2025</td></tr><tr style="height: 63.4px;"><td style="height: 63.4px;">**DONE**</td><td style="height: 63.4px;">**Leak in Grey Water Connecting Hoses**

The one we noticed was probably the rearmost, passenger-side grey water holding tank.  
</td><td style="height: 63.4px;">Completed Summer 2025</td></tr><tr style="height: 63.4px;"><td style="height: 63.4px;">Not Needed</td><td style="height: 63.4px;">**Better Support For IBC Totes in Back**

Weld in place a steel structure to support the weight of the water tanks in back, or add more wood</td><td style="height: 63.4px;">The wood that is there appears to be adequate</td></tr><tr style="height: 197.8px;"><td style="height: 197.8px;">**5 URGENT**</td><td style="height: 197.8px;">**[Secondary Containment](https://wiki.futureturtles.com/books/burning-man-infrastructure/page/gayflower-leak-prevention) for Grey / Black Water Tanks**  
There is an interesting problem that if the grey or black water tanks leak or the hoses connecting them come apart, the contents go onto the playa.  
  
There is a black liner there of some sort but it will not contain anything. It is is starting to rot away and probably has a lot of holes and screws going through it right now

</td><td style="height: 197.8px;">First attempt of adding more pond liner in back did not help. Currently we don't have any idea for what to do about this

</td></tr><tr style="height: 85.8px;"><td style="height: 85.8px;">**DONE**</td><td style="height: 85.8px;">**Level Indicators for Waste Water Tanks**  
Apparently there are already sensors connected to the grey and black water tanks to measure the level, but they are not hooked up to anything that can be used to read their output.

</td><td style="height: 85.8px;">[COMPLETED spring 2025](https://wiki.futureturtles.com/books/burning-man-infrastructure/page/gayflower-spring-2025-plan "Gayflower: 2024 water system and 2025 potential improvements")  
  
Indicators are not reliable for black water presumably due to dirty sensors.

</td></tr><tr style="height: 46.6px;"><td style="height: 46.6px;">**DONE**</td><td style="height: 46.6px;">**Main faucets broken**

cheap old faucets broke. Replace

</td><td style="height: 46.6px;">Replaced by Adam Pence (Summer 2025)</td></tr><tr style="height: 22.4px;"><td style="height: 22.4px;">**DONE**</td><td style="height: 22.4px;">**Shower heads clogged and corroded beyond repair**

</td><td style="height: 22.4px;">Replaced by Adam Pence (Summer 2025)</td></tr><tr style="height: 63.4px;"><td style="height: 63.4px;">5 Urgent</td><td style="height: 63.4px;">**System for easy winterization**

</td><td style="height: 63.4px;">We were able to winterize during strike 2025 using the connectors we bought and the RV air hose. Adam Pence also disconnected a lot of things like the backs of the toilets October 2025

</td></tr><tr style="height: 63.4px;"><td style="height: 63.4px;">2 Low Pri</td><td style="height: 63.4px;">**Repair Hand Wash SInks**

Both of these were damaged around the foot pump by freezing.

</td><td style="height: 63.4px;">People barely used this IIRC

Might be easy just to swap out the foot pumps, though.

</td></tr><tr style="height: 29.8px;"><td style="height: 29.8px;">**DONE**</td><td style="height: 29.8px;">**Light in back room**

</td><td style="height: 29.8px;">Done by Adam Pence (Summer 2025)

</td></tr></tbody></table>

#### Post 2025 Event List

<table border="1" id="bkmrk-priority-project-sta-1" style="border-collapse: collapse; width: 100%; height: 718px;"><tbody><tr style="height: 29.8px;"><td style="height: 29.8px; width: 11.4422%;">**Priority**  
</td><td style="height: 29.8px; width: 53.0419%;">**Project**  
</td><td style="height: 29.8px; width: 35.5159%;">**Status**  
</td></tr><tr style="height: 80.2px;"><td style="height: 80.2px; width: 11.4422%;">**5 Urgent**</td><td style="height: 80.2px; width: 53.0419%;">**Remount Shower**  
Shower plumbing has fallen from the ceiling</td><td style="height: 80.2px; width: 35.5159%;">removed </td></tr><tr><td style="width: 11.4422%;">**5 Urgent**</td><td style="width: 53.0419%;">**Repair Waterless Urinal**  
One of these waterless urinals is still not draining properly</td><td style="width: 35.5159%;">After investigation it became clear that the waste line is misrouted underneath the floor such that it bumps up rather than sloping purely downhill. This *might* be correctable by shortening the length of the pipe coming down from the urinal by 6", but the real fix would be to climb underneath to reroute it.</td></tr><tr><td style="width: 11.4422%;">**5** **Urgent**</td><td style="width: 53.0419%;">**Replace shower water supply**  
The current galvanized metal pipes being used to provide water to the showers will always corrode. The corroded material will clog the showers time and time again. Probably should replace with PVC</td><td style="width: 35.5159%;">[Plan](https://wiki.futureturtles.com/books/burning-man-infrastructure/page/2026-remount-shower "2026 Remount Shower") for fall 2025</td></tr><tr><td style="width: 11.4422%;">**5 Urgent**</td><td style="width: 53.0419%;">**Investigate dumping situation**

Need to discuss with fixxer. What do we need to do to make it easier to dump and clean the black tanks?

</td><td style="width: 35.5159%;">Tanks can only be emptied about 75% and there is no provision for rinsing.</td></tr><tr><td style="width: 11.4422%;">**5 Urgent**</td><td style="width: 53.0419%;">**Rear left door to van can't be closed without a crowbar**

</td><td style="width: 35.5159%;">  
</td></tr></tbody></table>

# Gayflower: Spring 2025 Plan

This documents the replacement of the fresh water system in the Gayflower that was completed May 2025.

#### "Before" Photo:

[![IMG_1731.jpg](https://wiki.futureturtles.com/uploads/images/gallery/2025-03/scaled-1680-/sAGKzACBbR6Iri0B-img-1731.jpg)](https://wiki.futureturtles.com/uploads/images/gallery/2025-03/sAGKzACBbR6Iri0B-img-1731.jpg)

[![IMG_1710.jpg](https://wiki.futureturtles.com/uploads/images/gallery/2025-03/scaled-1680-/Nod25OZGYMXGw6Qm-img-1710.jpg)](https://wiki.futureturtles.com/uploads/images/gallery/2025-03/Nod25OZGYMXGw6Qm-img-1710.jpg)

## 0. General conditions

1. Install plywood on rear wall to support the plumbing stack for the pump outlet. **DONE**
2. Get a big tool box and parts box to organize all our plumbing tools and parts **DONE**

## 1. IBC Tote Replacement

Replace all seven totes with new ones and completely replace all plumbing connecting them.

<p class="callout danger">This design had one bug: the pump would not work without a check valve at the input. We added that in and everything worked great!</p>

<details id="bkmrk-design-consideration"><summary>Design considerations</summary>

- Use flexible hoses instead of PVC with glue, for easy replacement, more flexibity, and less likely to break
- Pump requires 1" diameter inflow. To accomplish this the nearest IBC tote will be connected with 1" PEX-B. All the other totes can be connect to each other with 3/4" hose just to allow them to balance with each other.
- Shutoff valves everywhere for safety and quick repairs

</details>#### New plumbing configuration

[![IMG_2254.jpg](https://wiki.futureturtles.com/uploads/images/gallery/2025-03/scaled-1680-/e5rETJGkmK8mLz6z-img-2254.jpg)](https://wiki.futureturtles.com/uploads/images/gallery/2025-03/e5rETJGkmK8mLz6z-img-2254.jpg)[![IMG_2255.jpg](https://wiki.futureturtles.com/uploads/images/gallery/2025-03/scaled-1680-/Il6sZAWqTGD5PVjU-img-2255.jpg)](https://wiki.futureturtles.com/uploads/images/gallery/2025-03/Il6sZAWqTGD5PVjU-img-2255.jpg)

<table border="1" id="bkmrk-a-ibc-tote-with-2%22-c" style="border-collapse: collapse; width: 100%;"><colgroup><col style="width: 7.98177%;"></col><col style="width: 92.0162%;"></col></colgroup><tbody><tr><td>A</td><td>IBC tote   
</td></tr><tr><td>B</td><td>2" Camlock valve, preinstalled on tote</td></tr><tr><td>C</td><td>[2" Camlock to 3/4" Male Garden Hose](https://www.thecarycompany.com/2-female-camlock-to-garden-hose-adapter) adapter</td></tr><tr><td>D</td><td>2' long 3/4" Female to Female Garden Hose Extender (get some 1' as well to minimize slop)</td></tr><tr><td>E</td><td>3/4" Garden Hose splitter with valves (F - M - M)

</td></tr><tr><td>F</td><td>5' long 3/4" Garden Hose (M - F)</td></tr><tr><td>G</td><td>3/4" Garden Hose three way splitter with valves (F - M - M - M)

</td></tr><tr><td>H</td><td>50' 3/4" Garden Hose (M - F)

</td></tr><tr><td>I</td><td>Hole in floor

</td></tr><tr><td>J</td><td>2" Female Camlock to 2" Male NPT Adapter, Stainless Steel ([example](https://www.thecarycompany.com/2-inch-ss-female-camlock-to-2-inch-male-npt-adapter))

</td></tr><tr><td>K</td><td>2" Female NPT to 1" Female NPT

</td></tr><tr><td>L</td><td>1" Male NPT to 1" Sharkbite

</td></tr><tr><td>M</td><td>1" PEX-B

</td></tr><tr><td>N</td><td>1" - 1" - 3/4" Reducing Tee (Sharkbite)

</td></tr><tr><td>O</td><td>1" Sharkbite Elbows

</td></tr><tr><td>P</td><td>1" Sharkbite to 1" Male NPT

</td></tr><tr><td>Q</td><td>Pump, with 1" Female NPT inlet

</td></tr><tr><td>R</td><td>3/4" PEX-B

</td></tr><tr><td>S</td><td>3/4" Sharkbite to 3/4" Male NPT

</td></tr><tr><td>T</td><td>3/4" Female NPT to 3/4" Male Garden Hose

</td></tr><tr><td>U</td><td>3/4" Garden Hose Shutoff Valve (M-F)

</td></tr><tr><td>V</td><td>3/4" Garden Hose Male to Male Coupler

</td></tr></tbody></table>

<p class="callout info">The pump requires 1" diameter input, so it draws from the nearest tote using 1" PEX-B (put together with sharkbite fittings). That tote, and the other six, are all interconnected using 3/4" hoses, which allow the water to seek a level between them.</p>

## 2. Evaporative Cooler Supply Rerouting

The water supply line for the evaporative cooler should be rerouted so it does not interfere with that IBC tote. Also, it might be responsible for the leak at the top of the pump.


## 3. Rework plumbing above the pump

The main goal here is to make something that allows for quickly swapping out a failed pump, and eliminate the PVC+glue that is prone to leaks.

[![IMG_2257.jpg](https://wiki.futureturtles.com/uploads/images/gallery/2025-03/scaled-1680-/DywyrrXpG9giWzsB-img-2257.jpg)](https://wiki.futureturtles.com/uploads/images/gallery/2025-03/DywyrrXpG9giWzsB-img-2257.jpg)

<table border="1" id="bkmrk-a-existing-drummond-" style="border-collapse: collapse; width: 100%; height: 571.8px;"><colgroup><col style="width: 7.03316%;"></col><col style="width: 92.9649%;"></col></colgroup><tbody><tr style="height: 35.4px;"><td style="height: 35.4px;">A</td><td style="height: 35.4px;">Existing [DRUMMOND 1 HP Stainless Steel Shallow Well Pump and Tank](https://www.harborfreight.com/1-hp-stainless-steel-shallow-well-pump-and-tank-with-pressure-control-switch-950-gph-63407.html) with Pressure Control Switch - 950 GPH</td></tr><tr style="height: 29.8px;"><td style="height: 29.8px;">B</td><td style="height: 29.8px;">1" Female NPT output</td></tr><tr style="height: 35.4px;"><td style="height: 35.4px;">C</td><td style="height: 35.4px;">1" Male NPT to 1" Sharkbite [U140LF](https://www.sharkbite.com/us/en/brass-push-to-connect/fittings/adapters/brass-push-male-adapter)   
</td></tr><tr style="height: 29.8px;"><td style="height: 29.8px;">D</td><td style="height: 29.8px;">1" PEX-B Pipe</td></tr><tr style="height: 74.6px;"><td style="height: 74.6px;">E</td><td style="height: 74.6px;">Sharkbite 1" Check Valve ([U2020-0000LF](https://www.sharkbite.com/us/en/brass-push-to-connect/valves/control-valves/check-valve))  
  
Provide Sharkbite disconnect tongs ([U715](https://www.sharkbite.com/us/en/brass-push-to-connect/tools/disconnect-tongs)) for winterizing.</td></tr><tr style="height: 29.8px;"><td style="height: 29.8px;">F</td><td style="height: 29.8px;">1" Sharkbite Elbow</td></tr><tr style="height: 18.4px;"><td style="height: 18.4px;">G</td><td style="height: 18.4px;">1" Sharkbite PVC Fittings

Also provide different connections because I don't know what is over there

</td></tr><tr style="height: 29.8px;"><td style="height: 29.8px;">H</td><td style="height: 29.8px;">Existing water line, splitting to cold water and hot water

</td></tr><tr style="height: 29.8px;"><td style="height: 29.8px;">I</td><td style="height: 29.8px;">1" - 1" - 3/4" Reducing Tee (Sharkbite)

</td></tr><tr style="height: 29.8px;"><td style="height: 29.8px;">J</td><td style="height: 29.8px;">3/4" PEX-B Pipe

</td></tr><tr style="height: 52.2px;"><td style="height: 52.2px;">K</td><td style="height: 52.2px;">Brass Push Drop-Ear Elbow (3/4" Sharkbite to 3/4" FNPT) ([U340LF](https://www.sharkbite.com/us/en/brass-push-to-connect/fittings/adapters/brass-push-drop-ear-elbow))  
Can be screwed onto plywood so that FNPT is facing out

</td></tr><tr style="height: 35.4px;"><td style="height: 35.4px;">L</td><td style="height: 35.4px;">3/4" Male NPT to 3/4" Male Garden Hose ([amazon](https://www.amazon.com/Sanpaint-Connector-Garden-Fitting-Adapter/dp/B08FSY4DQT?crid=G0APD8MQJA6W&dib=eyJ2IjoiMSJ9.SFCwbtrRja_kAp0fML3_wwZWk0dtp-y1XFyiNQVkHeRKpDj8ZEb9Zx1NWcYQi5-qURtzqo93pSOVrLp9e6t63DxZyLsLmr2YtPSoehSoWeaD2zYqNdRdalhcA1tzQd9L7U8O54SUcExUGq6Lxw1oy9wq8tQ8VJ7ILv6RC5NIoPj66J4oQsIYHI5d31c7YvBsCq8W3c4IKLEfOB6Ry6j9x_BaDvJ7VktGyOQT6thw8wkPg-j3gjVTXeziunZ_WdBC7N2RDgck3VAgIzs7MZOug6tpIUtGybHP-6eR9HcAQxYd_-BYp1_NY3qXOmHUdVtAD1I4ZJzAweSd_NZ81tYZRs8XEH3g9G6Me3kovbShOLUCZRnJdAsv8UMsn12ugXgB8j1gmNLO3gyi93M9hXSv9q8TAonQkC-zpOF6hlwBl7kjQnERTJ3XVt-bwr-ei7fU.riMYEi0rQ_yIk8LbDB6I_MyU-vOT9LIyRDcIpehRxI8&dib_tag=se&keywords=3%2F4%22%2BMale%2BNPT%2Bto%2B3%2F4%22%2BMale%2BGarden%2BHose&qid=1742777640&sprefix=3%2F4%2Bmale%2Bnpt%2Bto%2B3%2F4%2Bmale%2Bgarden%2Bhose%2Caps%2C150&sr=8-3&th=1))

</td></tr><tr style="height: 29.8px;"><td style="height: 29.8px;">M</td><td style="height: 29.8px;">3/4 in. Evaporative Cooler FGH x MGH Sill Cock

</td></tr><tr style="height: 29.8px;"><td style="height: 29.8px;">N</td><td style="height: 29.8px;">1/4 in. x 1/8 in. Evaporative Cooler Angle Needle Valve

</td></tr><tr style="height: 29.8px;"><td style="height: 29.8px;">O</td><td style="height: 29.8px;">1/4 in. Evaporative Cooler Copper Tube leading to swamp cooler

</td></tr><tr style="height: 52.2px;"><td style="height: 52.2px;">P</td><td style="height: 52.2px;">This section to be mounted on plywood   
Use some 1" and 3/4" pipe hangers like [this](https://www.homedepot.com/p/Oatey-1-in-Galvanized-2-Hole-Pipe-Hanger-Strap-4-Pack-33544/303434706) to make it strong

</td></tr></tbody></table>

## 4. Urinal leak repair

Reference photo:

[![IMG_5958.jpeg](https://wiki.futureturtles.com/uploads/images/gallery/2025-04/scaled-1680-/sIqjRaDwZziuRS6J-img-5958.jpeg)](https://wiki.futureturtles.com/uploads/images/gallery/2025-04/sIqjRaDwZziuRS6J-img-5958.jpeg)

Not sure what size PVC this is. It is most likely 1 1/2" or 2".

- this might be the world's simplest fix, just glue it back
- but without knowing what it's connected to underneath, it might be a situation where whenever the black water tanks shift around, they move the pipes

To repair this, we would need:

- Short length of PVC pipe ([1 1/2"](https://www.homedepot.com/p/Charlotte-Pipe-1-1-2-in-x-10-ft-PVC-Schedule-40-DWV-Pipe-PVC071120600/100348474)) ([2"](https://www.homedepot.com/p/Charlotte-Pipe-2-in-x-10-ft-White-Schedule-40-PVC-Pipe-Solid-Core-PVC-07200-0600/100348475))
- PVC couplings ([1 1/2](https://www.homedepot.com/p/Charlotte-Pipe-1-1-2-in-PVC-Schedule-40-S-x-S-Coupling-PVC021001400HD/203811389?MERCH=REC-_-plpbrowse_multi-_-205808358-_-0-_-n/a-_-n/a-_-n/a-_-n/a-_-n/a)") ([2"](https://www.homedepot.com/p/Charlotte-Pipe-2-in-PVC-Schedule-40-S-x-S-Coupling-PVC021001600HD/203811391))
- Fernco flexible couplings ([this](https://www.homedepot.com/p/Fernco-2-in-x-2-in-DWV-Flexible-PVC-Coupling-P1056-22/100096490) or [this](https://www.homedepot.com/p/Fernco-1-1-2-in-x-1-1-2-in-DWV-Flexible-PVC-Coupling-P1056-150/100058870))
- PVC male - slip adapter
- Purple primer
- Fine tooth saw or PVC pipe cutter
- PVC cement

Everything here is going to be available from Home Depot.

## Consolidated Shopping List

This list has been added to the manifest on the Reno Warehouse (2025) page.

<table border="1" id="bkmrk-qty-item-vendor-note" style="border-collapse: collapse; width: 100%; height: 95px;"><colgroup><col style="width: 6.7938%;"></col><col style="width: 43.1466%;"></col><col style="width: 23.7187%;"></col><col style="width: 26.3409%;"></col></colgroup><thead><tr style="height: 29.8px;"><td style="height: 29.8px;">Qty</td><td style="height: 29.8px;">Item</td><td style="height: 29.8px;">Vendor</td><td style="height: 29.8px;">Notes

</td></tr></thead><tbody><tr style="height: 35.4px;"><td style="height: 35.4px;">4</td><td style="height: 35.4px;">1" Male NPT to 1" Sharkbite</td><td style="height: 35.4px;">Sharkbite [U140LF](https://www.sharkbite.com/us/en/brass-push-to-connect/fittings/adapters/brass-push-male-adapter)</td><td style="height: 35.4px;"> </td></tr><tr style="height: 29.8px;"><td style="height: 29.8px;">10'</td><td style="height: 29.8px;">1" PEX-B Pipe - White</td><td style="height: 29.8px;">[Home Depot](https://www.homedepot.com/p/Apollo-1-in-x-10-ft-White-PEX-B-Pipe-APPW101/301541234)</td><td style="height: 29.8px;">  
</td></tr><tr><td>5'</td><td>3/4" PEX-B Pipe - White</td><td>[Home Depot](https://www.homedepot.com/p/Apollo-3-4-in-x-2-ft-White-PEX-B-Pipe-APPW234/301541201)</td><td>  
</td></tr><tr><td>2</td><td>Sharkbite 1" Check Valve</td><td>Sharkbite [U2020-0000LF](https://www.sharkbite.com/us/en/brass-push-to-connect/valves/control-valves/check-valve)</td><td>  
</td></tr><tr><td>1</td><td>Sharkbite Disconnect Tongs 1"</td><td>Sharkbite [U715](https://www.sharkbite.com/us/en/brass-push-to-connect/tools/disconnect-tongs)  
</td><td>  
</td></tr><tr><td>1</td><td>Sharkbite Disconnect Tongs 3/4"</td><td>Sharkbite [U713](https://www.sharkbite.com/us/en/brass-push-to-connect/tools/disconnect-tongs)  
</td><td>  
</td></tr><tr><td>7</td><td>Sharkbite 1" Elbow</td><td>Sharkbite U260LF</td><td>  
</td></tr><tr><td>3</td><td>Sharkbite 1" Coupling   
</td><td>Sharkbite U020LF  
</td><td>  
</td></tr><tr><td>1</td><td>Sharkbite PVC Transition (1")</td><td>Sharkbite UIP4020  
</td><td>  
</td></tr><tr><td>1</td><td>Sharkbite PVC Transition (3/4")</td><td>Sharkbite UIP4016  
</td><td>  
</td></tr><tr><td>1</td><td>Sharkbite 1" to 3/4" Reducing Coupling</td><td>Sharkbite U060LF  
</td><td>  
</td></tr><tr><td>3</td><td>Sharkbite 1" - 1" - 3/4" Reducing Tee</td><td>Sharkbite U416LF</td><td>  
</td></tr><tr><td>1</td><td>Sharkbite Brass Push Drop Ear Elbow   
(3/4" Sharkbite to 3/4" FNPT)  
</td><td>Sharkbite [U340LF](https://www.sharkbite.com/us/en/brass-push-to-connect/fittings/adapters/brass-push-drop-ear-elbow)  
</td><td>  
</td></tr><tr><td>1</td><td>3/4" Male NPT to 3/4" Male Garden Hose</td><td>[Amazon](https://www.amazon.com/Sanpaint-Connector-Garden-Fitting-Adapter/dp/B08FSY4DQT?crid=G0APD8MQJA6W&dib=eyJ2IjoiMSJ9.SFCwbtrRja_kAp0fML3_wwZWk0dtp-y1XFyiNQVkHeRKpDj8ZEb9Zx1NWcYQi5-qURtzqo93pSOVrLp9e6t63DxZyLsLmr2YtPSoehSoWeaD2zYqNdRdalhcA1tzQd9L7U8O54SUcExUGq6Lxw1oy9wq8tQ8VJ7ILv6RC5NIoPj66J4oQsIYHI5d31c7YvBsCq8W3c4IKLEfOB6Ry6j9x_BaDvJ7VktGyOQT6thw8wkPg-j3gjVTXeziunZ_WdBC7N2RDgck3VAgIzs7MZOug6tpIUtGybHP-6eR9HcAQxYd_-BYp1_NY3qXOmHUdVtAD1I4ZJzAweSd_NZ81tYZRs8XEH3g9G6Me3kovbShOLUCZRnJdAsv8UMsn12ugXgB8j1gmNLO3gyi93M9hXSv9q8TAonQkC-zpOF6hlwBl7kjQnERTJ3XVt-bwr-ei7fU.riMYEi0rQ_yIk8LbDB6I_MyU-vOT9LIyRDcIpehRxI8&dib_tag=se&keywords=3%2F4%22%2BMale%2BNPT%2Bto%2B3%2F4%22%2BMale%2BGarden%2BHose&qid=1742777640&sprefix=3%2F4%2Bmale%2Bnpt%2Bto%2B3%2F4%2Bmale%2Bgarden%2Bhose%2Caps%2C150&sr=8-3&th=1)</td><td>comes as a two pack to provide spare</td></tr><tr><td>12</td><td>1" Pipe Hangers</td><td>[Home Depot](https://www.homedepot.com/p/Oatey-1-in-Galvanized-2-Hole-Pipe-Hanger-Strap-4-Pack-33544/303434706)</td><td>12 total needed. Check quantity per pack, don't order 12 packs!</td></tr><tr><td>10</td><td>3/4" Pipe Hangers</td><td>[Home Depot](https://www.homedepot.com/p/Oatey-3-4-in-Galvanized-2-Hole-Pipe-Hanger-Strap-10-Pack-33543/303434704)</td><td>10 total needed. Check quantity per pack, don't order 10 packs!</td></tr><tr><td style="width: 7.62813%;">1</td><td style="width: 47.4325%;">1/4 in. x 1/8 in. Evaporative Cooler Angle Needle Valve</td><td style="width: 19.9096%;">Home Depot ([link](https://www.homedepot.com/p/DIAL-1-4-in-x-1-8-in-Evaporative-Cooler-Angle-Needle-Valve-94395/100128922))</td><td style="width: 25.0298%;"> </td></tr><tr><td style="width: 7.62813%;">50 feet</td><td style="width: 47.4325%;">1/4 in. Evaporative Cooler Copper Tube</td><td style="width: 19.9096%;">Home Depot ([link](https://www.homedepot.com/p/DIAL-1-4-in-x-50-ft-Evaporative-Cooler-Copper-Tube-4355/100347208))</td><td style="width: 25.0298%;">  
</td></tr><tr><td style="width: 7.62813%;">1</td><td style="width: 47.4325%;">3/4 in. Evaporative Cooler FGH x MGH Sill Cock</td><td style="width: 19.9096%;">Home Depot ([link](https://www.homedepot.com/p/3-4-in-Evaporative-Cooler-FGH-x-MGH-Sill-Cock-92515/100345034))</td><td style="width: 25.0298%;">  
</td></tr><tr><td style="width: 7.62813%;">1</td><td style="width: 47.4325%;">1/4 in. x 1/8 in. Evaporative Cooler CC and MPT Male Union</td><td style="width: 19.9096%;">Home Depot ([link](https://www.homedepot.com/p/DIAL-1-4-in-x-1-8-in-Evaporative-Cooler-CC-and-MPT-Male-Union-93735/100146708?MERCH=REC-_-brand_based_collection-_-100345034-_-4-_-n/a-_-n/a-_-n/a-_-n/a-_-n/a))</td><td style="width: 25.0298%;">spare part</td></tr><tr><td style="width: 7.62813%;">1</td><td style="width: 47.4325%;">1/4 in. Compression Brass Nut Fitting</td><td style="width: 19.9096%;">Home Depot ([link](https://www.homedepot.com/p/Everbilt-1-4-in-Compression-Brass-Nut-Fitting-800629/300096260))</td><td style="width: 25.0298%;">spare part</td></tr><tr><td style="width: 7.62813%;">1</td><td style="width: 47.4325%;">Mini Copper Tubing Cutter</td><td style="width: 19.9096%;">Home Depot ([link](https://www.homedepot.com/p/Milwaukee-1-2-in-Mini-Copper-Tubing-Cutter-48-22-4250/207005244))</td><td style="width: 25.0298%;">tool</td></tr><tr><td style="width: 7.62813%;">20</td><td style="width: 47.4325%;">Copper tube straps</td><td style="width: 19.9096%;">Home Depot ([link](https://www.homedepot.com/p/Everbilt-1-2-in-Copper-Tube-Strap-5-Pack-C624HD12/204620164))</td><td style="width: 25.0298%;">need 20 total, not 20 packs</td></tr><tr><td style="height: 63.4px;">7</td><td style="height: 63.4px;">Rebottled or new IBC totes

330 gallon  
2" Camlock Valve

</td><td style="height: 63.4px;">The Cary Company  
EST104097</td><td style="height: 63.4px;">To ship to Empire</td></tr><tr><td style="height: 69px;">7</td><td style="height: 69px;">2" Camlock to 3/4" Male Garden Hose</td><td style="height: 69px;">The Cary Company or  
[Amazon](https://www.amazon.com/Gallon-Fittings-Adapter-Garden-Camlock/dp/B0CRKVCFG9)</td><td style="height: 69px;"> </td></tr><tr><td style="height: 46.6px;">2</td><td style="height: 46.6px;">3/4" Female - Female Garden Hose

5' Length

</td><td style="height: 46.6px;">[Amazon](https://www.amazon.com/Solution4Patio-Garden-Fittings-Connecting-Dehumidifier/dp/B0969W3ZXZ?dib=eyJ2IjoiMSJ9.ZWCfyiLQMmLykkYvEUp-J7u6UHzU4Gr2A_c1p0yMEQIHSdHeFaeaECJ4SHZjuZ3zwTzZKnXJfVNaj8E_aA27BjkDHdt8Yx50yIIcitfnatjok9qkuwwopLS9kXhBQcv24_BYhhVKLFmk3W-T1MlqzxPiQsL7d4TI8XGqLMwHG7ARDBxYtvvtLnY8emyiZT-PSFhzTZl6b5syksrxFknFQvKgSJ6PiHjDuwyYHjc36b7gT-K8qcwVf1q1A9ZGqYWCozKAOYz8vquvhMBcP2bYtINoPBzEsQh5XDdp9vYlPebhn2qaNQttuCFZM1Xu0GcoquTAMmxHPmDdmQaWT_nR19OH9BWRtrj5uKnGDwnsan63V0RH4P7gW3xYKSlm4nPVLp0owUEHEmjfJryEG5EVb0khoWXsAdeJcQwU8TGFl5Xw7jpEGElYC0doPO17b4Om.9K5kjqZVux9QwJCdFdfxWI5iZGpOLvPa8feEADckARY&dib_tag=se&keywords=3%2F4%22%2BFemale%2B-%2BFemale%2BGarden%2BHose%2B5%27%2BLength&qid=1742768601&sr=8-2&th=1)</td><td style="height: 46.6px;">  
</td></tr><tr><td style="height: 46.6px;">3</td><td style="height: 46.6px;">3/4" Female - Female Garden Hose  
2' Length</td><td style="height: 46.6px;">[Amazon](https://www.amazon.com/XUESNOF-Garden-Hose-Extender-1FT/dp/B0CY4SXBNN)</td><td style="height: 46.6px;">  
</td></tr><tr><td style="height: 46.6px;">3</td><td style="height: 46.6px;">3/4" Female - Female Garden Hose   
1' Length</td><td style="height: 46.6px;">[Amazon](https://www.amazon.com/XUESNOF-Garden-Hose-Extender-1FT/dp/B0CY4QTKC5?th=1)</td><td style="height: 46.6px;">  
</td></tr><tr><td style="height: 46.6px;">2</td><td style="height: 46.6px;">3/4" Male - Female Garden Hose

6' Length

</td><td style="height: 46.6px;">[Amazon](https://www.amazon.com/Solution4Patio-Garden-Lightweight-Household-Commercial/dp/B086MNV6W3?crid=35PCBSZZKEV27&dib=eyJ2IjoiMSJ9.RMG-E_KZSp1IqLoAKA-s4rOt-hXBdFEO-isc5jMZsaZOXKIVigFJHpY0-p64uU_8fjrDG9kOyUKixeLRNRrGEH6sg5L2PydE7ahQYE6rXKqRVr1hSlr-RuqRsmvWmgs4hTipr1Zv8XX6WMATYmjwGQSXQ-A7xZYwqMXHBXl_-CiS0ziY6D5BSlNUSn2MRRhs63OleKGqQF7Io0kNdKzNOwSYQg46ZlVp0WbFpxsvPaQTN260R9rA1HQcmsKzSSAZCZNE6VUmvwB40li7lhnSpaMosSd3Xd3_ju1hCxQ3QhPx47NS-q2tSEa3CjoLN6rXZU5JeOcxdn6NRzS9D7rWDnUyP5tyU3JI8b-9DuG8FZDvu-X2q08peu_s_ENngHZg80qZ-_MyBtT7XpnOcLrFGazn42BED6-1HK_dcuGwjonp7cy15riLHYF8qhlC0wPp.q8_noRtJ6t_316HuDNhX_L1nthBRXflWU8doozjzUoA&dib_tag=se&keywords=6%27%2Bgarden%2Bhose%2B3%2F4%22&qid=1742767943&sprefix=6%27%2Bgarden%2Bhose%2Bextension%2B3%2F4%2B%2Caps%2C225&sr=8-2&th=1)</td><td style="height: 46.6px;">  
</td></tr><tr><td style="height: 35.4px;">1</td><td style="height: 35.4px;">3/4" Garden Hose Y-Splitter With Valves</td><td style="height: 35.4px;">[Amazon](https://www.amazon.com/SANTONG-Splitter-Shut-Off-Rotation-Connectors/dp/B0D5CQM8MH?ref_=ast_sto_dp)</td><td style="height: 35.4px;">  
</td></tr><tr><td style="height: 35.4px;">2</td><td style="height: 35.4px;">3/4" Garden Hose Three way splitter With Valves</td><td style="height: 35.4px;">[Amazon](https://www.amazon.com/Splitter-Shut-Off-Connectors-Silicone-Washers/dp/B0CT29XMK3?crid=3L8CLO1HLB1JG&dib=eyJ2IjoiMSJ9.YmJBV6j2Y3hzQvNLRyuVDsuEIJFmTrzn2sJRSNBLiWPtdlP4tGyCgucSgFB8r0pxoxSpGpO8Gn9DeXJX0p0KvYyuOXQaeyigjQEiFOPo2Dc3vpobQ27ZDLEHk5fV8DGnGtKHyvxZnTJGd7VMRsaz9CT00JDuX8YgzTpWgGuHGJATRb1JEt_NwGyxQliv7zjuWVk0FNGA7sVfCa4_Jb1_RcJCVAlsdkmcLRqQdesl16d0_MMFZ_TTOeR6yjVo_k6dRuOW1PI0l9vUqhE5jwxh9EPKgm5mje1n2vo5TLTtuRCqGO2yx0y9w2fQDv7nSCzX3gW-rxERuNJcz4Dcs08ENICATcKhvOhJIDA6FilyAGvqtB2VhrRzWvU-7acXPQmxbo_0INzWmltR91GmAuuFBcid5-zzZ1EWjFTgjlCP9RrCp1fxz9UstRG9c2Rs1yf0.3LNrQu6vTYyKRzOQAEuY1kNphTHBGkfge1Vn1DK9cPQ&dib_tag=se&keywords=3%2F4%22+Garden+Hose+Splitter+With+Valves+three+way&qid=1742769198&sprefix=3%2F4+garden+hose+splitter+with+valves+three+way%2Caps%2C98&sr=8-6)</td><td style="height: 35.4px;">  
</td></tr><tr><td style="height: 35.4px;">2</td><td style="height: 35.4px;">3/4" Garden Hose, 50'</td><td style="height: 35.4px;">[Amazon](https://www.amazon.com/Flexzilla-Garden-Heavy-Lightweight-Drinking/dp/B0787HSB4Q?crid=2TGVKOVEJZ0A0&dib=eyJ2IjoiMSJ9.DBCJ9QDXa2gz5AGGTLSKkTpqXj9PbPnsibHQ0UFMI3zdDENwC7dz38G3pTz28KcAiDulZ_iZs5FVODB5gWJPb06dm7cHC0HDGakkVbZY-FaP7k9KVejeipYAcdSjab8XdhfXICIOkmgWzwiOHiR-Z_u82mNxJ2nVfIhHXd0wM2P2ae9HBGYiiGTRX6kAqjgJT0yjuk8x19cqb0bHe9KSC3dIsrlOts7bAQgAw4m_o1ZdFyZVwPB77mwJ7CXG1CHiMLkiT52WdCjpeap2y63m4c0CKdfwElv9UHJjAs2FzSmG_Uq-vSTzxV7Jaxi31JALnfoi5MV_jfWehqaAPh9-mAtW3ZBFBGnEBBUTc5B7SC8VK4JAR3MPX28gnDz_lAbQHIvtqJYA2O6xnme46nrRHHlVemYFsfTElXZPQRd_dU1KBP8HA1USNRi6PgsRXLUo.ht4NDRBSb4anwYH4D4edBv4oHg4bm-43yGKfdP3hI1Q&dib_tag=se&keywords=3%2F4%22%2BGarden%2BHose%2B50%27&qid=1742769472&sprefix=3%2F4%2Bgarden%2Bhose%2B50%27%2Caps%2C148&sr=8-6&ufe=app_do%3Aamzn1.fos.9fe8cbfa-bf43-43d1-a707-3f4e65a4b666&th=1)</td><td style="height: 35.4px;">  
</td></tr><tr><td style="height: 74.6px;">2</td><td style="height: 74.6px;">2" Camlock to 2" Male NPT Adapter</td><td style="height: 74.6px;">[The Cary Company](https://www.thecarycompany.com/2-inch-ss-female-camlock-to-2-inch-male-npt-adapter)  
or  
[Amazon (two included)](https://www.amazon.com/Quafwia-Aluminum-fittings-fitting-camlock/dp/B0919TDSFV?crid=3V485C5QPNYHE&dib=eyJ2IjoiMSJ9.XuJR_Zekc-BiDopiV9ofo6TbRVZS6-vNEUGv6kx9HfRlceQTQCZYkELEoFW8X99uS1yMdVXMeltSXSgnl_6jbfJ0fjB6uIup8lV417Yt09tdvBrWo_kYqMy32JD3kAp0pjoiZUQghMRLdT9UNEBPDUWiQpTDgjr01HevumkRy8LjoRR-4aS9YwfRH-pzg04amhmqjcfQBD2y5Az4CYbY7dZs2VzlhdyefaKjEri-7uU.X4oidAPyla0xtarcm20eCJ6EoQMv_wO8rvEgbICC4TI&dib_tag=se&keywords=2%22%2BCamlock%2Bto%2B2%22%2BMale%2BNPT%2BAdapter&qid=1742769642&sprefix=2%2Bcamlock%2Bto%2B2%2Bmale%2Bnpt%2Badapter%2Caps%2C160&sr=8-3&th=1)</td><td style="height: 74.6px;">  
</td></tr><tr><td style="height: 35.4px;">2</td><td style="height: 35.4px;">2" Female NPT to 1" Female NPT Reducer</td><td style="height: 35.4px;">[Amazon](https://www.amazon.com/Megairon-Reducing-Coupling-Stainless-Threaded/dp/B071YYP1QL?crid=34C7NRVW19D60&dib=eyJ2IjoiMSJ9.vFTfFOUu0AbymeoX38-sd4ccQBMdkUGAFcnGebJyf1m3OpuXdGvHDoe-jdl0Yj9NmhAPNyenyIDVsVyq9sLvwm0nUciPZdXcSKK0cJcBJqUaqPfXiqjCUzTjKhnYo0O24LJKsEzJmSlxJCiAYD_VvAgcGc3rJTuMouN9cz4TX-UXKb8dpnNKG5DFi8wdHeyobnIGx4urwz1T1dYlPLJ7yjS5RvQQZECufdYM8UtDVhHvompdw5nw4MLMJjb_ProbrwKqFR9bSVFahkQ9pAZP5VoeQIwRyZZAnz4jwESLHec8jyPQ_KMtuSoH1eUQY9Fpvsk-G22cKVYFnJD0A6tMXFuBioTjFkOOASosU31lTek.RNUuuomrae3HLTGmj6xpMk3HWLhOE9nRP9n_NJil2Zg&dib_tag=se&keywords=NPT%2Breducer%2B2%2Bto%2B1&qid=1742770045&s=hi&sprefix=npt%2Breducer%2B2%2Bto%2B1%2Ctools%2C86&sr=1-6&th=1)</td><td style="height: 35.4px;">  
</td></tr><tr><td style="height: 35.4px;">10'</td><td style="height: 35.4px;">1" PEX-B - White</td><td style="height: 35.4px;">[Home Depot](https://www.homedepot.com/p/Apollo-1-in-x-10-ft-White-PEX-B-Pipe-APPW101/301541234)</td><td style="height: 35.4px;">  
</td></tr><tr><td style="height: 35.4px;">2'</td><td style="height: 35.4px;">3/4" PEX-B - White</td><td style="height: 35.4px;">[Home Depot](https://www.homedepot.com/p/Apollo-3-4-in-x-2-ft-White-PEX-B-Pipe-APPW234/301541201)</td><td style="height: 35.4px;">  
</td></tr><tr><td style="height: 29.8px;">2</td><td style="height: 29.8px;">3/4" Sharkbite to 3/4" Male NPT</td><td style="height: 29.8px;">Sharkbite U134LF  
</td><td style="height: 29.8px;">  
</td></tr><tr><td style="height: 29.8px;">2</td><td style="height: 29.8px;">3/4" Female NPT to 3/4" Male Garden Hose</td><td style="height: 29.8px;">[Amazon](https://www.amazon.com/GRIDTECH-Connector-Heavy-Duty-High-Pressure-Corrosion/dp/B0B8XSV6H6?dib=eyJ2IjoiMSJ9.fge6n9GB3oZBa1U0Y-Zp2PubnNrpShF0cAltV9MgmFxRKJ1FNKkBkmtEI7BZDvgV068CsG9_dJCfLAh0nEj6-xAc-GZQhQmo9E3gUNarEpghccjSh7ZjQY4UgJq54G9oyu9nPKKpPqL0euEscTXIxEWXRnMDS4TFFvRGArai-cqj7YR8XOTe2I4Yw1u63ehq899Y1mJKVos-ITc0oFwEZThU7MC4EwGAPJylRTy-YQMa2dNX4QVNomedHfjCoIKvNTpK4rVgjgPG5_3HPvUguzEwDILpKYS27FnG4NSvZ2mG-nAllSpuGM-vWxplxYOjp9e3bQIdhCbS3O1OIrjK4DLZ69xRZFr9VGoMFATWRskWuH_kuDEkVD_qdqUnOrc7N3xF2hyGmqcfMaGcxABt7W5PwGr-YlImN0SEPhxjSevYy9kcPtNEJHY69V61Yrdb.PoXapKe7wReW5vDyzsYgKyZcP9wFQvE_JFs4tlZoz18&dib_tag=se&keywords=3%2F4%22%2BFemale%2BNPT%2Bto%2B3%2F4%22%2BMale%2BGarden%2BHose&qid=1742774001&sr=8-2&th=1)</td><td style="height: 46.6px;">  
</td></tr><tr><td style="height: 46.6px;">2</td><td style="height: 46.6px;">Garden hose shutoff valve  
3/4" male to 3/4" female</td><td style="height: 46.6px;">[Amazon](https://www.amazon.com/YELUN-Valve-Garden-Nozzle-Connections/dp/B08GHXBYMF)</td><td style="height: 29.8px;">  
</td></tr><tr><td style="height: 46.6px;">1 set</td><td style="height: 46.6px;">Garden Hose Couplers (M-M and F-F)</td><td style="height: 46.6px;">[Amazon](https://www.amazon.com/MINGLE-Garden-Adapter-Connector-Washers/dp/B07MP5BS9X?crid=2E189OJEFRNMQ&dib=eyJ2IjoiMSJ9.LIUsS0BZkKmW2Q2s2nki_TcxV4GvWe_TWGcYPQtMiy7xSnZu2SOsp0nfZ0ZqNzolqTbtcEcpc_IZm72q1svuUjV2VekKnO_Kvd0EvrWt70k1DORH8pLGh2WLA0EFO0ng8f8PfMBZaqXcMmHZPernme02b9xt7BaIPDSl_MxsIQvlR1AlrAnETn7XFYqJPpQDHJf1Zp2_TeGKgIdghVwNBq2FJrR_Y7PglXGtKzh8tx8SUl3QnXAyi_-dLdFcKDOpb4VR2jzlUKAgCEPP533KnqSr9nrALWCQgnSjcKHJ1A1yJE97mJf_I5oZX9Uc_95KNwwD5x7xH0dFl1qPdevc1L6JBpm-mOVcasrEPstPovuI_khp7t-dZ2cH569RdvfcUaiZtbmYoF67b6EO_23SvDQvqp3LCC6bU-3QiBG37zYM1HiEFOtIQAt93auXcVLu.ynmQNfAXETG6mcJN3ARBEfXONPWrgLPAoOpWWM9Mq4g&dib_tag=se&keywords=3%2F4%22%2Bgarden%2Bhose%2Bcoupler&qid=1742774124&sprefix=3%2F4%2Bgarden%2Bhose%2Bcoupler%2Caps%2C120&sr=8-5&th=1)</td><td style="height: 29.8px;">  
</td></tr><tr><td>1</td><td>3/4" Plywood  
24" x 48" panels</td><td>Home Depot in Reno</td><td>They sell precut 24x48 pieces (or buy 4'x8' pieces and cut in four)

Consider buying an extra 14 to replace crappy shelves in Empire Fort

</td></tr><tr><td>20</td><td>Wood-to-metal self-driving screws  
\#10 diameter  
1 1/2"  
  
</td><td>Home Depot in Reno  
([link](https://www.homedepot.com/p/Teks-10-x-1-7-16-in-Philips-Flat-Head-Self-Tapping-with-Wings-Screws-100-Pack-21380/100160285))</td><td>We might have them in the tool fort

</td></tr><tr><td>1</td><td>Teflon Tape</td><td>Home Depot</td><td></td></tr><tr><td>1</td><td>Tru-Blu Pipe Thread Sealant with PTFE  
</td><td>Home Depot</td><td></td></tr><tr><td>1</td><td>PEX-B cutter</td><td>  
</td><td>I might already have this in the LED Lab

</td></tr><tr><td>1</td><td>2" Ratcheting PVC cutter</td><td>[Home Depot](https://www.homedepot.com/p/Husky-2-in-Ratcheting-PVC-Cutter-16PL0805/304217599)</td><td></td></tr><tr><td>1</td><td>Assortment of wood screws</td><td>[Amazon](https://www.amazon.com/Stainless-Phillips-Assortment-Fasteners-Tapping/dp/B0C34CTV8L?crid=283MTGAZQ0HOI&dib=eyJ2IjoiMSJ9.mwmU8QvdAYVoNtPv5mU1R7AuylPp9DFPTbtabYRNIdoydA9sy8wHEIq__3KC6i-zKH9AuFR9h_J4RmJKDU-zx7zL61vhrtyfYudOcONZm5jDix2SA-m71vsfz7qufy_Yze77Z8aOf3A5CGz8eLnyWmNzohwegteD_vL8VzZW2Jg_l7RvmdT43dnvIMh_5cpN92TNEkNBviWD3BBcwlyiGJrDw-YTS1QErebMsqukfz4.c1xYM9mxXRUze4uhjYDG8WYOtfJW3Rbkjh8akboZGBQ&dib_tag=se&keywords=assortment%2Bwood%2Bscrews&qid=1742917283&sprefix=assortment%2Bwood%2Bscrew%2Caps%2C169&sr=8-15&th=1)</td><td></td></tr><tr><td>1</td><td>Storage packout on wheels for all plumbing parts and tools</td><td>Home Depot  
Milwaukee Packout</td><td>probably best to buy this at Home Depot in person</td></tr></tbody></table>

# Gayflower Leak Prevention

If one of the black or grey water tanks leaks, it pretty much goes straight onto the playa. There was a small leak in 2024 mostly caught in a bucket. This page is mostly a thought experiment in how we could solve this by constructing a bathtub out of a pond liner.

#### The idea

We install a "bathtub" around the entire grey/black water tank area to serve as secondary containment. This could be made out of a 45mil EPDM Pond Liner which seems like it would be bulletproof. There is also something called RPE which is even stronger.

The pond liner would be folded in the corners as follows:

[![IMG_2258.jpg](https://wiki.futureturtles.com/uploads/images/gallery/2025-03/scaled-1680-/ZOEaNt9fwatKzmXA-img-2258.jpg)](https://wiki.futureturtles.com/uploads/images/gallery/2025-03/ZOEaNt9fwatKzmXA-img-2258.jpg)

It is probably enough for the sides of the liner to be 8" - 12" to create a large basin that could handle a serious spill.

At the front of the truck, the corner folds would be permanently glued together with EPDM pond liner adhesive.

At the rear of the truck, we would construct a low gate (like on the back of a pickup truck), hinged at the bottom, out of wood, with very heavy duty latches holding it up. The gate would be connected to the pond liner. It would remain up/closed during the week to seal the bathtub and provide protection. It could also be lowered off-playa to drain the tanks using the hoses provided. In the event of a an emergency spill, we would pump the grey water out of the bathtub before attempting to open the hinged door.

#### Remaining Questions

I don't know how easy it would be to retrofit this, since there is a subfloor above the tanks. Here are some questions to study:

1. How hard is it to work in that crawlspace?
2. How is the subfloor above supported? Is it supported entirely from the sides, or are there columns coming down in the middle which would interfere with layout out a pond liner? 
    1. If there are columns of some sort, can they be removed temporarily so that the pond liner, with some protection, can be slipped underneath.
    2. Otherwise would we be able to do two separate pond liners, for left and right sides of the truck?
3. What are the exact dimensions of everything?
4. While we're working on this, could we reinforce the subfloor in back which holds the fresh water tanks?

#### 2025 Shortcut

For 2025, knowing that there is already a little bit of a black liner on the floor (as seen in this picture), we could probably improve the situation a lot by just extending the liner in the very rear to create that flap in the back. This can be done without taking out the tanks and relining everything. It would probably be sufficient to prevent leaks like this year's small leak, although it would not be that helpful in case of a more significant failure.

[![293282660_342874988052329_720694618782060161_n.jpg](https://wiki.futureturtles.com/uploads/images/gallery/2025-03/scaled-1680-/t0OFwhWJBbrnKDXz-293282660-342874988052329-720694618782060161-n.jpg)](https://wiki.futureturtles.com/uploads/images/gallery/2025-03/t0OFwhWJBbrnKDXz-293282660-342874988052329-720694618782060161-n.jpg)

How we might do this:

1. Get a 2x10 board (at least the length that the interior is wide, probably 101"). Maybe this is 2 pieces of 1" plywood glued together? Cut it to size in Empire.
2. Get a bunch of hinges so it can open and close
3. Get some latches for the sides and middle to hold it closed
4. Get a big sheet of super thick EPDM, say, 15' x 3'. Glue it to the existing liner and then run it up the side of the wood board.

There is not that much space for the new door behind the rearmost tanks. It might have to be mounted in the steel frame of the truck doors.

# Storage and Logistics

# Year Round Storage

Future Turtles camp gear is stored in six places:

<table border="1" id="bkmrk-name-description-con" style="border-collapse: collapse; width: 93.2143%; height: 477.4px;"><colgroup><col style="width: 16.7519%;"></col><col style="width: 28.6445%;"></col><col style="width: 38.2425%;"></col><col style="width: 16.2332%;"></col></colgroup><thead><tr style="height: 29.8px;"><td style="height: 29.8px;">Name  
</td><td style="height: 29.8px;">Description  
</td><td style="height: 29.8px;">Contents  
</td><td class="align-center" style="height: 29.8px;">Location\*  
</td></tr></thead><tbody><tr style="height: 97px;"><td style="height: 97px;">Tool Fort **FT2**</td><td style="height: 97px;">20' Shipping Container  
</td><td style="height: 97px;">Tools  
Utility lighting (everything but DJ lights)  
Electrical (spider boxes and large cables)

Plumbing  
Supplies (consumables)

</td><td class="align-center" style="height: 97px;">A  
</td></tr><tr style="height: 63.4px;"><td style="height: 63.4px;">Bike Fort **FT1**</td><td style="height: 63.4px;">20' Shipping Container  
</td><td style="height: 63.4px;">Bikes and bike tools  
Container deck guard posts and wire rails  
Turtle Pavillion Center Mast</td><td class="align-center" style="height: 63.4px;">A  
</td></tr><tr><td>Habitat **FT3**</td><td>20' Shipping Container</td><td><span style="color: rgb(186, 55, 42);">**New for 2026!**</span>

EMT and all EMT parts for shade construction

Shiftpods

Cots, hammocks, and camp furniture

Fans

</td><td class="align-center">A</td></tr><tr><td>Interactivity **FT4**</td><td>20' Shipping Container</td><td><span style="color: rgb(186, 55, 42);">**New for 2026!**</span>

Cafe tables, chairs, wee lights

Metro shelving

Yoga / HIIT

TP backup supply

Shower

Whiteboard

Folding tables and benches

Burn barrel and wood

Camper cubbies

Neon turtle sign

Espresso machine

Whips

Sawhorses

Extension cords

Bar

Wicker chairs

</td><td class="align-center">A</td></tr><tr style="height: 113.8px;"><td style="height: 113.8px;">Pillow Fort  
</td><td style="height: 113.8px;">24' Bumper-pull Trailer  
</td><td style="height: 113.8px;">Rugs  
Audio gear  
DJ lighting  
Pillows

Interactivity equipment needing annual maintenance

</td><td class="align-center" style="height: 113.8px;">A  
</td></tr><tr style="height: 46.6px;"><td style="height: 46.6px;">Food Fort  
</td><td style="height: 46.6px;">24' Bumper-pull Trailer with commercial kitchen  
</td><td style="height: 46.6px;">Cooking equipment  
</td><td class="align-center" style="height: 46.6px;">B  
</td></tr><tr style="height: 63.4px;"><td style="height: 63.4px;">Empire Fort  
</td><td style="height: 63.4px;">25' Pup Trailer (high deck, like a mini-semi trailer)  
</td><td style="height: 63.4px;">**Retired for 2026**

Contains some old, abandoned tarps

</td><td class="align-center" style="height: 63.4px;">C  
</td></tr><tr style="height: 63.4px;"><td style="height: 63.4px;">Gayflower  
</td><td style="height: 63.4px;">53' semi trailer  
</td><td style="height: 63.4px;">**Retired for 2026**  
Water  
Grey Water, and Black Water tanks  
Showers and bathrooms  
Plumbing tools, supplies, and equipment  
</td><td class="align-center" style="height: 63.4px;">C  
</td></tr></tbody></table>

\*[Location Details](https://wiki.futureturtles.com/books/burning-man-infrastructure/page/vendors-and-financial "Vendors and Financial 🔒")

## Where is it?

This flowchart shows how we decide where to store most things.

The detailed [**Where Is It?**](https://docs.google.com/spreadsheets/d/1lk9rTBhz5S9zQsZBZfVBd9uLi5uOZ-PVDatuwNXotRY/edit?usp=sharing) spreadsheet helps you track down exact locations down to shelf and bin, especially of specific tools and items in the Tool Fort.

(The following flowchart was created by Canva)

[![Where Is It Flowchart.png](https://wiki.futureturtles.com/uploads/images/gallery/2025-07/scaled-1680-/5JQn6qCzQjwae6TV-where-is-it-flowchart.png)](https://wiki.futureturtles.com/uploads/images/gallery/2025-07/5JQn6qCzQjwae6TV-where-is-it-flowchart.png)

## Camp Supplies

What we call "supplies" are anything consumable that we stock up on before each burn to have on hand: things like batteries, towels, cleaning supplies, and so forth. This does **not** include anything used by the food team.

- Google Sheets: [Camp Supplies](https://docs.google.com/spreadsheets/d/1lk9rTBhz5S9zQsZBZfVBd9uLi5uOZ-PVDatuwNXotRY/edit?gid=824721407#gid=824721407)

# Turtle Truck

## Quick pick...

<table border="1" id="bkmrk-we-rent-a-truck-in-s" style="border-collapse: collapse; border-width: 0px; height: 131px; width: 100%;"><colgroup><col style="width: 15%;"></col><col style="width: 85%;"></col></colgroup><tbody><tr><td style="border-width: 0px; vertical-align: middle;">[![TruckLogo.png](https://wiki.futureturtles.com/uploads/images/gallery/2024-12/scaled-1680-/pwFFdesd5qAMGvgQ-trucklogo.png)](https://wiki.futureturtles.com/uploads/images/gallery/2024-12/pwFFdesd5qAMGvgQ-trucklogo.png)  
</td><td style="border-width: 0px; vertical-align: middle;">We rent a truck in San Francisco to make camp possible.

- It brings bulky camper stuff from San Francisco to and from playa, such as tents, bikes, and black-and-yellow bins. In 2024 we rented a 16' box truck which was not too full so we have not had to institute official limits on what you can and can't bring.
- It makes a stop in Reno for people getting on and off there.
- It takes out camp trash which includes build team trash and kitchen trash, but no camper trash (campers are responsible for their own moop).

</td></tr></tbody></table>

## Turtle Truck reservation form

To use the Turtle Freight service <span class="link-annotation-unknown-block-id-308862648">reserve your space using the form: [https://forms.gle/pCYA8FRLh4WReAbT9](https://forms.gle/pCYA8FRLh4WReAbT9) </span>

## Plan in advance!

#### MOOP, MOOP, MOOOOOOOP...

While we’re happy to transport your item, please make sure you think about the MOOP.

<p class="callout warning">Who is demooping your item prior to being loaded on the truck? Don’t bring unnecessary MOOP to playa!</p>


#### Loading the truck

The truck will leave from San Francisco, with a stop in Reno. Make sure you bring your items during the loading time.

<table border="1" id="bkmrk-in-san-francisco-in-" style="border-collapse: collapse; width: 100%;"><colgroup><col style="width: 50%;"></col><col style="width: 50%;"></col></colgroup><thead><tr><td>**In San Francisco**</td><td>**In Reno**</td></tr></thead><tbody><tr><td>- Bring your items at the loading location in San Francisco in the morning of the Friday before the event **- Preferred method**

- You can also ship your items to a SF Turtle in advance, and ask them nicely if they can take care of loading your items for you (please arrange with them prior shipping).

</td><td>- Bring your items at the loading location in Reno in the evening of the Friday before the event or in the morning of the Saturday before the event **- Preferred method**

- You can also ship your items to a locker in Reno and ask nicely a Turtle there if they can take care of loading your items for you (please arrange with them prior shipping).

*Tip: If you plan to be in Reno on Saturday before the event or earlier, join us while we load the truck!*

</td></tr></tbody></table>


#### Bring it home

Your items will surely love the hot breeze of Black Rock desert but they will definitely want to return to their forever home which, I can assure you, is not the Freight’s team garage!

<p class="callout danger">Have you thought about how you will return your items home (or dispose of them)?</p>

Please keep in mind that the truck will not be able to bypass the traffic of the Exodus, also we will arrive in Reno way after the Turtle Bus! We will also have to dispose of the garbage. Bottom line, if you plan to leave Reno or San Francisco right after you step outside of the bus, please make some arrangements with a local Turtle in advance to take care of your items.

## Typical schedule

Here's a typical schedule based on 2024:

**Before the event**

<table border="1" id="bkmrk-friday-saturday-earl" style="border-collapse: collapse; width: 100%;"><colgroup><col style="width: 50.0596%;"></col><col style="width: 50.0596%;"></col></colgroup><thead><tr><td>Friday</td><td>Saturday</td></tr></thead><tbody><tr><td>- **early morning** - Pick up truck from rental company
- **11:00 am** - Load truck in San Francisco
- **Afternoon** - Travel to Reno
- **Evening** - Start pre-loading in Reno

</td><td>- **Morning (up to Bus departure or truck fully loaded) -** Load in Reno (at GSR or wherever the Turtle Bus will be)
- **Afternoon -** Travel to Playa

</td></tr></tbody></table>

**After the event**

<table border="1" id="bkmrk-monday-after-temple-" style="border-collapse: collapse; width: 100%;"><colgroup><col style="width: 33.3731%;"></col><col style="width: 33.3731%;"></col><col style="width: 33.3731%;"></col></colgroup><thead><tr><td>Monday After Temple Burn</td><td>Tuesday after the event</td><td>Wednesday after the event</td></tr></thead><tbody><tr><td>- **Morning** - Load bus on Playa
- **3 pm -** Depart for Reno
- **Evening** - Arrive in Reno

</td><td>- **Morning** - 
    - Take trash to Reno transfer station
    - Take broken bikes to recycling

</td><td>- **Morning** - 
    - Drive to San Francisco
    - Unload freight in San Francisco (first chance for campers to pick up their stuff)
- **Afternoon** - 
    - Get truck washed
    - Return to rental agency
- **Evening** - campers can pick up their own stuff if they missed the first chance

</td></tr></tbody></table>


## Freight for camp items

If you need to bring equipment for the camp, contact the freight team (Alexandre Sartel, Jorge Ortiz, Alejandro Robles).


## Logistics for the Truck team

<details id="bkmrk-show-truck-rental-co"><summary>Show</summary>

#### Truck Rental Companies

These two companies are reliable and happy to rent to Burners. However they have limited availability so you have to make a reservation in March or April.

- [Hengehold Trucks ](https://www.htrucks.com/burningman.php)(Company selected for 2024)
- [Doherty's Truck &amp; Auto Rental](https://www.dohertytruck.com/)

#### Road guides (to be printed)

- Guide to safe pull-outs along CR447: [Here](https://docs.google.com/document/d/1naJ0n18N193T03hwenBpOrNRH-pSwYYnc4vyUtXAUj4/edit?tab=t.0)
- Trash and Recycling facilities: [Here](https://drive.google.com/file/d/1srBKE1n97TAp3TXDUvnpaz6UGwcwagCR/view?usp=sharing)
    - In 2024, we dumped the trashes at Sage Transfer station (1390 E. Commercial Row, Reno NV)

#### Templates

[Link](https://docs.google.com/spreadsheets/d/1w7KJ5-DHhotVutJfIQPsXJ-qI8S6H5pF/edit?usp=sharing&ouid=110927239838941821693&rtpof=true&sd=true) to Manifesto, Intake form, etc...

#### Financials

Rental 2024: Box Truck 15ft with Ramp

- 13 days, 800 miles (including CDW 200USD): 3626 USD
- Truck wash: 200 USD
- Gas: 250 USD
- Trash station: 180 USD

</details>

# Tool Fort

##   


[![IMG_3290.jpg](https://wiki.futureturtles.com/uploads/images/gallery/2025-03/ca7kvDfeVKi0AoeZ-img-3290.jpg)](https://wiki.futureturtles.com/uploads/images/gallery/2025-03/ca7kvDfeVKi0AoeZ-img-3290.jpg)

## Tool Fort Details

A 20-foot long shipping container.

- Stored during the year at Location A.
- Stores tools! Mostly things needed to build and strike the camp.
- Also camp supplies, easily accessible on shelves and in drawers
- Room in the back for shiftpods
- Electrical distribution equipment like 50amp cables and Spider Boxes
- **Accessible, on request, during the year for Reno Work Weekends**

[![tool_fort.webp](https://wiki.futureturtles.com/uploads/images/gallery/2025-03/scaled-1680-/92Q64aKKvF7FexqO-tool-fort.webp)](https://wiki.futureturtles.com/uploads/images/gallery/2025-03/92Q64aKKvF7FexqO-tool-fort.webp)

# Guide to LTL Shipping

## What Is LTL and Why Do I Need It?

LTL stands for **Less Than Truckload**. If you've only ever shipped with UPS or FedEx, think of LTL as the middle ground between parcel shipping and hiring an entire semi-truck. Your shipment shares trailer space with other shippers' freight, and you pay for the portion of the truck you use.

You typically need LTL when your shipment is too big or heavy for parcel carriers. The rough threshold is anything over about 150 pounds, larger than about 108 inches in length, or more than a few boxes. If you've got one or two pallets of product sitting in your garage, you're squarely in LTL territory.

The experience is very different from dropping a box at a UPS Store. A driver will come to your location with a truck, load your pallets (usually with a liftgate), and your freight will pass through one or more terminals before reaching the destination warehouse. The whole process takes anywhere from two to seven business days depending on distance.

---

## Step 1: Get Your Supplies

### Pallets

You need standard **GMA pallets** — these are 48" x 40", the universal size that carriers, warehouses, and forklifts are built around.

Avoid painted pallets (often proprietary to companies like CHEP or PECO and technically aren't yours to take) and any pallet that smells of chemicals.

Get **new** **4-way entry heat-treated (HT stamped) pallets** for heavy loads (Uline sells them in [five packs](https://www.uline.com/Product/Detail/H-1260/Pallets/Heat-Treated-Wood-GMA-Pallet-48-x-40))

### Wrapping and Securing Materials

- **Stretch wrap (pallet wrap):** This is non-negotiable. You need at least one roll of 18" or 20" wide, 80-gauge stretch film. Available at Home Depot, Lowe's, U-Haul, Walmart, or Amazon for about $15–$25 per roll. Get a roll with a built-in handle or buy a separate stretch wrap dispenser — wrapping by hand without one is miserable.
- **Packing tape and a tape gun:** Standard 2" or 3" clear or brown packing tape for sealing individual boxes. A tape gun costs about $10 and will save your sanity.
- **Ratchet straps** For heavy loads band/strap the load to the pallet with ratchet straps; at least 2-3 cross bands
- **Corner boards (edge protectors):** These are L-shaped cardboard or plastic strips that go on the corners of your pallet stack before wrapping. They prevent the stretch wrap from crushing your boxes at the edges and add structural rigidity. You can find them at U-Haul, packing supply stores, or Amazon. Around $1–$2 each; you need at least four.
- **Cardboard sheets or slip sheets:** Useful to place between layers of boxes on the pallet and on top as a cap. You can cut up large cardboard boxes for this.

### Optional But Helpful

- A box cutter or utility knife.
- A tape measure.
- A bathroom scale or luggage scale (you'll need an approximate weight).
- Shipping labels and a printer.
- "Do Not Stack" or "Fragile" stickers if your freight can't bear weight on top (available on Amazon for a few dollars).

---

## Step 2: Build Your Pallet Properly

This is the most important step. A badly built pallet can get damaged in transit, and if the carrier determines your packaging was inadequate, your freight claim will be denied. LTL freight gets handled by forklifts, moved through busy terminals, and stacked next to other freight. It is not treated gently.

### The Golden Rules

1. **Nothing should overhang the pallet edges.** Overhanging items get crushed by forklifts and other freight. If your boxes are slightly too big, use a larger pallet or rearrange.
2. **Stack in columns, with heavier boxes on the bottom.** Interlock layers like bricks if possible (alternate box orientation each layer) for stability.
3. **Fill gaps.** Empty space inside the stack leads to collapse. Use void fill (crumpled paper, air pillows, foam) inside boxes, and fill gaps between boxes on the pallet with cardboard or foam.
4. **Make it flat on top.** A flat top surface means other freight can safely be stacked on yours during transit (unless you pay for non-stackable, which costs more). If you absolutely cannot have anything placed on top, use a plywood cap and mark it clearly.
5. **Wrap it like your livelihood depends on it** — because it might.

### Step-by-Step Palletizing

1. Place the pallet on a flat surface in your garage.
2. Arrange your heaviest, sturdiest boxes in the first layer, covering as much of the pallet surface as possible.
3. Place a cardboard sheet on top of the first layer.
4. Stack the next layer, interlocking if you can. Continue until you've stacked everything. Try to stay under 48" in total height (pallet + boxes) if possible. Most carriers accept up to about 72"–84" total, but taller pallets cost more and are harder to manage.
5. Place corner boards on all four vertical edges, running from the pallet deck to the top of the stack.
6. Place a cardboard cap sheet on top of the stack.
7. Begin wrapping with stretch film at the base. **Anchor the film to the pallet itself** — wrap it around and through the pallet deck boards a few times so the load is locked to the pallet, not just sitting on it. This is the step most beginners skip, and it's the most important.
8. Work your way up to the top, overlapping each pass by about half the film width. Pull the film tight as you go — it should be taut, not loose.
9. Wrap back down to the base. Do at least 3–4 full passes. If the pallet feels wobbly or you can shift boxes by pushing, add more wrap.
10. Secure the film end by pressing it against itself.

You should be able to tilt the pallet slightly and have nothing shift. If you can push the top layer sideways, you haven't wrapped enough.

---

## Step 3: Measure and Weigh Your Shipment

Carriers price LTL based on several factors, and you'll need to provide accurate measurements when booking.

**What you need:**

- **Total weight** of each pallet, including the pallet itself (a standard wood pallet weighs about 35–45 lbs). If you don't have a floor scale, weigh yourself on a bathroom scale, then weigh yourself holding individual boxes. Add them up. Round up to the nearest 10 lbs.
- **Dimensions** of each pallet: length x width x height (including the pallet). Measure the widest, longest, and tallest points.
- **Number of pallets** (sometimes called "handling units").
- **Freight class** — this is a classification system (classes 50 through 500) that LTL carriers use to categorize freight. It's based on density, stowability, handling, and liability. Denser, easy-to-handle freight gets a lower class and costs less. For most general merchandise, you're probably looking at class 70–125.

### How to Determine Freight Class

The simplest method is to calculate your shipment's density:

> **Density = Weight (lbs) ÷ Cubic feet**
> 
> Cubic feet = (L × W × H in inches) ÷ 1,728

Then use this rough density-to-class mapping:

<table id="bkmrk-density-%28lbs%2Fft%C2%B3%29-fr"><thead><tr><th>Density (lbs/ft³)</th><th>Freight Class</th></tr></thead><tbody><tr><td>50+</td><td>50</td></tr><tr><td>35–50</td><td>55</td></tr><tr><td>30–35</td><td>60</td></tr><tr><td>22.5–30</td><td>65</td></tr><tr><td>15–22.5</td><td>70</td></tr><tr><td>13.5–15</td><td>77.5</td></tr><tr><td>12–13.5</td><td>85</td></tr><tr><td>10.5–12</td><td>92.5</td></tr><tr><td>9–10.5</td><td>100</td></tr><tr><td>8–9</td><td>110</td></tr><tr><td>7–8</td><td>125</td></tr><tr><td>6–7</td><td>150</td></tr><tr><td>5–6</td><td>175</td></tr><tr><td>4–5</td><td>200</td></tr><tr><td>3–4</td><td>250</td></tr><tr><td>2–3</td><td>300</td></tr><tr><td>1–2</td><td>400</td></tr><tr><td>&lt;1</td><td>500</td></tr></tbody></table>

If you're shipping dense items like hardware, canned goods, or electronics in retail packaging, you'll likely land around class 70–100. Lighter, bulkier items like pillows, lampshades, or unassembled furniture will be class 150 or higher.

**Get this right.** If you book at class 70 and the carrier inspects and reclassifies your freight to class 125, they will adjust the price upward — sometimes dramatically — and send you an additional invoice.

---

## Step 4: Get Quotes and Book the Shipment

### Freight Brokers and Marketplaces (Recommended for Beginners)

You don't need to call individual trucking companies. Freight broker platforms aggregate rates from multiple carriers and make the process much easier. These are the most beginner-friendly options:

- **Freightquote (by C.H. Robinson)** — freightquote.com — One of the most well-known. Enter your details, get instant quotes from multiple carriers, and book online. Very user-friendly.
- **FreightCenter** — freightcenter.com — Similar marketplace with good customer support.
- **GoShip** — goship.com — Stripped-down, self-service platform. Great for simple residential pickups.
- **uShip** — uship.com — Marketplace where carriers bid on your shipment. Can get competitive rates.
- **Freightos** — freightos.com — Another comparison tool.

### What You'll Need to Provide When Getting Quotes

- Pickup zip code (your home).
- Delivery zip code (the warehouse).
- Number of pallets.
- Weight per pallet.
- Dimensions per pallet.
- Freight class (some platforms will calculate this for you).
- **Pickup accessorials** — this is critical. You need to specify: 
    - **Residential pickup:** Your home isn't a commercial location, so carriers charge extra. Expect $50–$150 added to the rate.
    - **Liftgate at pickup:** Unless you have a loading dock (you don't — you have a garage), the driver needs a hydraulic liftgate to lower from the truck bed to ground level so you can roll or carry the pallet on. This typically adds $50–$100.
    - **Limited access:** Some carriers lump residential and limited access together; some charge separately.
- **Delivery accessorials:** If the destination is a commercial warehouse with a dock, you likely don't need a liftgate or any special services at delivery. Confirm with the receiving warehouse.

### What It Costs

LTL pricing varies wildly based on distance, freight class, weight, and current market conditions. That said, for one or two pallets of general merchandise shipping across a few states, here are rough ballpark ranges (as of recent years):

<table id="bkmrk-scenario-estimated-c"><thead><tr><th>Scenario</th><th>Estimated Cost</th></tr></thead><tbody><tr><td>1 pallet, 300 lbs, class 100, 500 miles</td><td>$150–$350</td></tr><tr><td>1 pallet, 500 lbs, class 70, 500 miles</td><td>$150–$300</td></tr><tr><td>2 pallets, 1,000 lbs total, class 85, 1,000 miles</td><td>$350–$700</td></tr><tr><td>Cross-country (2,500+ miles), 2 pallets</td><td>$500–$1,200+</td></tr></tbody></table>

Add $100–$250 on top for residential pickup + liftgate. These are estimates — always get actual quotes.

---

## Step 5: Prepare the Bill of Lading (BOL)

The Bill of Lading is the single most important document in freight shipping. It's a legal contract between you (the shipper), the carrier, and the receiver. Most broker platforms will generate one for you when you book, but you should understand what's on it.

A BOL includes:

- **Shipper name and address** (you).
- **Consignee name and address** (the warehouse).
- **Description of freight:** What are you shipping? Be specific but not excessively detailed. "Consumer electronics in boxes" or "Assorted household goods" is fine. "Stuff" is not.
- **Number of handling units** (pallets).
- **Weight.**
- **Freight class.**
- **Special instructions** — note if the freight is fragile, needs to stay upright, or cannot be stacked.
- **PO number or reference number** — the receiving warehouse may require you to include a specific PO number or delivery reference. Ask them before booking.

**Print at least three copies.** The driver will take one, you keep one, and you should have a spare. When the driver picks up, both of you will sign the BOL. Check the pallet count and note any pre-existing damage before signing. If there's any issue with the freight at that point, write it on the BOL.

---

## Step 6: The Pickup — What to Expect

Here's what pickup day looks like:

1. **Timing:** Carriers will give you a pickup window, usually a range like 12:00–5:00 PM. It is not Amazon — they will not give you a precise time. You need to be home and available for that entire window. If you need a tighter window (called an "appointment"), you can request it, but it usually costs extra.
2. **Location:** Have your pallets staged in the garage or driveway, as close to where the truck will park as possible. The driver is not going to navigate through your house.
3. **The truck:** A large box truck or sometimes a smaller straight truck will arrive. The driver will lower the liftgate.
4. **Loading:** In most cases, the driver will bring a pallet jack and roll the pallet onto the liftgate. However, you should confirm at booking whether pickup includes "driver assist" or if you're responsible for getting the freight to the truck. For residential pickups, drivers generally help, but don't assume — clarify when booking.
5. **Paperwork:** The driver will present the BOL. Review it, make sure the pallet count and details are correct, note any existing damage, and sign. Keep your copy.
6. **The driver leaves.** Your freight is on its way.

### After Pickup

Your freight will travel to the carrier's local terminal, where it's sorted and consolidated with other freight heading the same direction. It may pass through one or more intermediate terminals (called "cross-docking"). Each transfer is a point where damage can occur, which is why good palletizing is so important.

Most brokers and carriers provide a tracking number or PRO number. Tracking updates in LTL are not as detailed as UPS tracking — you'll typically see "picked up," "in transit," "at terminal," and "out for delivery."

Transit time depends on distance. Generally expect two to five business days for regional shipments and four to seven for cross-country.

---

## Step 7: Delivery and Receiving

Coordinate with the receiving warehouse. Most commercial warehouses require a delivery appointment — the carrier will call the warehouse to schedule one. Make sure the warehouse knows to expect your freight and has any reference numbers they need.

If there's visible damage at delivery, the warehouse should note it on the delivery receipt before signing. This is critical for filing a claim later.

---

## Key Differences from Parcel Shipping (UPS, FedEx)

<table id="bkmrk-parcel-ltl-drop-off-"><thead><tr><th>Parcel</th><th>LTL</th></tr></thead><tbody><tr><td>Drop off or schedule a pickup for boxes</td><td>Driver comes with a truck and loads pallets</td></tr><tr><td>Detailed tracking updates throughout the day</td><td>Basic milestone tracking</td></tr><tr><td>Delivery in 1–5 days, very reliable</td><td>2–7 days, somewhat less precise</td></tr><tr><td>Insurance/claims straightforward</td><td>Claims process is more complex and slower</td></tr><tr><td>Simple pricing by weight and zone</td><td>Pricing by class, weight, distance, and accessorials</td></tr><tr><td>Damage is relatively rare</td><td>Damage is more common — packaging quality matters enormously</td></tr><tr><td>No special paperwork needed</td><td>Requires a Bill of Lading</td></tr><tr><td>Price: $10–$100+ per box</td><td>Price: $150–$1,200+ per shipment</td></tr></tbody></table>

---

## Common Mistakes to Avoid

**Underestimating weight or misclassifying freight.** Carriers routinely weigh and re-measure freight at terminals. If your actual shipment doesn't match what you booked, you'll get a reweigh or reclass invoice — which is always more expensive than if you'd booked correctly.

**Not specifying residential pickup or liftgate.** If you book a standard commercial pickup and the driver shows up at a house with no dock, the shipment may be refused or you'll get hit with surprise accessorial charges.

**Wrapping the pallet poorly.** A pallet that falls apart in transit is your problem, not the carrier's. They will deny damage claims for insufficiently packaged freight.

**Not confirming delivery requirements with the warehouse.** Many warehouses require appointment scheduling, specific labeling, or PO numbers on the BOL. If your freight shows up without the right information, the warehouse may refuse it, and you'll pay for redelivery or storage.

**Skipping insurance or declared value.** Basic carrier liability for LTL freight is very low — often $0.10 to $0.25 per pound. That means if your 300 lb pallet of electronics worth $5,000 is destroyed, the carrier's default liability is only $30–$75. If your freight is valuable, either purchase additional freight insurance through the broker or through a third-party provider like Shipsurance or Falvey. It typically costs 1–3% of the declared value.

**Not inspecting at delivery.** Once the delivery receipt is signed "clear" (no damage noted), your ability to file a claim drops dramatically. Always inspect — or make sure the receiving warehouse inspects — before signing.

---

## Quick Checklist

- \[ \] Obtain pallets (48" x 40" standard GMA)
- \[ \] Get stretch wrap, tape, corner boards
- \[ \] Pack individual boxes tightly with void fill
- \[ \] Build the pallet: heavy on bottom, no overhang, interlock layers
- \[ \] Wrap the pallet thoroughly, anchoring film to the pallet base
- \[ \] Measure and weigh each pallet
- \[ \] Calculate freight class from density
- \[ \] Get quotes from a freight broker platform
- \[ \] Specify residential pickup and liftgate
- \[ \] Confirm delivery requirements with the warehouse (appointments, PO numbers)
- \[ \] Consider freight insurance for valuable goods
- \[ \] Print BOL (3 copies)
- \[ \] Stage pallets in garage/driveway on pickup day
- \[ \] Be available for the entire pickup window
- \[ \] Inspect and sign BOL at pickup, noting any issues
- \[ \] Track the shipment and coordinate delivery with the warehouse
- \[ \] Confirm the warehouse inspects freight and notes any damage at delivery

# 2026 Dispositions

Some of the things we have and where they should go in 2026.

**Philosophical Changes:**

- Things are stored based on where they are deployed on playa
- **Totes with lids** should only be used for things where you use everything in the tote at the same time, for example, when it's a bunch of gear that is associated with setting up one thing during build and you completely empty it.
- When you have a bunch of random parts and you might just need one on playa, for example, extension cords, use **milk crates** or **tool chest drawers** because it is much easier to grab one item and take it out when you don't have to deal with the tote lid.

**Big Observations:**

- Shiftpods move from Tool Fort to Habitat
- Need a place for big bulky stuff from Empire Fort that is NOT habitat. Maybe back of Tool Fort 
    - tables
    - camper cubbies
    - ladders
    - trash cans
- A lot of the stuff in TOTES in the tool fort is a pain to get out and should be sorted better into drawers or something. The biggest problem is the tote lid. Moving these into milk crates would probably solve the problem.

<table border="1" id="bkmrk-thing-size-dispositi" style="border-collapse: collapse; width: 100%; height: 1162.8px;"><colgroup><col style="width: 25%;"></col><col style="width: 25%;"></col><col style="width: 25%;"></col><col style="width: 25%;"></col></colgroup><thead><tr style="height: 46.6px;"><td style="height: 46.6px;">thing</td><td style="height: 46.6px;">size</td><td style="height: 46.6px;">disposition. - means **NOT** going to playa</td><td style="height: 46.6px;">notes</td></tr></thead><tbody><tr style="height: 29.8px;"><td style="height: 29.8px;">"spare antenna parts"</td><td style="height: 29.8px;">small cardboard box</td><td style="height: 29.8px;">-</td><td style="height: 29.8px;">  
</td></tr><tr style="height: 29.8px;"><td style="height: 29.8px;">H2O light</td><td style="height: 29.8px;">clear tote</td><td style="height: 29.8px;">-</td><td style="height: 29.8px;">  
</td></tr><tr style="height: 29.8px;"><td style="height: 29.8px;">super anchors</td><td style="height: 29.8px;">clear tote</td><td style="height: 29.8px;">-</td><td style="height: 29.8px;">associated with tower</td></tr><tr style="height: 29.8px;"><td style="height: 29.8px;">tower</td><td style="height: 29.8px;">giant tall 25' antenna tower</td><td style="height: 29.8px;">-</td><td style="height: 29.8px;">  
</td></tr><tr style="height: 29.8px;"><td style="height: 29.8px;">"antenna spares"</td><td style="height: 29.8px;">clear tote</td><td style="height: 29.8px;">-</td><td style="height: 29.8px;">  
</td></tr><tr style="height: 29.8px;"><td style="height: 29.8px;">generator (honda)</td><td style="height: 29.8px;">generator sized</td><td style="height: 29.8px;">-</td><td style="height: 29.8px;">hasn't been used in a while</td></tr><tr style="height: 46.6px;"><td style="height: 46.6px;">generator maintenance</td><td style="height: 46.6px;">RYOBI low flat tool box</td><td style="height: 46.6px;">tool fort</td><td style="height: 46.6px;">has some useful stuff like fuel pump, brushes, oils</td></tr><tr style="height: 46.6px;"><td style="height: 46.6px;">dead battery starter</td><td style="height: 46.6px;">breadbox size thing</td><td style="height: 46.6px;">tool fort</td><td style="height: 46.6px;">could be useful if we remembered we own it</td></tr><tr style="height: 29.8px;"><td style="height: 29.8px;">makito impact wrench</td><td style="height: 29.8px;">low profile tool box</td><td style="height: 29.8px;">tool fort</td><td style="height: 29.8px;">  
</td></tr><tr style="height: 29.8px;"><td style="height: 29.8px;">extra power supplies</td><td style="height: 29.8px;">black ammo box</td><td style="height: 29.8px;">-</td><td style="height: 29.8px;">leftover from antenna 2022</td></tr><tr style="height: 29.8px;"><td style="height: 29.8px;">polaroid cameras</td><td style="height: 29.8px;">clear tote</td><td style="height: 29.8px;">-</td><td style="height: 29.8px;">  
</td></tr><tr style="height: 29.8px;"><td style="height: 29.8px;">globe lights</td><td style="height: 29.8px;">clear tote</td><td style="height: 29.8px;">-</td><td style="height: 29.8px;">didn't really work</td></tr><tr style="height: 29.8px;"><td style="height: 29.8px;">fairy lights</td><td style="height: 29.8px;">clear tote</td><td style="height: 29.8px;">tool fort "supplies"</td><td style="height: 29.8px;">  
</td></tr><tr style="height: 29.8px;"><td style="height: 29.8px;">yurt lights (gobos)</td><td style="height: 29.8px;">clear tote</td><td style="height: 29.8px;">tool fort</td><td style="height: 29.8px;">  
</td></tr><tr style="height: 29.8px;"><td style="height: 29.8px;">shiftpods!</td><td style="height: 29.8px;">25 giant bags</td><td style="height: 29.8px;">habitat</td><td style="height: 29.8px;">  
</td></tr><tr style="height: 29.8px;"><td style="height: 29.8px;">2024 antenna parts</td><td style="height: 29.8px;">black and red tote</td><td style="height: 29.8px;">-</td><td style="height: 29.8px;">  
</td></tr><tr style="height: 29.8px;"><td style="height: 29.8px;">2024 turtle whips </td><td style="height: 29.8px;">black and red tote</td><td style="height: 29.8px;">tool fort</td><td style="height: 29.8px;">  
</td></tr><tr style="height: 113.8px;"><td style="height: 113.8px;">plumbing tools</td><td style="height: 113.8px;">milwaukee tool box</td><td style="height: 113.8px;">tool fort</td><td style="height: 113.8px;">move from gayflower  
we need more tool boxes, honestly, and that bottom storage thing on the milwaukee is a pain to get into</td></tr><tr style="height: 46.6px;"><td style="height: 46.6px;">Large and klunky tools</td><td style="height: 46.6px;">Oversize tote at ground level</td><td style="height: 46.6px;">tool fort - ideally move to new tool drawers</td><td style="height: 46.6px;"> </td></tr><tr style="height: 29.8px;"><td style="height: 29.8px;">Metro Shelving Parts</td><td style="height: 29.8px;">clear tote</td><td style="height: 29.8px;">Tool fort</td><td style="height: 29.8px;">  
</td></tr><tr style="height: 80.2px;"><td style="height: 80.2px;">A lot of lighting</td><td style="height: 80.2px;">several large totes</td><td style="height: 80.2px;">habitat

pillow fort

</td><td style="height: 80.2px;">sort according to where it goes in camp. Assorted extra lighting can go in tool fort but must be sorted into drawers</td></tr><tr style="height: 29.8px;"><td style="height: 29.8px;">USB bluetooth box</td><td style="height: 29.8px;">small box</td><td style="height: 29.8px;">Tool fort - move to drawers

</td><td style="height: 29.8px;">  
</td></tr><tr style="height: 29.8px;"><td style="height: 29.8px;">First Aid</td><td style="height: 29.8px;">  
</td><td style="height: 29.8px;"></td><td style="height: 29.8px;">update</td></tr><tr style="height: 29.8px;"><td style="height: 29.8px;">Cleaning supplies</td><td style="height: 29.8px;">3 totes</td><td style="height: 29.8px;">Tool fort - move to milk crate

</td><td style="height: 29.8px;">  
</td></tr><tr style="height: 29.8px;"><td style="height: 29.8px;">Towels</td><td style="height: 29.8px;">tote</td><td style="height: 29.8px;">Tool fort - move to milk crate

</td><td style="height: 29.8px;">  
</td></tr><tr style="height: 29.8px;"><td style="height: 29.8px;">Wet wipes</td><td style="height: 29.8px;">tote</td><td style="height: 29.8px;">-

</td><td style="height: 29.8px;">  
</td></tr><tr style="height: 63.4px;"><td style="height: 63.4px;">Elec distro connectors (50a+)</td><td style="height: 63.4px;">tote</td><td style="height: 63.4px;">Tool fort

</td><td style="height: 63.4px;">this is only used once at set up time so it can stay in a tote</td></tr><tr style="height: 63.4px;"><td style="height: 63.4px;">Elec parts (120v)</td><td style="height: 63.4px;">tote</td><td style="height: 63.4px;">Tool fort - move to drawers

</td><td style="height: 63.4px;">Things like switches for 120v. A lot of things like dusk switches never get used.</td></tr><tr style="height: 29.8px;"><td style="height: 29.8px;">Generator Spill Kit</td><td style="height: 29.8px;">Home Depot Bucket</td><td style="height: 29.8px;">Tool fort

</td><td style="height: 29.8px;">  
</td></tr><tr><td>Tool Chargers</td><td>milk crate</td><td>Tool fort

</td><td>  
</td></tr><tr><td>Gloves</td><td>tote</td><td>Tool fort - move to milk crate

</td><td>  
</td></tr><tr><td>Comfort (goggles, knee pads, etc)</td><td>milk crate</td><td>Tool fort

</td><td>  
</td></tr><tr><td>Sockit Boxes</td><td>tote</td><td>Tool fort - move to 2 milk crates

</td><td>  
</td></tr><tr><td>Power tools</td><td>tote</td><td>move to milk crate

</td><td>  
</td></tr><tr><td>RV macerating pump</td><td>own case</td><td>-

</td><td>sus</td></tr><tr><td>2 antennas (44')</td><td>golf bags</td><td>-

</td><td>  
</td></tr><tr><td>25' tower</td><td>huge</td><td>-

</td><td>not using it this year</td></tr><tr><td>Whips</td><td>2 ski bags</td><td>Tool fort

</td><td>  
</td></tr><tr><td>Brian's Minibar</td><td>huge</td><td>-

</td><td>  
</td></tr><tr><td>O.G. minibar</td><td>big 'n' klunky</td><td>Tool fort

</td><td>we seem to use this every year</td></tr><tr><td>New shiny bar</td><td>big 'n' klunky</td><td>Pillow fort (interactivity right?)

</td><td>  
</td></tr><tr><td>Trash bags</td><td>milk crate</td><td>tool fort

</td><td>  
</td></tr><tr><td>Shiftpod spare parts</td><td>milk crate</td><td>tool fort

</td><td>  
</td></tr><tr><td>Toilet paper</td><td>  
</td><td>tool fort

</td><td>  
</td></tr><tr><td>Fire extinguishers</td><td>  
</td><td>1 to empire fort  
1 to tool fort

1 to pillow fort

</td><td>  
</td></tr></tbody></table>

# The Food Fort

The glory of towing a commercial-quality kitchen into Burning Man

# Food Fort Pictures

**Grill, Stove and Oven, Air Conditioner, Handwashing Sink, Dishwashing Sinks, Microwave, Counter space / undercounter freezer, Ice Maker**

[May 26 Progress Pictures](https://photos.google.com/share/AF1QipMdQQGzbTN3KMeWHEIW3rOFZskju-Ht6YZWYhJIkPfZu_HCsUZPwiU1VtR_zVr2aA?key=MzVCSkF6QkFGdzFwdmxUX0xnd0gtOVo2VW5UZldB)

[June 6 Progress Pictures](https://photos.app.goo.gl/tP39Q2sFwumT5YAU8)

[Final Ship Out Exterior Pictures](https://photos.app.goo.gl/yJGc1ZmkKVLnHr5k9)

[June 12 Inspection Pictures](https://photos.app.goo.gl/xkaEPUsECzVr7EY37)

[Audio + Transcription of Propane System Walkthrough](https://otter.ai/u/TK1yLZw8cwH5XTCL8pLgxBAogyg?utm_source=copy_url)

[Audio + Transcription of Water System Walkthrough](https://otter.ai/u/lgdOiUcU3DJZeQMOyOookhQ2TNc?utm_source=copy_url)

[![IMG_1697.jpg](https://wiki.futureturtles.com/uploads/images/gallery/2024-09/scaled-1680-/PWrW6uDn6IWcz7g8-img-1697.jpg)](https://wiki.futureturtles.com/uploads/images/gallery/2024-09/PWrW6uDn6IWcz7g8-img-1697.jpg)

**Looking towards the back and the large walk-in refrigerator:**

[![IMG_1695.jpg](https://wiki.futureturtles.com/uploads/images/gallery/2024-09/scaled-1680-/FMFwugnKoVS5gjJS-img-1695.jpg)](https://wiki.futureturtles.com/uploads/images/gallery/2024-09/FMFwugnKoVS5gjJS-img-1695.jpg)

**Inside the Walk-In Refrigerator:**

[![IMG_1701.jpg](https://wiki.futureturtles.com/uploads/images/gallery/2024-09/scaled-1680-/NPvKVhPfB1KTsSNA-img-1701.jpg)](https://wiki.futureturtles.com/uploads/images/gallery/2024-09/NPvKVhPfB1KTsSNA-img-1701.jpg)

**Propane Tanks and Power Inlet:**

[![24753971-4320-4BDA-B450-20C151FE0100.jpg](https://wiki.futureturtles.com/uploads/images/gallery/2024-09/scaled-1680-/24753971-4320-4bda-b450-20c151fe0100.jpg)](https://wiki.futureturtles.com/uploads/images/gallery/2024-09/24753971-4320-4bda-b450-20c151fe0100.jpg)

# Technical Details

The Food Fort was built by Concession Nation in Florida and delivered on June 14th, 2023.

[![Floor Plan.png](https://wiki.futureturtles.com/uploads/images/gallery/2024-09/scaled-1680-/OfIDvrAxD93B78jl-floor-plan.png)](https://wiki.futureturtles.com/uploads/images/gallery/2024-09/OfIDvrAxD93B78jl-floor-plan.png)

## Equipment Schedule

This file has a lot of details including model numbers for most of the equipment installed in the trailer:

[Concession Nation Estimate.pdf](https://wiki.futureturtles.com/attachments/8)

### Ice Maker ([<span class="link-annotation-unknown-block-id--1675431659" style="border-bottom: 0.05em solid; border-color: rgba(55,53,47,.4); opacity: 0.7;">Blueair BLUI-250A</span>](https://www.blueairinc.com/product-detail?table=p_ice_undercounter&mod_id=2))

- [Service Manual](https://wiki.futureturtles.com/attachments/9)
- [Spec Sheet](https://wiki.futureturtles.com/attachments/10)
- [User Manual](https://wiki.futureturtles.com/attachments/11)

### Range / Oven ([<span class="link-annotation-unknown-block-id-1504332806" style="border-bottom: 0.05em solid; border-color: rgba(55,53,47,.4); opacity: 0.7;">Imperial IR-6-C</span>](https://www.katom.com/406-IR6CLP.html))

- [User Manual](https://wiki.futureturtles.com/attachments/12)
- [Spec Sheet](https://wiki.futureturtles.com/attachments/13)

### Freezer ([<span class="link-annotation-unknown-block-id-2134176475" style="border-bottom: 0.05em solid; border-color: rgba(55,53,47,.4); opacity: 0.7;">TurboAir MUF-60-N Undercounter</span>](https://www.ckitchen.com/p/turbo-air-muf-60-n-m3-series-undercounter-freezer.html))

- [Manual](https://wiki.futureturtles.com/attachments/14)
- Uses R-290 Refrigerant

## Trailer Specifications

- Gross Vehicle Weight Rating (GVWR): 14,000 lbs
- Tongue Weight: 1,700 lbs
- Total Trailer Weight (including Tongue Weight): 10,080 lbs
- Height: over 12’
- 7' Interior Height
- We need a heavy duty pickup truck, like a Ford 350, to tow this

## Over-the-road Generator

We use an external generator so that we can fill up the refrigerator and freezer in Reno and tow everything into Burning Man. There used to be one mounted on the tongue but this was not a good design. Currently we ratchet a portable generator down in the bed of the rental pickup truck that we use to tow the trailer. This needs to be a pretty heavy duty generator (like a 9000 watts or more) with 30 amp 207/240 output to power the condenser for the refrigerator.

# Reno Repair Resources & Repair History

Need something repaired in the food truck? We've found these services in Reno who can come out to the yard and fix things.

## Moving the Damn Thing

The trailer is a **24'** **bumper pull.** Owing to its weight, it needs to be hauled by a 1-ton truck (i.e. a truck with 2,000 lbs towing capacity - Ford F350, Ram 3500, etc). But in a pinch you can get away with a 3/4-ton truck (e.g. F-250).

Here are folks who can move it:

##### Adventure Assist Recovery / Mikel Tirado

- (cell/txt) 415-470-0308
- <adventureassistrecovery2025@gmail.com>

##### Matt

- (cell/txt) 702-551-1717

##### ?

- (cell/txt) 408-840-1845
- Quoted $350

[![image.png](https://wiki.futureturtles.com/uploads/images/gallery/2025-08/scaled-1680-/jEONvY4uRgJLI3hv-image.png)](https://wiki.futureturtles.com/uploads/images/gallery/2025-08/jEONvY4uRgJLI3hv-image.png)

[![Screenshot 2025-08-17 at 9.51.03 PM.jpeg](https://wiki.futureturtles.com/uploads/images/gallery/2025-08/scaled-1680-/AhHDhc4rFsZLOCN2-screenshot-2025-08-17-at-9-51-03-pm.jpeg)](https://wiki.futureturtles.com/uploads/images/gallery/2025-08/AhHDhc4rFsZLOCN2-screenshot-2025-08-17-at-9-51-03-pm.jpeg)

## Major Trailer Repairs

(775) 358-6390  
[Washoe Metal](https://www.washoemetal.net/) (Jason)  
<order@washoemetal.net>

Referred by Fixxer for raising the ground clearance

## Minor / Cosmetic Repairs

Paramount RV

[https://paramountautobody.com/](https://paramountautobody.com/)

bill@paramountrv.com

## Refrigerator / Freezer Repair

### Hilltop Refrigeration

[https://hilltoprefrigeration.com/northern-nevada](https://hilltoprefrigeration.com/northern-nevada)

RenoOffice@Hilltop.Pro  
They do both HVAC and refrigeration and do not give you any BS about food trucks. The only catch is you need to schedule 2 weeks out before they book up.

### Burney’s Commercial Service

(775) 355-9111  
[https://www.burneyscommercial.com/](https://www.burneyscommercial.com/)  
<sparks@burneyscommercial.com>

We do not have an account with them, but other burners use them. Will go to the yard, but kinda annoying. Will readily charge overtime.

### Cool Breeze Environmental

[https://www.coolbreezenv.com/](https://www.coolbreezenv.com/)  
775-535-7192  
We have an account with them. Will go to the yard. Reasonably priced. USED IN 2024 TO REPAIR FREEZER, but as of 2025 no longer service food trucks (the real answer is, it depends on whoever the service manager is at the time)

### Hi-Tech Commercial

[https://www.hitechnv.com/](https://www.hitechnv.com/)  
(702) 649-4616  
(877) 924-4832

Specialize in commercial kitchen appliance repair  
We have an account with them. But they are somewhat expensive compared.

### Buffo’s

[https://buffos-refrigeration.com/commercial-refrigeration-repair-reno/](https://buffos-refrigeration.com/commercial-refrigeration-repair-reno/)  
775-782-8204  
We have not used them, listing as a backup

## AC Repair

### M+S Heating and Air

[https://ms-ac.com/](https://ms-ac.com/)

(775) 843-7930  
Recommended by Brian Konash of NYC Deli  
Importantly, they will come to us!

[Full details here](https://mailchi.mp/6500f359ca4b/maintenance-plan-for-past-ms-heating-air-customers-12704838?e=1a441dce89).

## Manuals for Major Appliances / Equipment Aboard the Food Fort

\[[Blueair BLUI-250A](https://www.blueairinc.com/product-detail?table=p_ice_undercounter&mod_id=2) Spec Sheet \]([https://s3-us-west-2.amazonaws.com/secure.notion-static.com/bfe936a0-27b9-4a6d-8089-e8344058e348/BLUI-250A\_opt.pdf](https://s3-us-west-2.amazonaws.com/secure.notion-static.com/bfe936a0-27b9-4a6d-8089-e8344058e348/BLUI-250A_opt.pdf))

[Blueair BLUI-250A User Manual.pdf](https://s3-us-west-2.amazonaws.com/secure.notion-static.com/d2e40c0a-09d1-4cbd-94e1-1e5701153c0a/220627_User_Manual_BLUI_with_3rd_generation_evaporator.pdf)


#### Ice Maker - [Blueair BLUI-250A](https://www.blueairinc.com/product-detail?table=p_ice_undercounter&mod_id=2)

\[[Blueair BLUI-250A](https://www.blueairinc.com/product-detail?table=p_ice_undercounter&mod_id=2) Spec Sheet \]([https://s3-us-west-2.amazonaws.com/secure.notion-static.com/bfe936a0-27b9-4a6d-8089-e8344058e348/BLUI-250A\_opt.pdf](https://s3-us-west-2.amazonaws.com/secure.notion-static.com/bfe936a0-27b9-4a6d-8089-e8344058e348/BLUI-250A_opt.pdf))

[Blueair BLUI-250A User Manual.pdf](https://s3-us-west-2.amazonaws.com/secure.notion-static.com/d2e40c0a-09d1-4cbd-94e1-1e5701153c0a/220627_User_Manual_BLUI_with_3rd_generation_evaporator.pdf)

#### Range/Oven - [Imperial IR-6-C](https://www.katom.com/406-IR6CLP.html)

[ImperialRange\_IR36\_RestaurantRange36Inch\_SpecSheet\_1.pdf](https://s3-us-west-2.amazonaws.com/secure.notion-static.com/21ddc15c-471b-451b-abb9-ae7d248fdfb9/ImperialRange_IR36_RestaurantRange36Inch_SpecSheet_1.pdf)

[ImperialRange\_IRSeries\_IRRangesManual\_Manual\_1.pdf](https://s3-us-west-2.amazonaws.com/secure.notion-static.com/aab745b0-1535-4791-8a89-c74c0a47e6fd/ImperialRange_IRSeries_IRRangesManual_Manual_1.pdf)

#### Generator - [DuroMax XP15000EH](https://www.duromaxpower.com/products/duromax-xp15000eh-15000-watt-v-twin-electric-start-dual-fuel-hybrid-portable-generator)

[XP15000eh\_manual.pdf](https://s3-us-west-2.amazonaws.com/secure.notion-static.com/554e41ab-8704-40cc-9337-46ebfd352f3e/XP15000eh_manual.pdf)

#### Freezer - [TurboAir MUF-60-N Undercounter Freezer](https://www.ckitchen.com/p/turbo-air-muf-60-n-m3-series-undercounter-freezer.html)

[MUR\_MUF\_HC.pdf](https://prod-files-secure.s3.us-west-2.amazonaws.com/da1b91cf-bc4e-4180-a8a2-b4317ebe89da/3e512c78-14f9-41b8-8c4b-32772002e794/MUR_MUF_HC.pdf)

Uses R-290 refrigerant

## Repair History

#### 2023 Freezer Problem

Hi-Tech Commercial serviced it but we had to drag it to them. It sucked.

There was a leak in the refrigeration line. “found leak on high side process port. Repaired and pressurized unit to 200Psi, unit is holding. Vacuumed unit and added 2.5 Oz of R290”

[Inv\_WO184473\_from\_Intiam\_Inc\_dba\_Hi\_Tech\_Commercial\_Service\_9624.pdf](https://wiki.futureturtles.com/attachments/27)

#### 2024 Freezer Problem

"Replaced Schrader cores in both service ports to ensure proper seal. Pulled vacuum and recharged system with R290."

[Invoice #107302.pdf](https://wiki.futureturtles.com/attachments/28)

#### 2025 Freezer Problem

Low on refrigerant, but tech could not find leaks.

[Hilltop Refrigeration, Inc. Invoice #41156.pdf](https://wiki.futureturtles.com/attachments/40)

# Winterization Process

1. Blow out lines
2. Disconnect all lines
3. Empty all tanks - both of the two freshwater and greywater tanks
4. (Future) Do something about ice maker?

# Camp Bikes

Our camp owns a collection of excellent beach cruisers for getting around playa.

# Biking in Black Rock City

## Why biking in BRC?

<table border="1" id="bkmrk-a-bike-is-almost-ess" style="border-collapse: collapse; width: 100%; border-width: 0px;"><colgroup><col style="width: 15%;"></col><col style="width: 85%;"></col></colgroup><tbody><tr><td style="border-width: 0px;">[![BikeLogo.png](https://wiki.futureturtles.com/uploads/images/gallery/2024-12/scaled-1680-/or4xGUDj2OqrZqae-bikelogo.png)](https://wiki.futureturtles.com/uploads/images/gallery/2024-12/or4xGUDj2OqrZqae-bikelogo.png)</td><td style="border-width: 0px;">A bike is almost essential at Burning Man because the event takes place in the Black Rock Desert, a vast and sprawling space covering several square miles.

- Black Rock City is massive, and walking everywhere would take a lot of time and energy (inside the trash fence is 6.149 square miles)
- Art installations, theme camps, and events are scattered all over the Playa.
- The desert terrain is flat but soft and dusty. Walking long distances in the dry and alkaline environment can be tiring and uncomfortable.
- Many activities happen after dark. A bike equipped with lights or decorations helps you navigate the Playa safely and ensures others can see you in the dark.
- Biking is a big part of the Burning Man experience. Most attendees use bikes as their primary mode of transport, so it helps you fit into the flow of the event.

</td></tr></tbody></table>

<p class="callout danger">Without a bike, you'll likely feel limited in how much you can explore and participate. It’s one of the best tools for making the most out of the Burning Man experience!</p>

## The Turtle Bikes

The camp owns a fleet of about 50 [<span class="link-annotation-unknown-block-id--1654772782">Priority Beach Cruisers</span>](https://www.prioritybicycles.com/products/thecoast) which are ideal for playa condition. You can rent one if you camp with us.

[![BikeGreen.jpg](https://wiki.futureturtles.com/uploads/images/gallery/2024-12/scaled-1680-/a6OfSUs4zJOVCymv-bikegreen.jpg)](https://wiki.futureturtles.com/uploads/images/gallery/2024-12/a6OfSUs4zJOVCymv-bikegreen.jpg)[![BikeWhite.jpg](https://wiki.futureturtles.com/uploads/images/gallery/2024-12/scaled-1680-/NB0DMMN7HvHLUkrA-bikewhite.jpg)](https://wiki.futureturtles.com/uploads/images/gallery/2024-12/NB0DMMN7HvHLUkrA-bikewhite.jpg)[![BikeBlue.jpg](https://wiki.futureturtles.com/uploads/images/gallery/2024-12/scaled-1680-/qeD3n6o3ATRYmFw7-bikeblue.jpg)](https://wiki.futureturtles.com/uploads/images/gallery/2024-12/qeD3n6o3ATRYmFw7-bikeblue.jpg)

- Our bikes are 3 speed step-through models.
- We provide a basket, lock, and minimum safety lights
- Rear forks are also available if you have a totem
- You should provide decorations, fancy lights, seat cushions, whatever you want to pimp your bike.
- As a courtesy to the next camper please return your bike un-decorated and de-festooned at the end of the burn

<p class="callout warning">Please! Don't lose / break your bike! Although if the universe is against you, we'll unfortunately have to charge you the cost to replace it.</p>

## BYOB(ike)

If you would like to bring your own bike that is fine too.

And if you bring your own bike and would like us to store it for the next year, we can do that at a charge of $75

<p class="callout info">Due to fire risk we **cannot store or transport batteries** of e-bikes under any circumstances. However if you remove the battery we can store the e-bike with the rest of our bikes.</p>

The Burning Man organization is rethinking their policy on e-bikes, so you’re on your own there

- In 2023 only Class-1 (pedal assist) E-bikes are permitted, and they are limited to 5mph, which is even slower than regular bikes.

## Tips for using a bike at Burning Man:

- Decorate your bike to make it unique and easy to spot.
- Use lights and reflective materials to stay visible at night (no! people can't see you).
- Bring a lock to prevent accidental "borrowing" (bike theft isn't common but mix-ups happen).
- Protect your bike from the Playa dust with maintenance and a cover when not in use.

[![bikes.jpg](https://wiki.futureturtles.com/uploads/images/gallery/2024-12/scaled-1680-/Nq3ozjQZI9dSooxV-bikes.jpg)](https://wiki.futureturtles.com/uploads/images/gallery/2024-12/Nq3ozjQZI9dSooxV-bikes.jpg)

*Where is my back? - every burner ever*

*[![bikes arival.png](https://wiki.futureturtles.com/uploads/images/gallery/2024-12/scaled-1680-/cOtAF6fSp5FevfpD-bikes-arival.png)](https://wiki.futureturtles.com/uploads/images/gallery/2024-12/cOtAF6fSp5FevfpD-bikes-arival.png)[![bike assembly.jpg](https://wiki.futureturtles.com/uploads/images/gallery/2024-12/scaled-1680-/6Ysh6TRW0GeJigwK-bike-assembly.jpg)](https://wiki.futureturtles.com/uploads/images/gallery/2024-12/6Ysh6TRW0GeJigwK-bike-assembly.jpg)*

*The Turtle Bikes being assembled*

# Bike tutorials

## Video tutorials

#### End-to-end assembly instructions

<iframe allow="accelerometer; autoplay; clipboard-write; encrypted-media; gyroscope; picture-in-picture; web-share" allowfullscreen="allowfullscreen" frameborder="0" height="315" src="https://www.youtube.com/embed/9s92J_Dygyo?si=zitcgSqjXLUgDnCu" title="YouTube video player" width="560"></iframe>

#### Front basket

<iframe allow="accelerometer; autoplay; clipboard-write; encrypted-media; gyroscope; picture-in-picture; web-share" allowfullscreen="allowfullscreen" frameborder="0" height="315" src="https://www.youtube.com/embed/heW-leuV_ak?si=yww2uuJm5bvEjZFq" title="YouTube video player" width="560"></iframe>

#### Rear rack

<iframe allow="accelerometer; autoplay; clipboard-write; encrypted-media; gyroscope; picture-in-picture; web-share" allowfullscreen="allowfullscreen" frameborder="0" height="315" src="https://www.youtube.com/embed/FVs5tR738fM?si=HrlGa9gSL1oRnvtW" title="YouTube video player" width="560"></iframe>

## Printable tutorials

How to:

- adjust your seat (height and alignment) - [here](https://drive.google.com/file/d/1AaZhmYU5HaLTRO058aWOux4BJQgAZYFf/view?usp=sharing)
- inflate your tires - [here](https://drive.google.com/file/d/1Umr5bx47OCirdwKrTnbzPBCQwNnxBe7W/view?usp=sharing)
- adjust your handlebar 
    - height and alignment - [here](https://drive.google.com/file/d/1MGB5xZiZau5tXKbn9cgy4JUAxks9oYkj/view?usp=sharing)
    - angle - [here](https://drive.google.com/file/d/12CDuEI3qf7YvJeheYYGuaV6ZaDRVyprM/view?usp=sharing)
- adjust your brakes - [here](https://drive.google.com/file/d/1E7M9cdg_x6IFcG8GD2pIaXwDCi5C_wi4/view?usp=sharing)
- switch your bike during the event - [here](https://drive.google.com/file/d/1w_SYMfUwHyINqRcSyYqAghD04kcMHA1_/view?usp=sharing)

# Turtle Fleet management

<p class="callout info">This page is targeted to the Bike team, for inventory and fleet management purpose.</p>

## Fleet Inventory

[![BikeGreen.jpg](https://wiki.futureturtles.com/uploads/images/gallery/2024-12/scaled-1680-/a6OfSUs4zJOVCymv-bikegreen.jpg)](https://wiki.futureturtles.com/uploads/images/gallery/2024-12/a6OfSUs4zJOVCymv-bikegreen.jpg)![BikeWhite.jpg](https://wiki.futureturtles.com/uploads/images/gallery/2024-12/scaled-1680-/NB0DMMN7HvHLUkrA-bikewhite.jpg)[![BikeBlue.jpg](https://wiki.futureturtles.com/uploads/images/gallery/2024-12/scaled-1680-/qeD3n6o3ATRYmFw7-bikeblue.jpg)](https://wiki.futureturtles.com/uploads/images/gallery/2024-12/qeD3n6o3ATRYmFw7-bikeblue.jpg)

<table border="1" id="bkmrk-fleet-id-bike-name-s" style="border-collapse: collapse; width: 112.143%; height: 2340.5px;"><colgroup><col style="width: 8.93921%;"></col><col style="width: 18.8319%;"></col><col style="width: 14.0644%;"></col><col style="width: 10.3695%;"></col><col style="width: 10.0119%;"></col><col style="width: 23.3611%;"></col><col style="width: 14.4219%;"></col></colgroup><thead><tr style="height: 29.7969px;"><td style="height: 29.7969px;">**Fleet ID**</td><td style="height: 29.7969px;">**Bike name**</td><td style="height: 29.7969px;">**Serial**</td><td style="height: 29.7969px;">**Purchase**</td><td style="height: 29.7969px;">**Status**</td><td style="height: 29.7969px;">**Riders**</td><td style="height: 29.7969px;">**Bike fort place**</td></tr></thead><tbody><tr style="height: 29.7969px;"><td colspan="7" style="background-color: rgb(236, 240, 241); height: 29.7969px;">**White bikes**</td></tr><tr style="height: 46.5938px;"><td class="xl66" height="25" style="height: 46.5938px; width: 68pt;" width="91">WHT-01</td><td class="xl65" height="21" style="height: 46.5938px; width: 121pt;" width="161">Shell on Wheels</td><td height="21" style="height: 46.5938px; width: 65pt;" width="87">PTCR22H0175</td><td style="height: 46.5938px;">2023</td><td style="height: 46.5938px;">  
</td><td class="xl67" height="25" style="height: 46.5938px; width: 73.5pt;" width="196">2023: Zander

2024: Animus

</td><td style="width: 73.5pt; height: 46.5938px;">1T</td></tr><tr style="height: 46.5938px;"><td class="xl65" height="25" style="height: 46.5938px; border-top: none;">WHT-02</td><td class="xl65" height="21" style="height: 46.5938px;">Turtleneck Express</td><td height="21" style="height: 46.5938px;">PTCR22H0320</td><td style="height: 46.5938px;">2023</td><td style="height: 46.5938px;">  
</td><td class="xl65" height="25" style="height: 46.5938px; border-top: none;">2023: Ammon

2024: Ammon

</td><td style="border-top: none; height: 46.5938px;">1T</td></tr><tr style="height: 46.5938px;"><td class="xl65" height="25" style="height: 46.5938px; border-top: none;">WHT-03</td><td class="xl65" height="21" style="height: 46.5938px;">Burnished Turtle</td><td height="21" style="height: 46.5938px;">PTCR22H0384</td><td style="height: 46.5938px;">2023</td><td style="height: 46.5938px;">  
</td><td class="xl66" height="25" style="height: 46.5938px; border-top: none;">2023: Yoni

2024: -

</td><td style="border-top: none; height: 46.5938px;">1T</td></tr><tr style="height: 29.7969px;"><td style="border-top: none; height: 29.7969px;">WHT-04</td><td style="height: 29.7969px;">Snap Trek</td><td height="21" style="height: 29.7969px;">PTCR22H0506</td><td style="height: 29.7969px;">2023</td><td style="height: 29.7969px;">Lost 2023</td><td style="height: 29.7969px;">2023: Scott</td><td style="height: 29.7969px;">-</td></tr><tr style="height: 29.7969px;"><td class="xl65" height="25" style="height: 29.7969px; border-top: none;">WHT-05</td><td class="xl65" height="21" style="height: 29.7969px;">Playa Snapper</td><td height="21" style="height: 29.7969px;">PTCR22H0521</td><td style="height: 29.7969px;">2023</td><td style="height: 29.7969px;">  
</td><td class="xl67" height="25" style="height: 29.7969px; width: 73.5pt;" width="196">-</td><td style="width: 73.5pt; height: 29.7969px;">3T</td></tr><tr style="height: 46.5938px;"><td class="xl65" height="25" style="height: 46.5938px; border-top: none;">WHT-06</td><td class="xl65" height="21" style="height: 46.5938px;">Pedal Shell-stial</td><td height="21" style="height: 46.5938px;">PTCR22H0535</td><td style="height: 46.5938px;">2023</td><td style="height: 46.5938px;">  
</td><td class="xl66" height="25" style="height: 46.5938px; border-top: none;">2023: Basil

2024: Andrew

</td><td style="border-top: none; height: 46.5938px;">2T</td></tr><tr style="height: 29.7969px;"><td class="xl65" height="25" style="height: 29.7969px; border-top: none;">WHT-07</td><td class="xl65" height="21" style="height: 29.7969px;">Slow Burn</td><td height="21" style="height: 29.7969px;">PTCR22H0541</td><td style="height: 29.7969px;">2023</td><td style="height: 29.7969px;">  
</td><td class="xl67" height="25" style="height: 29.7969px; border-top: none;">-</td><td style="border-top: none; height: 29.7969px;">3T</td></tr><tr style="height: 29.7969px;"><td class="xl65" height="25" style="height: 29.7969px; border-top: none;">WHT-08</td><td class="xl65" height="21" style="height: 29.7969px;">Dusty Hatchling</td><td height="21" style="height: 29.7969px;">PTCR22H1205</td><td style="height: 29.7969px;">2023</td><td style="height: 29.7969px;">  
</td><td class="xl67" height="25" style="height: 29.7969px; border-top: none;">-</td><td style="border-top: none; height: 29.7969px;">3T</td></tr><tr style="height: 46.5938px;"><td class="xl65" height="25" style="height: 46.5938px; border-top: none;">WHT-09</td><td class="xl65" height="21" style="height: 46.5938px;">Shellibrant</td><td height="21" style="height: 46.5938px;">PTCR22H1225</td><td style="height: 46.5938px;">2023</td><td style="height: 46.5938px;">  
</td><td class="xl66" height="25" style="height: 46.5938px; border-top: none;">2023: Daniel

2024: Dimitri

</td><td style="border-top: none; height: 46.5938px;">2B</td></tr><tr style="height: 46.5938px;"><td class="xl65" height="25" style="height: 46.5938px; border-top: none;">WHT-10</td><td class="xl65" height="21" style="height: 46.5938px;">Tortoise the Playa</td><td height="21" style="height: 46.5938px;">PTCR22H1230</td><td style="height: 46.5938px;">2023</td><td style="height: 46.5938px;">  
</td><td class="xl67" height="25" style="height: 46.5938px; border-top: none;">2023: -

2024: AlexW

</td><td style="border-top: none; height: 46.5938px;">2B</td></tr><tr style="height: 46.5938px;"><td class="xl65" height="25" style="height: 46.5938px; border-top: none;">WHT-11</td><td class="xl65" height="21" style="height: 46.5938px;">Fire Snap</td><td height="21" style="height: 46.5938px;">PTCR22H1277</td><td style="height: 46.5938px;">2023</td><td style="height: 46.5938px;">  
</td><td class="xl66" height="25" style="height: 46.5938px; border-top: none;">2023: Beam

2024: -

</td><td style="border-top: none; height: 46.5938px;">1T</td></tr><tr style="height: 29.7969px;"><td class="xl65" height="25" style="height: 29.7969px; border-top: none;">WHT-12</td><td class="xl65" height="21" style="height: 29.7969px;">Terrapinned Down</td><td height="21" style="height: 29.7969px;">PTCR22H1344</td><td style="height: 29.7969px;">2023</td><td style="height: 29.7969px;">  
</td><td class="xl67" height="25" style="height: 29.7969px; border-top: none;">-</td><td style="border-top: none; height: 29.7969px;">3T</td></tr><tr style="height: 46.5938px;"><td class="xl65" height="25" style="height: 46.5938px; border-top: none;">WHT-13</td><td class="xl65" height="21" style="height: 46.5938px;">ShellShock’d</td><td height="21" style="height: 46.5938px;">PTCR22H1374</td><td style="height: 46.5938px;">2023</td><td style="height: 46.5938px;">  
</td><td class="xl66" height="25" style="height: 46.5938px; border-top: none;">2023: Andre

2024: Tristan

</td><td style="border-top: none; height: 46.5938px;">2T</td></tr><tr style="height: 46.5938px;"><td class="xl65" height="25" style="height: 46.5938px; border-top: none;">WHT-14</td><td class="xl65" height="21" style="height: 46.5938px;">Turt-Lit Up</td><td height="21" style="height: 46.5938px;">PTCR22H1381</td><td style="height: 46.5938px;">2023</td><td style="height: 46.5938px;">  
</td><td class="xl65" height="25" style="height: 46.5938px; border-top: none;">2023: Jihoon

2024: Kyle

</td><td style="border-top: none; height: 46.5938px;">3B</td></tr><tr style="height: 29.7969px;"><td class="xl65" height="25" style="height: 29.7969px; border-top: none;">WHT-15</td><td class="xl65" height="21" style="height: 29.7969px;">Snappy Burner</td><td height="21" style="height: 29.7969px;">PTCR22H1440</td><td style="height: 29.7969px;">2023</td><td style="height: 29.7969px;">  
</td><td class="xl67" height="25" style="height: 29.7969px; border-top: none;">-</td><td style="border-top: none; height: 29.7969px;">3T</td></tr><tr style="height: 46.5938px;"><td class="xl65" height="25" style="height: 46.5938px; border-top: none;">WHT-16</td><td class="xl65" height="21" style="height: 46.5938px;">Dusty Shell Rider</td><td height="21" style="height: 46.5938px;">PTCR22H1483</td><td style="height: 46.5938px;">2023</td><td style="height: 46.5938px;">  
</td><td class="xl65" height="25" style="height: 46.5938px; border-top: none;">2023: Kyle

2024: Sean

</td><td style="border-top: none; height: 46.5938px;">2T</td></tr><tr style="height: 46.5938px;"><td class="xl65" height="25" style="height: 46.5938px; border-top: none;">WHT-17</td><td class="xl65" height="21" style="height: 46.5938px;">Burnturtle Blaze</td><td height="21" style="height: 46.5938px;">PTCR22H1506</td><td style="height: 46.5938px;">2023</td><td style="height: 46.5938px;">  
</td><td class="xl65" height="25" style="height: 46.5938px; border-top: none;">2023: Azzam

2024: Azzam

</td><td style="border-top: none; height: 46.5938px;">1T</td></tr><tr style="height: 46.5938px;"><td class="xl65" height="25" style="height: 46.5938px; border-top: none;">WHT-18</td><td class="xl65" height="21" style="height: 46.5938px;">Desert Hatchback</td><td height="21" style="height: 46.5938px;">PTCR22H1544</td><td style="height: 46.5938px;">2023</td><td style="height: 46.5938px;">  
</td><td class="xl66" height="25" style="height: 46.5938px; border-top: none;">2023: Doug

2024: Edouard

</td><td style="border-top: none; height: 46.5938px;">2B</td></tr><tr style="height: 46.5938px;"><td class="xl65" height="25" style="height: 46.5938px; border-top: none;">WHT-19</td><td class="xl65" height="21" style="height: 46.5938px;">Playa Shellection</td><td height="21" style="height: 46.5938px;">PTCR22H1570</td><td style="height: 46.5938px;">2023</td><td style="height: 46.5938px;">  
</td><td class="xl65" height="25" style="height: 46.5938px; border-top: none;">2023: Dimitri

2024: MJ

</td><td style="border-top: none; height: 46.5938px;">3B</td></tr><tr style="height: 46.5938px;"><td class="xl65" height="25" style="height: 46.5938px; border-top: none;">WHT-20</td><td class="xl65" height="21" style="height: 46.5938px;">Snap, Crackle, Burn</td><td height="21" style="height: 46.5938px;">PTCR22H1591</td><td style="height: 46.5938px;">2023</td><td style="height: 46.5938px;">  
</td><td class="xl65" height="25" style="height: 46.5938px; border-top: none;">2023: Klajdi

2024: Shuai

</td><td style="border-top: none; height: 46.5938px;">3B</td></tr><tr style="height: 29.7969px;"><td class="xl65" height="25" style="height: 29.7969px; border-top: none;">WHT-21</td><td class="xl65" height="21" style="height: 29.7969px;">Ashback Express</td><td height="21" style="height: 29.7969px;">PTCR22H1776</td><td style="height: 29.7969px;">2023</td><td style="height: 29.7969px;">  
</td><td class="xl67" height="25" style="height: 29.7969px; border-top: none;">-</td><td style="border-top: none; height: 29.7969px;">3T</td></tr><tr style="height: 46.5938px;"><td class="xl65" height="25" style="height: 46.5938px; border-top: none;">WHT-22</td><td class="xl65" height="21" style="height: 46.5938px;">Pedal Reptile</td><td height="21" style="height: 46.5938px;">PTCR22H1603</td><td style="height: 46.5938px;">2023</td><td style="height: 46.5938px;">  
</td><td class="xl65" height="25" style="height: 46.5938px; border-top: none;">2023: Emir

2024: Emir

</td><td style="border-top: none; height: 46.5938px;">2B</td></tr><tr style="height: 46.5938px;"><td class="xl65" height="25" style="height: 46.5938px; border-top: none;">WHT-23</td><td class="xl65" height="21" style="height: 46.5938px;">Shellionaire</td><td height="21" style="height: 46.5938px;">PTCR22H1630</td><td style="height: 46.5938px;">2023</td><td style="height: 46.5938px;">  
</td><td class="xl65" height="25" style="height: 46.5938px; border-top: none;">2023: BRock

2024: Steven

</td><td style="border-top: none; height: 46.5938px;">1B</td></tr><tr style="height: 46.5938px;"><td class="xl65" height="25" style="height: 46.5938px; border-top: none;">WHT-24</td><td class="xl65" height="21" style="height: 46.5938px;">Glide &amp; Hide</td><td height="21" style="height: 46.5938px;">PTCR22H1646</td><td style="height: 46.5938px;">2023</td><td style="height: 46.5938px;">  
</td><td class="xl65" height="25" style="height: 46.5938px; border-top: none;">2023: Andre

2024: Andre

</td><td style="border-top: none; height: 46.5938px;">2T</td></tr><tr style="height: 46.5938px;"><td class="xl65" height="25" style="height: 46.5938px; border-top: none;">WHT-25</td><td class="xl65" height="21" style="height: 46.5938px;">Carapace Cruiser</td><td height="21" style="height: 46.5938px;">PTCR22H1659</td><td style="height: 46.5938px;">2023</td><td style="height: 46.5938px;">  
</td><td class="xl67" height="25" style="height: 46.5938px; border-top: none;">2023: -

2024: Joe

</td><td style="border-top: none; height: 46.5938px;">3B</td></tr><tr style="height: 46.5938px;"><td class="xl65" height="25" style="height: 46.5938px; border-top: none;">WHT-26</td><td class="xl65" height="21" style="height: 46.5938px;">Burnerback Turtle</td><td height="21" style="height: 46.5938px;">PTCR22H1661</td><td style="height: 46.5938px;">2023</td><td style="height: 46.5938px;">  
</td><td class="xl65" height="25" style="height: 46.5938px; border-top: none;">2023: Sean

2024: Romain

</td><td style="border-top: none; height: 46.5938px;">2T</td></tr><tr style="height: 29.7969px;"><td class="xl65" height="25" style="height: 29.7969px; border-top: none;">WHT-27</td><td class="xl65" height="21" style="height: 29.7969px;">Shellabration Station</td><td height="21" style="height: 29.7969px;">PTCR22H1680</td><td style="height: 29.7969px;">2023</td><td style="height: 29.7969px;">  
</td><td class="xl67" height="25" style="height: 29.7969px; border-top: none;">-</td><td style="border-top: none; height: 29.7969px;">3T</td></tr><tr style="height: 29.7969px;"><td class="xl65" height="25" style="height: 29.7969px; border-top: none;">WHT-28</td><td class="xl65" height="21" style="height: 29.7969px;">Playa Shelldier</td><td height="21" style="height: 29.7969px;">PTCR22H1695</td><td style="height: 29.7969px;">2023</td><td style="height: 29.7969px;">  
</td><td class="xl67" height="25" style="height: 29.7969px; border-top: none;">-</td><td style="border-top: none; height: 29.7969px;">3T</td></tr><tr style="height: 46.5938px;"><td class="xl65" height="25" style="height: 46.5938px; border-top: none;">WHT-29</td><td class="xl65" height="21" style="height: 46.5938px;">Snapdash Rider</td><td height="21" style="height: 46.5938px;">PTCR22H1705</td><td style="height: 46.5938px;">2023</td><td style="height: 46.5938px;">  
</td><td class="xl66" height="25" style="height: 46.5938px; border-top: none;">2023: Dat

2024: Mohammed

</td><td style="border-top: none; height: 46.5938px;">2B</td></tr><tr style="height: 46.5938px;"><td class="xl65" height="25" style="height: 46.5938px; border-top: none;">WHT-30</td><td class="xl65" height="21" style="height: 46.5938px;">Scute Boot</td><td height="21" style="height: 46.5938px;">PTCR22H1922</td><td style="height: 46.5938px;">2023</td><td style="height: 46.5938px;">  
</td><td class="xl66" height="25" style="height: 46.5938px; border-top: none;">2023: Maxxi

2024: Klajdi

</td><td style="border-top: none; height: 46.5938px;">1T</td></tr><tr style="height: 29.7969px;"><td class="xl67" height="25" style="height: 29.7969px; border-top: none;">WHT-31</td><td class="xl65" height="23" style="height: 29.7969px;">Playa Snapstorm</td><td style="height: 29.7969px;">PTCR24D0745</td><td style="height: 29.7969px;">2024</td><td style="height: 29.7969px;">  
</td><td class="xl68" height="25" style="height: 29.7969px; border-top: none;">2024: Alejandro</td><td style="border-top: none; height: 29.7969px;">3B</td></tr><tr style="height: 29.7969px;"><td colspan="7" style="background-color: rgb(194, 224, 244); height: 29.7969px;">**Blue bikes**</td></tr><tr style="height: 46.5938px;"><td height="21" style="height: 46.5938px; width: 65pt;" width="87">BLU-01</td><td height="21" style="height: 46.5938px; width: 65pt;" width="87">Pyra-Shell Explorer</td><td height="21" style="height: 46.5938px; width: 65pt;" width="87">PTCR22H0301</td><td style="height: 46.5938px;">2023</td><td style="height: 46.5938px;">  
</td><td class="xl65" height="25" style="height: 46.5938px; width: 147pt;" width="196">2023: Jorge

2024: Jorge

</td><td style="border-top: none; height: 46.5938px;">2B</td></tr><tr style="height: 46.5938px;"><td height="21" style="height: 46.5938px;">BLU-02</td><td height="21" style="height: 46.5938px;">Glow Slow Snapper</td><td height="21" style="height: 46.5938px;">PTCR22H0332</td><td style="height: 46.5938px;">2023</td><td style="height: 46.5938px;">  
</td><td class="xl65" height="25" style="height: 46.5938px; border-top: none;">2023: AlexS

2024: -

</td><td style="border-top: none; height: 46.5938px;">1T</td></tr><tr style="height: 46.5938px;"><td height="21" style="height: 46.5938px;">BLU-03</td><td height="21" style="height: 46.5938px;">Hardshell Heat</td><td height="21" style="height: 46.5938px;">PTCR22H0373</td><td style="height: 46.5938px;">2023</td><td style="height: 46.5938px;">  
</td><td class="xl65" height="25" style="height: 46.5938px; border-top: none;">2023: Johnny

2024: Johnny

</td><td style="height: 46.5938px;">2B</td></tr><tr style="height: 46.5938px;"><td height="21" style="height: 46.5938px;">BLU-04</td><td height="21" style="height: 46.5938px;">Dusty Turtlin’</td><td height="21" style="height: 46.5938px;">PTCR22H0443</td><td style="height: 46.5938px;">2023</td><td style="height: 46.5938px;">  
</td><td class="xl66" height="25" style="height: 46.5938px; border-top: none;">2023: Loic

2024: BRock

</td><td style="height: 46.5938px;">2T</td></tr><tr style="height: 46.5938px;"><td height="21" style="height: 46.5938px;">BLU-05</td><td height="21" style="height: 46.5938px;">Shelldorado</td><td height="21" style="height: 46.5938px;">PTCR22H0450</td><td style="height: 46.5938px;">2023</td><td style="height: 46.5938px;">  
</td><td class="xl65" height="25" style="height: 46.5938px; border-top: none;">2023: Neptune

2024: Neptune

</td><td style="height: 46.5938px;">1T</td></tr><tr style="height: 46.5938px;"><td height="21" style="height: 46.5938px;">BLU-06</td><td height="21" style="height: 46.5938px;">Bikeshell Luminous</td><td height="21" style="height: 46.5938px;">PTCR22H0525</td><td style="height: 46.5938px;">2023</td><td style="height: 46.5938px;">  
</td><td class="xl66" height="25" style="height: 46.5938px; border-top: none;">2023: Rafa

2024: Emmett

</td><td style="height: 46.5938px;">3B</td></tr><tr style="height: 46.5938px;"><td height="21" style="height: 46.5938px;">BLU-07</td><td height="21" style="height: 46.5938px;">Playa Plodder</td><td height="21" style="height: 46.5938px;">PTCR22H0580</td><td style="height: 46.5938px;">2023</td><td style="height: 46.5938px;">  
</td><td class="xl65" height="25" style="height: 46.5938px; border-top: none;">2023: Joel

2024: -

</td><td style="height: 46.5938px;">1T</td></tr><tr style="height: 46.5938px;"><td height="21" style="height: 46.5938px;">BLU-08</td><td height="21" style="height: 46.5938px;">Pedals in the Shell</td><td height="21" style="height: 46.5938px;">PTCR22H1337</td><td style="height: 46.5938px;">2023</td><td style="height: 46.5938px;">  
</td><td class="xl65" height="25" style="height: 46.5938px; border-top: none;">2023: Animus

2024: Scott

</td><td style="height: 46.5938px;">3B</td></tr><tr style="height: 46.5938px;"><td height="21" style="height: 46.5938px;">BLU-09</td><td height="21" style="height: 46.5938px;">Ashback Adventurer</td><td height="21" style="height: 46.5938px;">PTCR22H1733</td><td style="height: 46.5938px;">2023</td><td style="height: 46.5938px;">  
</td><td class="xl67" height="25" style="height: 46.5938px; border-top: none;">2023: -

2024: Joel

</td><td style="height: 46.5938px;">1B</td></tr><tr style="height: 46.5938px;"><td height="21" style="height: 46.5938px;">BLU-10</td><td height="21" style="height: 46.5938px;">Snail Trail Rider</td><td height="21" style="height: 46.5938px;">PTCR22H1752</td><td style="height: 46.5938px;">2023</td><td style="height: 46.5938px;">  
</td><td class="xl68" height="25" style="height: 46.5938px; border-top: none;">2023: BennyB

2024: BennyB

</td><td style="height: 46.5938px;">2T</td></tr><tr style="height: 29.7969px;"><td colspan="7" style="background-color: rgb(191, 237, 210); height: 29.7969px;">**Green bikes**  
</td></tr><tr style="height: 46.5938px;"><td height="21" style="height: 46.5938px; width: 65pt;" width="87">GRN-01</td><td class="xl65" height="21" style="height: 46.5938px; width: 121pt;" width="161">Turtleneck Torch</td><td height="21" style="height: 46.5938px; width: 65pt;" width="87">PTCR22E0678</td><td style="height: 46.5938px;">2023</td><td style="height: 46.5938px;">Lost 2024</td><td class="xl67" height="25" style="height: 46.5938px; width: 147pt;" width="196">2023: Evan

2024: -

</td><td style="height: 46.5938px;">-</td></tr><tr style="height: 46.5938px;"><td height="21" style="height: 46.5938px;">GRN-02</td><td class="xl65" height="21" style="height: 46.5938px;">Glowtorise</td><td height="21" style="height: 46.5938px;">PTCR22E0866</td><td style="height: 46.5938px;">2023</td><td style="height: 46.5938px;">  
</td><td class="xl66" height="25" style="height: 46.5938px; border-top: none;">2023: Renaud

2024: Christophe

</td><td style="height: 46.5938px;">3B</td></tr><tr style="height: 46.5938px;"><td height="21" style="height: 46.5938px;">GRN-03</td><td class="xl65" height="21" style="height: 46.5938px;">Blaze the Carapace</td><td height="21" style="height: 46.5938px;">PTCR22E0936</td><td style="height: 46.5938px;">2023</td><td style="height: 46.5938px;">  
</td><td class="xl65" height="25" style="height: 46.5938px; border-top: none;">2023: Fotis

2024: Luka

</td><td style="height: 46.5938px;">3B</td></tr><tr style="height: 46.5938px;"><td height="21" style="height: 46.5938px;">GRN-04</td><td class="xl65" height="21" style="height: 46.5938px;">Burn Shell Burn</td><td height="21" style="height: 46.5938px;">PTCR22E1018</td><td style="height: 46.5938px;">2023</td><td style="height: 46.5938px;">  
</td><td class="xl65" height="25" style="height: 46.5938px; border-top: none;">2023: Peter

2024: Peter

</td><td style="height: 46.5938px;">1B</td></tr><tr style="height: 29.7969px;"><td height="21" style="height: 29.7969px;">GRN-05</td><td class="xl65" height="21" style="height: 29.7969px;">Molten Snapper</td><td height="21" style="height: 29.7969px;">PTCR22E1030</td><td style="height: 29.7969px;">2023</td><td style="height: 29.7969px;">Lost 2023</td><td style="height: 29.7969px;">2023: Steven</td><td style="height: 29.7969px;">-</td></tr><tr style="height: 46.5938px;"><td height="21" style="height: 46.5938px;">GRN-06</td><td class="xl65" height="21" style="height: 46.5938px;">Dusted Scutes</td><td height="21" style="height: 46.5938px;">PTCR22E1041</td><td style="height: 46.5938px;">2023</td><td style="height: 46.5938px;">  
</td><td class="xl66" height="25" style="height: 46.5938px; width: 147pt;" width="196">2023: Jean-Carlo

2024: -

</td><td style="height: 46.5938px;">3T</td></tr><tr style="height: 46.5938px;"><td height="21" style="height: 46.5938px;">GRN-07</td><td class="xl65" height="21" style="height: 46.5938px;">Pedal Para-shell</td><td height="21" style="height: 46.5938px;">PTCR22E1058</td><td style="height: 46.5938px;">2023</td><td style="height: 46.5938px;">  
</td><td class="xl65" height="25" style="height: 46.5938px; border-top: none;">2023: Grant

2024: Grant

</td><td style="height: 46.5938px;">2T</td></tr><tr style="height: 46.5938px;"><td height="21" style="height: 46.5938px;">GRN-08</td><td class="xl65" height="21" style="height: 46.5938px;">Terra Blaze</td><td height="21" style="height: 46.5938px;">PTCR22E1110</td><td style="height: 46.5938px;">2023</td><td style="height: 46.5938px;">  
</td><td class="xl65" height="25" style="height: 46.5938px; border-top: none;">2023: Andrew

2024: Fotis

</td><td style="height: 46.5938px;">2T</td></tr><tr style="height: 46.5938px;"><td height="21" style="height: 46.5938px;">GRN-09</td><td class="xl65" height="21" style="height: 46.5938px;">Playa Plastron</td><td height="21" style="height: 46.5938px;">PTCR22E1945</td><td style="height: 46.5938px;">2023</td><td style="height: 46.5938px;">  
</td><td class="xl65" height="25" style="height: 46.5938px; border-top: none;">2023: Oscarito

2024: Oscarito

</td><td style="height: 46.5938px;">2B</td></tr><tr style="height: 46.5938px;"><td height="21" style="height: 46.5938px;">GRN-10</td><td class="xl65" height="21" style="height: 46.5938px;">Scorchie Shell</td><td height="21" style="height: 46.5938px;">PTCR22E2006</td><td style="height: 46.5938px;">2023</td><td style="height: 46.5938px;">  
</td><td class="xl65" height="25" style="height: 46.5938px; border-top: none;">2023: Jeremy

2024: Jeremy

</td><td style="height: 46.5938px;">2B</td></tr><tr style="height: 29.7969px;"><td style="height: 29.7969px;">GRN-11</td><td style="height: 29.7969px;">Turtlestar Galactibike</td><td style="height: 29.7969px;">PTCR24D0760</td><td style="height: 29.7969px;">2024</td><td style="height: 29.7969px;">  
</td><td class="xl67" height="25" style="height: 29.7969px; border-top: none;">2024: AlexS</td><td style="height: 29.7969px;">1B</td></tr></tbody></table>

<details id="bkmrk-bike-fort-organizati"><summary>Bike fort organization - click to open</summary>

Bikes are organized in the container by Rows (1 / 2 / 3) and Level (Bottom / Top). As such a bike whose location is **3B** would be located at the rear of the container on the bottom level, while a bike whose location is **1T** would be at the front of the container on the top level.
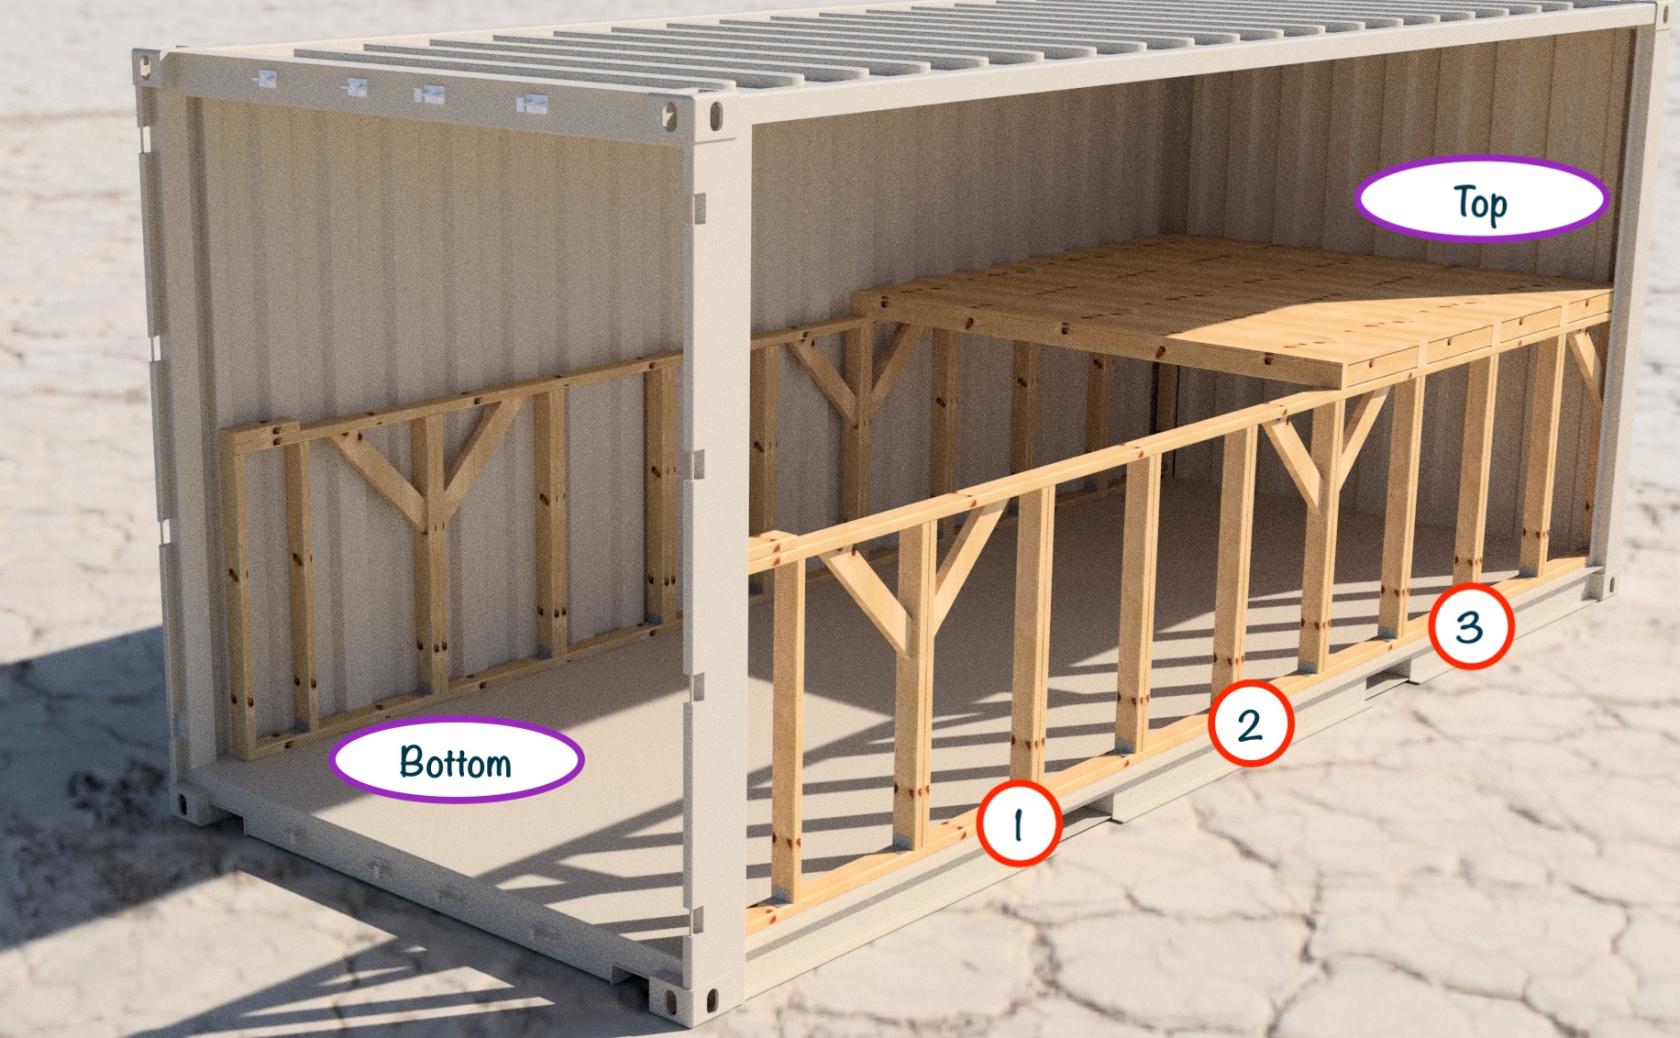
![Bike fort locations.jpg](https://wiki.futureturtles.com/uploads/images/gallery/2024-12/scaled-1680-/WlLbQGUEJIuv3RI4-bike-fort-locations.jpg)

</details>## Campers' bike storage

<table border="1" id="bkmrk-camper-type-years-st" style="border-collapse: collapse; width: 100%; height: 1668.63px;"><colgroup><col style="width: 18.8319%;"></col><col style="width: 21.1117%;"></col><col style="width: 32.5236%;"></col><col style="width: 27.5328%;"></col></colgroup><thead><tr style="height: 29.7969px;"><td style="height: 29.7969px;">**Camper**</td><td style="height: 29.7969px;">**Type**</td><td style="height: 29.7969px;">**Years stored**</td><td style="height: 29.7969px;">**Bike fort place**</td></tr></thead><tbody><tr style="height: 29.7969px;"><td class="xl66" height="25" style="height: 29.7969px; width: 68pt;" width="91">Ben W</td><td class="xl65" height="21" style="height: 29.7969px; width: 121pt;" width="161">E-bike</td><td style="height: 29.7969px;">2023, 2024</td><td style="width: 73.5pt; height: 29.7969px;">Front bottom</td></tr></tbody></table>


## Templates

[Link](https://docs.google.com/spreadsheets/d/1f8_0EhtJgv7hoBQBDKtIOLT5SIMWwdSN/edit?usp=sharing&ouid=110927239838941821693&rtpof=true&sd=true) to intake forms and templates to be printed

[Link](https://docs.google.com/spreadsheets/d/1sEBcr72O3RTuwsf_KRnSjULh5WBJCqqZ/edit?usp=sharing&ouid=110927239838941821693&rtpof=true&sd=true) to the Bike Switch form

## Kick Stands

In 2025, we're testing a few after-market kickstands to prevent the toppling bike problem. We did a try run test of 10 different kickstand styles during a summer 2025 work weekend to assess balance and ease-of-install ([example 1](https://www.amazon.com/dp/B09QLZ939K?ref=ppx_yo2ov_dt_b_fed_asin_title), [example 2](https://www.amazon.com/dp/B089LXZV6P?ref=ppx_yo2ov_dt_b_fed_asin_title)). We narrowed it down to two models:

[Lumintrail Center Mount Bike Kickstand - Fits 24-29 Inch Bicycles - Adult Mountain, Cruiser and Road Bike Kickstand - Quick Adjust Height](https://www.amazon.com/dp/B074DYYXKC?ref=ppx_yo2ov_dt_b_fed_asin_title&th=1)

[Schwinn Center or Rear Mounted Kickstand for Adult and Kids Bike, Lightweight, Convenient for Upright Storage, Bicycle Parts and Accessories, Perfect for Bikes Without Factory Mounting Plate Visit the Schwinn Store](https://www.amazon.com/dp/B08PXT9C7V?ref=ppx_yo2ov_dt_b_fed_asin_title&th=1)

We'll order 3 of each and let campers install them as they wish. If successful, we'll install them all during a 2026 work weekend.

# DJ and Lighting

# DJ Information

![P1060675.jpeg](https://wiki.futureturtles.com/uploads/images/gallery/2025-03/scaled-1680-/pwaD9fLs9vJ0aSWx-p1060675.jpeg)To keep the people dancing, the Future Turtles camp includes a complete set of DJ gear and powered speakers which provide excellent sound for our camp parties.

## So you wanna be a DJ...

Here are a few things to know…

- To DJ on playa, there’s a fair amount of work to do ahead of time.
- We use a Pioneer controller ([XDJ-RX3](https://www.pioneerdj.com/en/product/all-in-one-system/xdj-rx3/black/overview/)) which requires you to prepare your music ahead of time.
- You’ll need to: 
    - Buy music - YOU MUSIC FILES (MP3s)
    - Learn Rekordbox [https://www.youtube.com/watch?v=pfcB95NHUbk](https://www.youtube.com/watch?v=pfcB95NHUbk)

## Our Audio Setup

DJ Controller: Pioneer DJ XDJ-RX3

[![image.png](https://wiki.futureturtles.com/uploads/images/gallery/2025-03/scaled-1680-/B6LElWWYxuaQJdiC-image.png)](https://wiki.futureturtles.com/uploads/images/gallery/2025-03/B6LElWWYxuaQJdiC-image.png)

Powered Speakers:

- Three Bose F1 Subwoofers
- Five Bose F1 Model 812 Loudspeakers (1000 watts each)
- Three Alto Pro TX315 Loudspeakers (700 watts each)

Yamaha MG10XU Mixer (not currently used)

Furman PL-PRO DMC Power Conditioner (important to plug all equipment into this to avoid damage from flaky electrical grid!)

We have a bluetooth -&gt; XLR adapter for streaming through the audio system or through one speaker.

A detailed inventory of the audio equipment we own is on the [camp manifest Google Sheet, in a tab called DJ Gear.](https://docs.google.com/spreadsheets/d/1lk9rTBhz5S9zQsZBZfVBd9uLi5uOZ-PVDatuwNXotRY/edit?usp=sharing)

## DJ Tutorial

DJ curious? Let’s get you on the decks!

Best beginner deck: [DDJ FLX 4](https://a.co/d/hq5Y3oy)

- If someone is looking for a cheaper alternative to see if they’re interested in DJing then get the [DDJ 200](https://a.co/d/ctuphUQ), but most people find after a short period of time they outgrow it and want to move to the DDJ FLX 4

Music library: [Beatport Streaming](https://stream.beatport.com/) and/or [ZIPDJ](https://www.zipdj.com/)

- Beatport Streaming makes it easy to access a large music library in the Rekordbox software, but note that we won’t be able to access Beatport Streaming on the playa so they’ll likely want to use a website like ZIPDJ to download the song files onto a USB
- When registering for ZIPDJ, they ask for you to prove that you are a DJ, but they don’t seem to be that strict, if you create a [SoundCloud](https://soundcloud.com/discover) profile and include “DJ” in your SoundCloud profile name you should be fine

Quick tutorial on how to load songs onto a USB using rekordbox:

- [https://www.youtube.com/watch?v=mjZCgsszBX0](https://www.youtube.com/watch?v=mjZCgsszBX0)

# Lighting Equipment

This is the equipment we have for lighting the dance floor.

It is all DMX controlled.

## DMX Controllers

- ADJ DJ WMX1 Controller - a powerful, compact standalone DMX controller that is used to control lights in the dance area 
    - Our [DMX Setup](https://wiki.futureturtles.com/books/burning-man-infrastructure/page/dmx-lighting-setup-2025 "DMX Setup 2025") page has setup details.
    - [Manufacturer's home page](https://www.adj.com/wmx1)
    - Visit [wolfmix.com/activate](https://wolfmix.com/activate) for activation and help getting started
- [ADJ Airstream Bridge](https://www.adj.com/airstream-dmx-bridge) (plus iPad to control it) - An older device that works reasonably well as a simple, backup DMX controller

## DMX controlled lights

- 6 (six) [ADJ 7P HEX IP](https://www.adj.com/7p-hex-ip) with 3pin DMX plugs and Neutrik True1 for power - daisy chainable
- 10 (ten) [ADJ 7P HEX IP](https://www.adj.com/7p-hex-ip) with 5pin DMX plugs and Neutrik True1 for power- daisy chainable
- 4 (four) [ADJ Saber Spot RGBW LED Pinspot](https://www.adj.com/saber-spot-rgbw) with 3pin DMX plugs and Neutrik PowerCon for power - daisy chainable
- 8 (eight) [DJXFLI 120W Moving Head DJ Lights](https://www.amazon.com/Moving-Activated-Control-Wedding-Lighting/dp/B0C9LZXY8K?ref_=ast_sto_dp&th=1) (cheap amazon random stuff) with 3pin DMX and Neutrik PowerCon for power - not daisy chainable

## Power cables

Note there are two kinds. Neutrik PowerCon is the old kind("blue and grey"), shown here on the left -- it is not designed to be unplugged under load. Neutrik True1 is the new kind which can be unplugged under load and is therefore safer.

[![Screenshot 2025-06-11 at 4.04.57 AM.png](https://wiki.futureturtles.com/uploads/images/gallery/2025-06/scaled-1680-/nM3StwtdOKxFhSF9-screenshot-2025-06-11-at-4-04-57-am.png)](https://wiki.futureturtles.com/uploads/images/gallery/2025-06/nM3StwtdOKxFhSF9-screenshot-2025-06-11-at-4-04-57-am.png)[![Screenshot 2025-06-11 at 4.05.23 AM.png](https://wiki.futureturtles.com/uploads/images/gallery/2025-06/scaled-1680-/1M0JSWwbmEiMjMgx-screenshot-2025-06-11-at-4-05-23-am.png)](https://wiki.futureturtles.com/uploads/images/gallery/2025-06/1M0JSWwbmEiMjMgx-screenshot-2025-06-11-at-4-05-23-am.png)

#### Inventory

<table border="1" id="bkmrk-description-length-i" style="border-collapse: collapse; width: 100%;"><colgroup><col style="width: 55.4231%;"></col><col style="width: 10.7246%;"></col><col style="width: 15.8546%;"></col><col style="width: 17.9976%;"></col></colgroup><thead><tr><td>Description

</td><td>Length

</td><td>Inventory 2024</td><td>New for 2025</td></tr></thead><tbody><tr><td>Nema 5-15P to True1 (plugs PAR lights into normal outlet)</td><td>6'</td><td>16</td><td>0</td></tr><tr><td>True1 Daisy Chain (plug one PAR light into neighbor)</td><td>10'</td><td>0</td><td>5</td></tr><tr><td>True1 Daisy Chain (plug one PAR light into neighbor)</td><td>15'</td><td>7</td><td>0</td></tr><tr><td>True1 Daisy Chain (plug one PAR light into neighbor)</td><td>25'</td><td>6</td><td>0</td></tr><tr><td>Nema 5-15P to PowerCon (plug spots and moving heads into power)</td><td>6' (?)</td><td>12 (?)</td><td>0</td></tr><tr><td>PowerCon Daisy Chain (plug one spot into neighbor)</td><td>6'</td><td>0</td><td>2</td></tr><tr><td>Nema 5-15R to PowerCon (plug DMX TX and RX into PinSpot)

</td><td>1'</td><td>0</td><td>2</td></tr></tbody></table>

## DMX cables

DMX cables come in 5-pin and 3-pin variations. Note that ten of our PAR lights use 5-pin and everything else is 3-pin.

**Did you know -** DMX cables, used for lighting control, look the same as XLR cables, used for speakers, but they have a different impedance, so don't mix them up.

The last "output" in a chain of DMX cables must have a terminator on it.

<table border="1" id="bkmrk-description-length-i-1" style="border-collapse: collapse; width: 100%; height: 149px;"><colgroup><col style="width: 55.7807%;"></col><col style="width: 10.4887%;"></col><col style="width: 15.8522%;"></col><col style="width: 17.8784%;"></col></colgroup><thead><tr style="height: 29.8px;"><td style="height: 29.8px;">Description

</td><td style="height: 29.8px;">Length

</td><td style="height: 29.8px;">Inventory 2024</td><td style="height: 29.8px;">New for 2025</td></tr></thead><tbody><tr style="height: 29.8px;"><td style="height: 29.8px;">3-pin DMX</td><td style="height: 29.8px;">6.5'</td><td style="height: 29.8px;">0</td><td style="height: 29.8px;">13</td></tr><tr style="height: 29.8px;"><td style="height: 29.8px;">3-pin DMX</td><td style="height: 29.8px;">10'</td><td style="height: 29.8px;">8</td><td style="height: 29.8px;">  
</td></tr><tr style="height: 29.8px;"><td style="height: 29.8px;">3-pin DMX</td><td style="height: 29.8px;">15'</td><td style="height: 29.8px;">3</td><td style="height: 29.8px;">  
</td></tr><tr style="height: 29.8px;"><td style="height: 29.8px;">3-pin DMX</td><td style="height: 29.8px;">25'</td><td style="height: 29.8px;">15</td><td style="height: 29.8px;">  
</td></tr><tr><td>3-pin DMX Terminator</td><td>  
</td><td>0</td><td>2</td></tr><tr><td>5-pin DMX</td><td>6.5'</td><td>0</td><td>7</td></tr><tr><td>5-pin DMX</td><td>15'</td><td>8</td><td>  
</td></tr><tr><td>5-pin DMX</td><td>25'</td><td>9</td><td>  
</td></tr><tr><td>5-pin DMX</td><td>50'</td><td>4</td><td>  
</td></tr><tr><td>5-pin DMX Terminator</td><td>  
</td><td>0</td><td>2</td></tr><tr><td>3-pin F to 5-pin M adapter</td><td>  
</td><td>6</td><td>  
</td></tr><tr><td>3-pin M to 5-pin F adapter</td><td>  
</td><td>6</td><td>  
</td></tr></tbody></table>

# DMX Lighting Setup 2025

See also: [Lighting Equipment](https://wiki.futureturtles.com/books/burning-man-infrastructure/page/lighting-equipment "Lighting Equipment")

This [spreadsheet](https://docs.google.com/spreadsheets/d/1PbZgVjgRahp9gOPVavxyPQ-1FblbSy8RPH4hTlAwiWc/edit?usp=sharing) has the detailed lighting schedule, including the address of every fixture and an analysis of all DMX and power cables and connectors needed.

Our primary lighting controller is a ADJ / Wolfmix WMX1.

It can control 1 universe of DMX512 via DMX cables. (You can pay extra to unlock a second universe)

Ask Joel for the password to the online account on Nicolaudie Connect ([https://cloud.nicolaudiegroup.com/#](https://cloud.nicolaudiegroup.com/)) which is a cloud service that lets you sync and save projects. Only 6 projects can be saved on the controller, but you can store more on the cloud. There is a Mac app called WTools that lets you move projects between the cloud and the controller:

[![Screenshot 2025-06-10 at 11.45.01 AM.png](https://wiki.futureturtles.com/uploads/images/gallery/2025-06/scaled-1680-/Nr4lkxbduQZK1UxX-screenshot-2025-06-10-at-11-45-01-am.png)](https://wiki.futureturtles.com/uploads/images/gallery/2025-06/Nr4lkxbduQZK1UxX-screenshot-2025-06-10-at-11-45-01-am.png)

### Fixture Setup 2025

#### Par Floods

Fixtures 001-016: **ADJ 7P HEX IP PAR Floods** set up in seven channel mode. The 7 channels will be Red, Green, Blue, White, Amber, UV, Master Dimmer.

Some have 3pin connections and some of 5pin connections. The plan for 2025 is designed so there is only one transition from 3 to 5.

These fixtures are well supported by the WMX1.

<details id="bkmrk-instructions-for-set"><summary>Instructions for setting up each PAR light</summary>

<span style="font-size: 11pt; font-family: Arial,sans-serif; color: #000000; background-color: transparent; font-weight: 400; font-style: normal; font-variant: normal; text-decoration: none; vertical-align: baseline; white-space: pre-wrap;">When the PAR flood lights wake up, the LCD screen shows you their settings for the two most important things.</span>

1. <span style="font-size: 11pt; font-family: Arial,sans-serif; color: #000000; background-color: transparent; font-weight: 400; font-style: normal; font-variant: normal; text-decoration: none; vertical-align: baseline; white-space: pre-wrap;">The number of channels should be 7</span>
2. <span style="font-size: 11pt; font-family: Arial,sans-serif; color: #000000; background-color: transparent; font-weight: 400; font-style: normal; font-variant: normal; text-decoration: none; vertical-align: baseline; white-space: pre-wrap;">Each flood light has a DMX address (1, 8, 15, 22, etc)</span>

<span style="font-size: 11pt; font-family: Arial,sans-serif; color: #000000; background-color: transparent; font-weight: 400; font-style: normal; font-variant: normal; text-decoration: none; vertical-align: baseline; white-space: pre-wrap;">If the screen is locked, press and hold </span><span style="font-size: 11pt; font-family: Arial,sans-serif; color: #000000; background-color: transparent; font-weight: bold; font-style: normal; font-variant: normal; text-decoration: none; vertical-align: baseline; white-space: pre-wrap;">Mode</span><span style="font-size: 11pt; font-family: Arial,sans-serif; color: #000000; background-color: transparent; font-weight: 400; font-style: normal; font-variant: normal; text-decoration: none; vertical-align: baseline; white-space: pre-wrap;"> to unlock it.</span>

<span style="font-size: 11pt; font-family: Arial, sans-serif; color: rgb(0, 0, 0); background-color: transparent; font-style: normal; font-variant: normal; text-decoration: none; vertical-align: baseline; white-space: pre-wrap;">If a flood light is **not** set up correctly, follow these exact instructions </span><span style="font-size: 11pt; font-family: Arial,sans-serif; color: #000000; background-color: transparent; font-weight: 400; font-style: normal; font-variant: normal; text-decoration: none; vertical-align: baseline; white-space: pre-wrap;">to get it set up:</span>

## <span style="font-size: 16pt; font-family: Arial,sans-serif; color: #000000; background-color: transparent; font-weight: 400; font-style: normal; font-variant: normal; text-decoration: none; vertical-align: baseline; white-space: pre-wrap;">1. Factory Reset</span>

- <span style="font-size: 11pt; font-family: Arial,sans-serif; color: #000000; background-color: transparent; font-weight: bold; font-style: normal; font-variant: normal; text-decoration: none; vertical-align: baseline; white-space: pre-wrap;">Mode</span><span style="font-size: 11pt; font-family: Arial,sans-serif; color: #000000; background-color: transparent; font-weight: 400; font-style: normal; font-variant: normal; text-decoration: none; vertical-align: baseline; white-space: pre-wrap;"> (hold if necessary to unlock)</span>
- <span style="font-size: 11pt; font-family: Arial,sans-serif; color: #000000; background-color: transparent; font-weight: 400; font-style: normal; font-variant: normal; text-decoration: none; vertical-align: baseline; white-space: pre-wrap;">Press </span><span style="font-size: 11pt; font-family: Arial,sans-serif; color: #000000; background-color: transparent; font-weight: bold; font-style: normal; font-variant: normal; text-decoration: none; vertical-align: baseline; white-space: pre-wrap;">Down</span><span style="font-size: 11pt; font-family: Arial,sans-serif; color: #000000; background-color: transparent; font-weight: 400; font-style: normal; font-variant: normal; text-decoration: none; vertical-align: baseline; white-space: pre-wrap;"> until you see </span><span style="font-size: 11pt; font-family: Arial,sans-serif; color: #000000; background-color: transparent; font-weight: 400; font-style: normal; font-variant: normal; text-decoration: underline; -webkit-text-decoration-skip: none; text-decoration-skip-ink: none; vertical-align: baseline; white-space: pre-wrap;">Menu Function</span><span style="font-size: 11pt; font-family: Arial,sans-serif; color: #000000; background-color: transparent; font-weight: 400; font-style: normal; font-variant: normal; text-decoration: none; vertical-align: baseline; white-space: pre-wrap;"> then </span><span style="font-size: 11pt; font-family: Arial,sans-serif; color: #000000; background-color: transparent; font-weight: bold; font-style: normal; font-variant: normal; text-decoration: none; vertical-align: baseline; white-space: pre-wrap;">Enter</span>
- <span style="font-size: 11pt; font-family: Arial,sans-serif; color: #000000; background-color: transparent; font-weight: 400; font-style: normal; font-variant: normal; text-decoration: none; vertical-align: baseline; white-space: pre-wrap;">Press </span><span style="font-size: 11pt; font-family: Arial,sans-serif; color: #000000; background-color: transparent; font-weight: bold; font-style: normal; font-variant: normal; text-decoration: none; vertical-align: baseline; white-space: pre-wrap;">Down</span><span style="font-size: 11pt; font-family: Arial,sans-serif; color: #000000; background-color: transparent; font-weight: 400; font-style: normal; font-variant: normal; text-decoration: none; vertical-align: baseline; white-space: pre-wrap;"> until </span><span style="font-size: 11pt; font-family: Arial,sans-serif; color: #000000; background-color: transparent; font-weight: 400; font-style: normal; font-variant: normal; text-decoration: underline; -webkit-text-decoration-skip: none; text-decoration-skip-ink: none; vertical-align: baseline; white-space: pre-wrap;">DFSET</span><span style="font-size: 11pt; font-family: Arial,sans-serif; color: #000000; background-color: transparent; font-weight: 400; font-style: normal; font-variant: normal; text-decoration: none; vertical-align: baseline; white-space: pre-wrap;"> then </span><span style="font-size: 11pt; font-family: Arial,sans-serif; color: #000000; background-color: transparent; font-weight: bold; font-style: normal; font-variant: normal; text-decoration: none; vertical-align: baseline; white-space: pre-wrap;">Enter</span><span style="font-size: 11pt; font-family: Arial,sans-serif; color: #000000; background-color: transparent; font-weight: 400; font-style: normal; font-variant: normal; text-decoration: none; vertical-align: baseline; white-space: pre-wrap;"> </span><span style="font-size: 11pt; font-family: Arial,sans-serif; color: #000000; background-color: transparent; font-weight: bold; font-style: normal; font-variant: normal; text-decoration: none; vertical-align: baseline; white-space: pre-wrap;">UP Enter</span>
- <span style="font-size: 11pt; font-family: Arial,sans-serif; color: #000000; background-color: transparent; font-weight: bold; font-style: normal; font-variant: normal; text-decoration: none; vertical-align: baseline; white-space: pre-wrap;">Mode</span>

## <span style="font-size: 16pt; font-family: Arial,sans-serif; color: #000000; background-color: transparent; font-weight: 400; font-style: normal; font-variant: normal; text-decoration: none; vertical-align: baseline; white-space: pre-wrap;">2. Disable the screen autolock feature</span>

- <span style="font-size: 11pt; font-family: Arial,sans-serif; color: #000000; background-color: transparent; font-weight: bold; font-style: normal; font-variant: normal; text-decoration: none; vertical-align: baseline; white-space: pre-wrap;">Mode</span><span style="font-size: 11pt; font-family: Arial,sans-serif; color: #000000; background-color: transparent; font-weight: 400; font-style: normal; font-variant: normal; text-decoration: none; vertical-align: baseline; white-space: pre-wrap;"> (hold if necessary to unlock)</span>
- <span style="font-size: 11pt; font-family: Arial,sans-serif; color: #000000; background-color: transparent; font-weight: 400; font-style: normal; font-variant: normal; text-decoration: none; vertical-align: baseline; white-space: pre-wrap;">Press </span><span style="font-size: 11pt; font-family: Arial,sans-serif; color: #000000; background-color: transparent; font-weight: bold; font-style: normal; font-variant: normal; text-decoration: none; vertical-align: baseline; white-space: pre-wrap;">Down</span><span style="font-size: 11pt; font-family: Arial,sans-serif; color: #000000; background-color: transparent; font-weight: 400; font-style: normal; font-variant: normal; text-decoration: none; vertical-align: baseline; white-space: pre-wrap;"> until you see </span><span style="font-size: 11pt; font-family: Arial,sans-serif; color: #000000; background-color: transparent; font-weight: 400; font-style: normal; font-variant: normal; text-decoration: underline; -webkit-text-decoration-skip: none; text-decoration-skip-ink: none; vertical-align: baseline; white-space: pre-wrap;">Menu Function</span><span style="font-size: 11pt; font-family: Arial,sans-serif; color: #000000; background-color: transparent; font-weight: 400; font-style: normal; font-variant: normal; text-decoration: none; vertical-align: baseline; white-space: pre-wrap;"> then </span><span style="font-size: 11pt; font-family: Arial,sans-serif; color: #000000; background-color: transparent; font-weight: bold; font-style: normal; font-variant: normal; text-decoration: none; vertical-align: baseline; white-space: pre-wrap;">Enter</span>
- <span style="font-size: 11pt; font-family: Arial,sans-serif; color: #000000; background-color: transparent; font-weight: 400; font-style: normal; font-variant: normal; text-decoration: none; vertical-align: baseline; white-space: pre-wrap;">Press </span><span style="font-size: 11pt; font-family: Arial,sans-serif; color: #000000; background-color: transparent; font-weight: bold; font-style: normal; font-variant: normal; text-decoration: none; vertical-align: baseline; white-space: pre-wrap;">Down</span><span style="font-size: 11pt; font-family: Arial,sans-serif; color: #000000; background-color: transparent; font-weight: 400; font-style: normal; font-variant: normal; text-decoration: none; vertical-align: baseline; white-space: pre-wrap;"> until </span><span style="font-size: 11pt; font-family: Arial,sans-serif; color: #000000; background-color: transparent; font-weight: 400; font-style: normal; font-variant: normal; text-decoration: underline; -webkit-text-decoration-skip: none; text-decoration-skip-ink: none; vertical-align: baseline; white-space: pre-wrap;">LCD.SET</span><span style="font-size: 11pt; font-family: Arial,sans-serif; color: #000000; background-color: transparent; font-weight: 400; font-style: normal; font-variant: normal; text-decoration: none; vertical-align: baseline; white-space: pre-wrap;"> then </span><span style="font-size: 11pt; font-family: Arial,sans-serif; color: #000000; background-color: transparent; font-weight: bold; font-style: normal; font-variant: normal; text-decoration: none; vertical-align: baseline; white-space: pre-wrap;">Enter</span>
- <span style="font-size: 11pt; font-family: Arial,sans-serif; color: #000000; background-color: transparent; font-weight: 400; font-style: normal; font-variant: normal; text-decoration: none; vertical-align: baseline; white-space: pre-wrap;">Press </span><span style="font-size: 11pt; font-family: Arial,sans-serif; color: #000000; background-color: transparent; font-weight: bold; font-style: normal; font-variant: normal; text-decoration: none; vertical-align: baseline; white-space: pre-wrap;">Enter</span><span style="font-size: 11pt; font-family: Arial,sans-serif; color: #000000; background-color: transparent; font-weight: 400; font-style: normal; font-variant: normal; text-decoration: none; vertical-align: baseline; white-space: pre-wrap;"> until </span><span style="font-size: 11pt; font-family: Arial,sans-serif; color: #000000; background-color: transparent; font-weight: 400; font-style: normal; font-variant: normal; text-decoration: underline; -webkit-text-decoration-skip: none; text-decoration-skip-ink: none; vertical-align: baseline; white-space: pre-wrap;">Key Lock</span>
- <span style="font-size: 11pt; font-family: Arial,sans-serif; color: #000000; background-color: transparent; font-weight: 400; font-style: normal; font-variant: normal; text-decoration: none; vertical-align: baseline; white-space: pre-wrap;">Press </span><span style="font-size: 11pt; font-family: Arial,sans-serif; color: #000000; background-color: transparent; font-weight: bold; font-style: normal; font-variant: normal; text-decoration: none; vertical-align: baseline; white-space: pre-wrap;">Down</span><span style="font-size: 11pt; font-family: Arial,sans-serif; color: #000000; background-color: transparent; font-weight: 400; font-style: normal; font-variant: normal; text-decoration: none; vertical-align: baseline; white-space: pre-wrap;"> until </span><span style="font-size: 11pt; font-family: Arial,sans-serif; color: #000000; background-color: transparent; font-weight: 400; font-style: normal; font-variant: normal; text-decoration: underline; -webkit-text-decoration-skip: none; text-decoration-skip-ink: none; vertical-align: baseline; white-space: pre-wrap;">Off</span><span style="font-size: 11pt; font-family: Arial,sans-serif; color: #000000; background-color: transparent; font-weight: 400; font-style: normal; font-variant: normal; text-decoration: none; vertical-align: baseline; white-space: pre-wrap;"> </span>
- <span style="font-size: 11pt; font-family: Arial,sans-serif; color: #000000; background-color: transparent; font-weight: 400; font-style: normal; font-variant: normal; text-decoration: none; vertical-align: baseline; white-space: pre-wrap;">Press </span><span style="font-size: 11pt; font-family: Arial,sans-serif; color: #000000; background-color: transparent; font-weight: bold; font-style: normal; font-variant: normal; text-decoration: none; vertical-align: baseline; white-space: pre-wrap;">Enter</span><span style="font-size: 11pt; font-family: Arial,sans-serif; color: #000000; background-color: transparent; font-weight: 400; font-style: normal; font-variant: normal; text-decoration: none; vertical-align: baseline; white-space: pre-wrap;"> until </span><span style="font-size: 11pt; font-family: Arial,sans-serif; color: #000000; background-color: transparent; font-weight: 400; font-style: normal; font-variant: normal; text-decoration: underline; -webkit-text-decoration-skip: none; text-decoration-skip-ink: none; vertical-align: baseline; white-space: pre-wrap;">LCD.SET</span>
- <span style="font-size: 11pt; font-family: Arial,sans-serif; color: #000000; background-color: transparent; font-weight: 400; font-style: normal; font-variant: normal; text-decoration: none; vertical-align: baseline; white-space: pre-wrap;">Press </span><span style="font-size: 11pt; font-family: Arial,sans-serif; color: #000000; background-color: transparent; font-weight: bold; font-style: normal; font-variant: normal; text-decoration: none; vertical-align: baseline; white-space: pre-wrap;">Mode</span>

## <span style="font-size: 16pt; font-family: Arial,sans-serif; color: #000000; background-color: transparent; font-weight: 400; font-style: normal; font-variant: normal; text-decoration: none; vertical-align: baseline; white-space: pre-wrap;">3. Set this flood light’s address</span>

<span style="font-size: 11pt; font-family: Arial,sans-serif; color: #000000; background-color: transparent; font-weight: 400; font-style: normal; font-variant: normal; text-decoration: none; vertical-align: baseline; white-space: pre-wrap;">First light’s address is 1, then add 7 for each subsequent light, i.e., 1, 8, 15, 22, etc.  
  
</span>

- <span style="font-size: 11pt; font-family: Arial,sans-serif; color: #000000; background-color: transparent; font-weight: 400; font-style: normal; font-variant: normal; text-decoration: none; vertical-align: baseline; white-space: pre-wrap;">Press </span><span style="font-size: 11pt; font-family: Arial,sans-serif; color: #000000; background-color: transparent; font-weight: bold; font-style: normal; font-variant: normal; text-decoration: none; vertical-align: baseline; white-space: pre-wrap;">Mode</span><span style="font-size: 11pt; font-family: Arial,sans-serif; color: #000000; background-color: transparent; font-weight: 400; font-style: normal; font-variant: normal; text-decoration: none; vertical-align: baseline; white-space: pre-wrap;"> until </span><span style="font-size: 11pt; font-family: Arial,sans-serif; color: #000000; background-color: transparent; font-weight: 400; font-style: normal; font-variant: normal; text-decoration: underline; -webkit-text-decoration-skip: none; text-decoration-skip-ink: none; vertical-align: baseline; white-space: pre-wrap;">Menu Set Addr</span><span style="font-size: 11pt; font-family: Arial,sans-serif; color: #000000; background-color: transparent; font-weight: 400; font-style: normal; font-variant: normal; text-decoration: none; vertical-align: baseline; white-space: pre-wrap;"> then </span><span style="font-size: 11pt; font-family: Arial,sans-serif; color: #000000; background-color: transparent; font-weight: bold; font-style: normal; font-variant: normal; text-decoration: none; vertical-align: baseline; white-space: pre-wrap;">Enter</span>
- <span style="font-size: 11pt; font-family: Arial,sans-serif; color: #000000; background-color: transparent; font-weight: 400; font-style: normal; font-variant: normal; text-decoration: none; vertical-align: baseline; white-space: pre-wrap;">Use </span><span style="font-size: 11pt; font-family: Arial,sans-serif; color: #000000; background-color: transparent; font-weight: bold; font-style: normal; font-variant: normal; text-decoration: none; vertical-align: baseline; white-space: pre-wrap;">Up/Down </span><span style="font-size: 11pt; font-family: Arial,sans-serif; color: #000000; background-color: transparent; font-weight: 400; font-style: normal; font-variant: normal; text-decoration: none; vertical-align: baseline; white-space: pre-wrap;">to set address then </span><span style="font-size: 11pt; font-family: Arial,sans-serif; color: #000000; background-color: transparent; font-weight: bold; font-style: normal; font-variant: normal; text-decoration: none; vertical-align: baseline; white-space: pre-wrap;">Enter</span>

## <span style="font-size: 16pt; font-family: Arial,sans-serif; color: #000000; background-color: transparent; font-weight: 400; font-style: normal; font-variant: normal; text-decoration: none; vertical-align: baseline; white-space: pre-wrap;">4. Set to 7-channel mode</span>

- <span style="font-size: 11pt; font-family: Arial,sans-serif; color: #000000; background-color: transparent; font-weight: 400; font-style: normal; font-variant: normal; text-decoration: none; vertical-align: baseline; white-space: pre-wrap;">Press </span><span style="font-size: 11pt; font-family: Arial,sans-serif; color: #000000; background-color: transparent; font-weight: bold; font-style: normal; font-variant: normal; text-decoration: none; vertical-align: baseline; white-space: pre-wrap;">Mode</span><span style="font-size: 11pt; font-family: Arial,sans-serif; color: #000000; background-color: transparent; font-weight: 400; font-style: normal; font-variant: normal; text-decoration: none; vertical-align: baseline; white-space: pre-wrap;"> until </span><span style="font-size: 11pt; font-family: Arial,sans-serif; color: #000000; background-color: transparent; font-weight: 400; font-style: normal; font-variant: normal; text-decoration: underline; -webkit-text-decoration-skip: none; text-decoration-skip-ink: none; vertical-align: baseline; white-space: pre-wrap;">Menu User Mode</span><span style="font-size: 11pt; font-family: Arial,sans-serif; color: #000000; background-color: transparent; font-weight: 400; font-style: normal; font-variant: normal; text-decoration: none; vertical-align: baseline; white-space: pre-wrap;"> then </span><span style="font-size: 11pt; font-family: Arial,sans-serif; color: #000000; background-color: transparent; font-weight: bold; font-style: normal; font-variant: normal; text-decoration: none; vertical-align: baseline; white-space: pre-wrap;">Enter</span>
- <span style="font-size: 11pt; font-family: Arial,sans-serif; color: #000000; background-color: transparent; font-weight: 400; font-style: normal; font-variant: normal; text-decoration: none; vertical-align: baseline; white-space: pre-wrap;">Press </span><span style="font-size: 11pt; font-family: Arial,sans-serif; color: #000000; background-color: transparent; font-weight: bold; font-style: normal; font-variant: normal; text-decoration: none; vertical-align: baseline; white-space: pre-wrap;">Up</span><span style="font-size: 11pt; font-family: Arial,sans-serif; color: #000000; background-color: transparent; font-weight: 400; font-style: normal; font-variant: normal; text-decoration: none; vertical-align: baseline; white-space: pre-wrap;"> to set </span><span style="font-size: 11pt; font-family: Arial,sans-serif; color: #000000; background-color: transparent; font-weight: 400; font-style: normal; font-variant: normal; text-decoration: underline; -webkit-text-decoration-skip: none; text-decoration-skip-ink: none; vertical-align: baseline; white-space: pre-wrap;">CH: 07</span><span style="font-size: 11pt; font-family: Arial,sans-serif; color: #000000; background-color: transparent; font-weight: 400; font-style: normal; font-variant: normal; text-decoration: none; vertical-align: baseline; white-space: pre-wrap;"> then </span><span style="font-size: 11pt; font-family: Arial,sans-serif; color: #000000; background-color: transparent; font-weight: bold; font-style: normal; font-variant: normal; text-decoration: none; vertical-align: baseline; white-space: pre-wrap;">Enter</span>
- <span style="font-size: 11pt; font-family: Arial,sans-serif; color: #000000; background-color: transparent; font-weight: 400; font-style: normal; font-variant: normal; text-decoration: none; vertical-align: baseline; white-space: pre-wrap;">Press </span><span style="font-size: 11pt; font-family: Arial,sans-serif; color: #000000; background-color: transparent; font-weight: bold; font-style: normal; font-variant: normal; text-decoration: none; vertical-align: baseline; white-space: pre-wrap;">Mode</span>

<span style="font-size: 11pt; font-family: Arial,sans-serif; color: #000000; background-color: transparent; font-weight: bold; font-style: normal; font-variant: normal; text-decoration: none; vertical-align: baseline; white-space: pre-wrap;">Still flummoxed? </span><span style="font-size: 11pt; font-family: Arial, sans-serif; color: rgb(0, 0, 0); background-color: transparent; font-style: normal; font-variant: normal; text-decoration: none; vertical-align: baseline; white-space: pre-wrap;">Here's the [ADJ 7P Hex IP - User Manual.pdf](https://wiki.futureturtles.com/attachments/22).</span>

</details>#### Pinspots

**ADJ Saber Spot RGBW LED Pinspot** set up in five channel mode. The 5 channels will be Red, Green, Blue, White, Master Dimmer.

These fixtures are well supported by the WMX1.

<details id="bkmrk-instructions-for-set-1"><summary>Instructions for setting up each pin spot</summary>

1\. Press the either the MENU, UP, or DOWN buttons until “DMX MODE” is displayed, press ENTER.  
2\. The current address will now be displayed and flashing.  
Press the UP or DOWN buttons to find your desired address.  
Press ENTER to set your desired DMX address (113, 118, 123, and 128).  
CHANNEL - This will let select your desired DMX  
channel mode.  
1\. Press the either the MENU button until “CHANNEL” is dis-  
played, press ENTER. The current DMX channel mode will be  
displayed.  
2\. Press the UP or DOWN buttons to set the DMX  
channel mode to 5 and press ENTER to confirm and exit.

Here is the manual: [ADJ Saber Spot RGBW Manual.pdf](https://wiki.futureturtles.com/attachments/23)

</details>#### Moving Heads

**DJXFLI 120W Mini SPOT LED Moving Heads**. These have 12 channels each: X, X Fine, Y, Y Fine, Speed from fast to slow, Dimming, Strobe, Color, Gobo, Prism, Reset.

These fixtures require a special fixture on the WMX1 called **DJXFLI 120W Moving Head Light**. We have downloaded the profile for this fixture to the cloud account so it should show up under **Cloud** in the WMX1 fixture library. If you don't see it there, you can sync it using the WTOOLS app.

<details id="bkmrk-instructions-for-set-2"><summary>Instructions for setting up each moving head</summary>

Sorry buddy you are on your own with this one.

</details>#### DJ and Bar LED Strips

Joel is building a setup with three **Alitove SP201E Decoders** which control LED strips.

DJ Booth Front - Set up as a generic RGBW four channel  
Bar Front - Set up as a generic RGBW four channel  
DJ Desk - shines a light on the DJ, with RGBWV five channel (V is Ultra Violet so you can make the DJ glow)

### Layout

Par Floods are on the ground around the edge of the pavillion, pointing up at the sails. They are positioned to give even light to illuminate the sails:

[![Screenshot 2025-06-10 at 4.15.02 PM.png](https://wiki.futureturtles.com/uploads/images/gallery/2025-06/scaled-1680-/wHNZ6juQEwHoEtIt-screenshot-2025-06-10-at-4-15-02-pm.png)](https://wiki.futureturtles.com/uploads/images/gallery/2025-06/wHNZ6juQEwHoEtIt-screenshot-2025-06-10-at-4-15-02-pm.png)

The four Saber Spot Pinlights will be used for the rear sails.

Moving lamps will be clamped to the top, inner guardrail, with four on each shipping container:

[![Screenshot 2025-06-10 at 4.23.15 PM.png](https://wiki.futureturtles.com/uploads/images/gallery/2025-06/scaled-1680-/72gTZ4H1sXD2ErTz-screenshot-2025-06-10-at-4-23-15-pm.png)](https://wiki.futureturtles.com/uploads/images/gallery/2025-06/72gTZ4H1sXD2ErTz-screenshot-2025-06-10-at-4-23-15-pm.png)

**Here's how it all looks:**

[![Screenshot 2025-06-18 at 11.40.38 AM.png](https://wiki.futureturtles.com/uploads/images/gallery/2025-06/scaled-1680-/vlPirlkOf4cPTjXV-screenshot-2025-06-18-at-11-40-38-am.png)](https://wiki.futureturtles.com/uploads/images/gallery/2025-06/vlPirlkOf4cPTjXV-screenshot-2025-06-18-at-11-40-38-am.png)

### Cabling

The DMX path will be clockwise. It starts at the DJ booth (to the right of the Tool Fort), then goes first to fixture #02, then proceeds strictly clockwise to fixture #03. This way there is only one spot where it has to cross a walking path, which is between fixtures #18 and #17. At this point we will use a DMX transmitter and receiver. If that fails, we can pull an DMX cable up and over the entrance to the lounge.

Power cables are daisy chained wherever possible. There are spider boxes at the DJ booth and bar which get their power from separate cables so no power cables have to cross the dance floor or passageways.

### WMX1 Presets

The Wolfmix (WMX1) Controller allows us to program up to 10 pages of 20 presets (200 total) to easily control lights (press the big "Preset" Button to access). Before the burn, we'll have the following pre-programmed in the controller

- Pages 1-5: "Smart presets" that were built by the software that have some default scenes
- Pages 6-8: Specific presets built by Turtles to provide quick access to scenes for parties
- Pages 9-10: Scenes to be played during non-party nights that will look cool from far away and will not be distracting to people in the common space. They will be played on a slow loop

# Pillow Fort

The Pillow Fort is a (28'?) towed trailer.

During Burning Man, it is a comfy, dark, air conditioned spot to hang out in.

During the rest of the year, it is used to store much of the camp's other furniture/cushions.

# Pillow Fort Set Up

*Updated for Burning Man 2025.*

[![A.jpg](https://wiki.futureturtles.com/uploads/images/gallery/2025-03/scaled-1680-/r4Jon2BzscTqfDBR-a.jpg)](https://wiki.futureturtles.com/uploads/images/gallery/2025-03/r4Jon2BzscTqfDBR-a.jpg)

The Pillow Fort is fairly easy to set up, and this guide will help you along the way!

Pillow fort tricks:

<p class="callout info">If the front passenger door feels stuck or locked, but it's not locked, you will have to press in right above the latch while pulling the latch open.</p>

<p class="callout info">If you want to prop the door open, which we do whenever the pillow fort is open to the public, use the hook on the outside bottom of the door</p>

<p class="callout info">The pillow fort has D-hooks along the top exterior edge located every 18" which can be connected to tarps.</p>

<p class="callout info">We try to build a shade structure over the pillow fort so the sun isn't hitting directly on the roof. This helps keep it cooler.</p>

#### Physical Setup

After the pillow fort has been dropped off, you need to stabilize the back corners so it doesn't tip backwards. There are stabilizing jacks located inside the passenger door on the right. Install two of them under the rear corners. **Important: They should be positioned so as to provide support to the main, load-bearing steel frame of the trailer.**

[![Untitled.png](https://wiki.futureturtles.com/uploads/images/gallery/2025-03/scaled-1680-/vd3mDPPtmsgVPYIF-untitled.png)](https://wiki.futureturtles.com/uploads/images/gallery/2025-03/vd3mDPPtmsgVPYIF-untitled.png)

<details id="bkmrk-stabilizing-jack-ins"><summary>Stabilizing Jack Installation Instructions</summary>

The long bolt in the center of the jack stand is threaded; At the top of the jack stand is a large nut that fits into a pocket to keep it from turning; The center bolt raises and lowers by turning the long bolt with the T-handle, either clockwise or counter-clockwise; Place under a section of sub frame close to the corners. The manufacturer recommends using wood or concrete blocks under jacks.

[![Screenshot 2023-07-06 at 2.59.53 PM.png](https://wiki.futureturtles.com/uploads/images/gallery/2025-03/scaled-1680-/FlyqX417wkch82X8-screenshot-2023-07-06-at-2-59-53-pm.png)
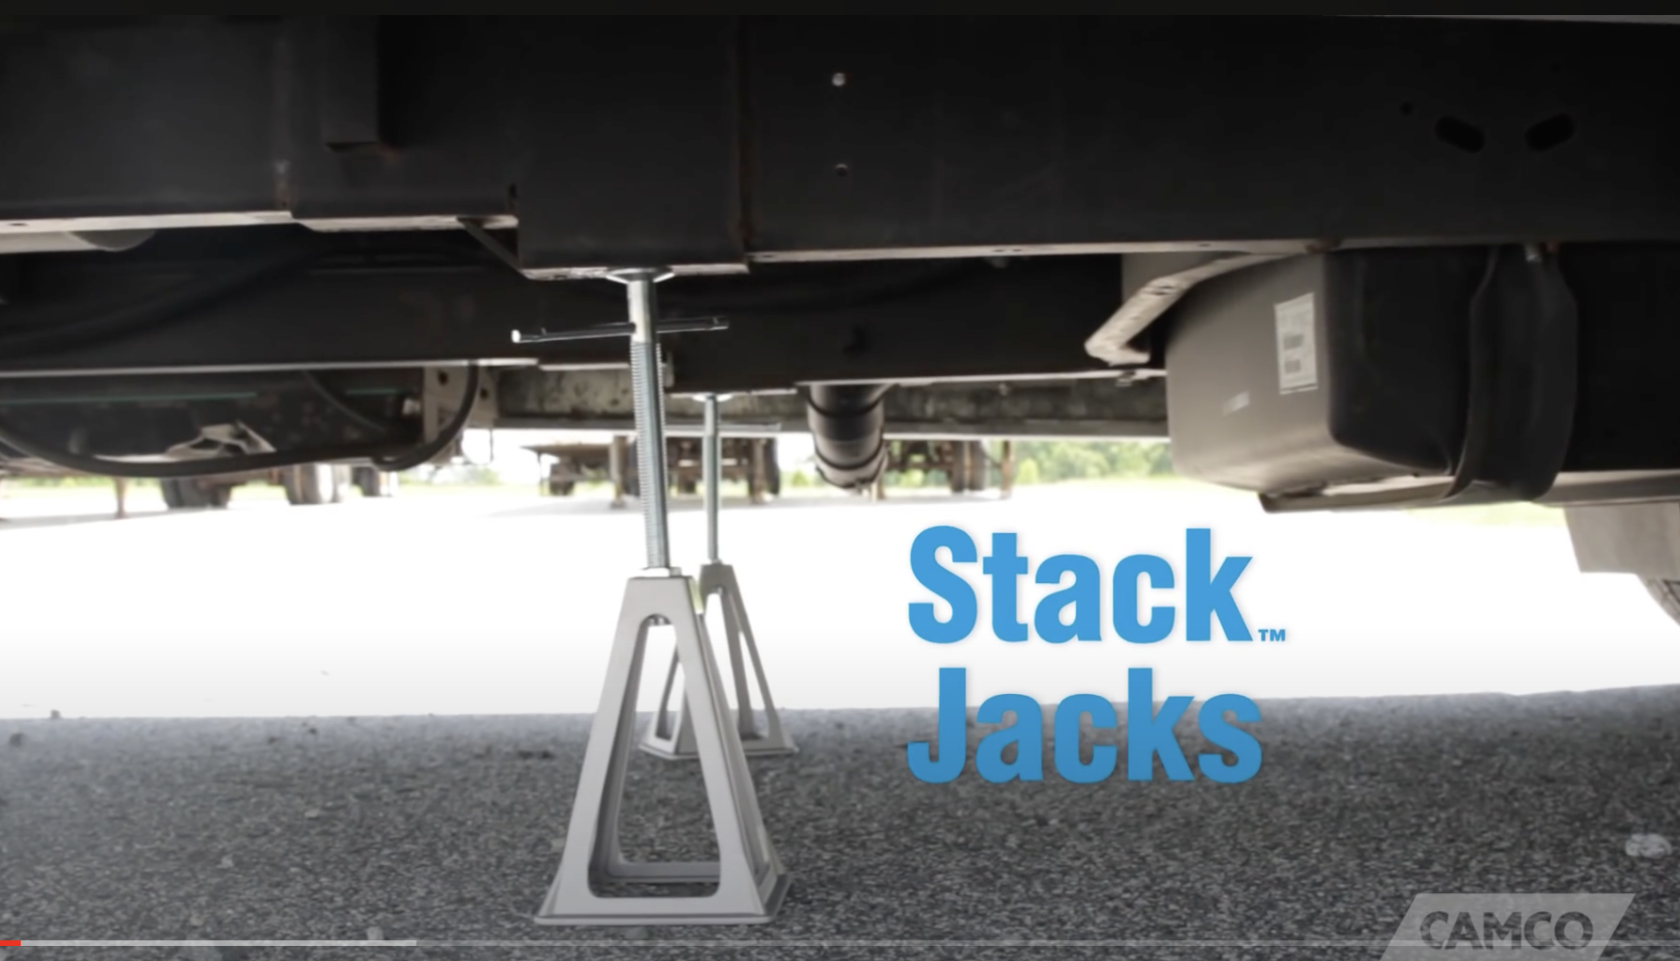
](https://wiki.futureturtles.com/uploads/images/gallery/2025-03/FlyqX417wkch82X8-screenshot-2023-07-06-at-2-59-53-pm.png)

They are <span class="notion-enable-hover" data-token-index="1" style="font-weight: 600;">not</span> strong enough to support the weight of the trailer, so don’t jack them so far that they are pushing the trailer up in the air. They are only intended to keep the trailer from tipping back when people walk to the back, and to keep the trailer from rocking back and forth.

**Warning: If you install the jacks when the trailer is empty, and try to remove them when the trailer is loaded, you will find that the added weight pressing down on the jacks makes it extremely difficult to remove them.** You should install the jacks immediately on delivery when the trailer is at its maximum weight so they will be easy to remove.

</details>The infrastructure team will provide power to the trailer by connecting the NEMA SS2-50P plug, located on the front exterior, to a [spider box](https://wiki.futureturtles.com/books/burning-man-infrastructure/page/on-playa-electrical-grid "On Playa Electrical Grid").

The pillow fort contains gear that goes elsewhere in camp such as audio and lighting equipment, and some gear that will not end up being used on playa but needs to be stored someplace sheltered. Before you empty the pillow fort, you will probably want to set up a tent where this equipment can be move and stored during build week.

- Empty most items from the trailer, including bed frames. Any items that are intended for the pillow fort should already be on the bench in front; those can stay inside
- Sweep out moop
- Run A/Cs full blast to get dust out
- Tape up a hammock filter over inlets of each AC
- Run the leaf blower from front to back to get out any remaining dust.
- Close the back door

#### Decor

- **Take off your shoes!** from this point forward the pillow fort should be a shoe- and dust-free zone.
- Hang the plastic protective flaps in front of the entrance door, which block light and dust when the front door is open. There are two layers of flaps.
- Unfold and place the floor padding. The pieces are numbered; start with the H-shaped piece 1 in front. The padding will not go all the way to the back. Make sure the side with the fine plastic mesh faces down. Dog for scale.

[![IMG_2148.jpg](https://wiki.futureturtles.com/uploads/images/gallery/2025-03/scaled-1680-/Fs8l6Iil6T0UXRO4-img-2148.jpg)](https://wiki.futureturtles.com/uploads/images/gallery/2025-03/Fs8l6Iil6T0UXRO4-img-2148.jpg)

- Unfold the shaped carpet. It is similarly tailored.

[![IMG_2149.jpg](https://wiki.futureturtles.com/uploads/images/gallery/2025-03/scaled-1680-/Mo7Dgq75jBXAhvh1-img-2149.jpg)](https://wiki.futureturtles.com/uploads/images/gallery/2025-03/Mo7Dgq75jBXAhvh1-img-2149.jpg)

- Unroll the multicolored shimmery fabric, and hang it in the back by zigzagging the string through the D-hooks provided.
- Place the bed frames and mattresses. Notice one bed frame has a short leg where it sits on the wheel well.

[![layoutbeds.jpg](https://wiki.futureturtles.com/uploads/images/gallery/2025-03/scaled-1680-/fIlAEJSdvgfZbiGq-layoutbeds.jpg)](https://wiki.futureturtles.com/uploads/images/gallery/2025-03/fIlAEJSdvgfZbiGq-layoutbeds.jpg)

[![IMG_2153.jpg](https://wiki.futureturtles.com/uploads/images/gallery/2025-03/scaled-1680-/L4igXk38BfXbAg8d-img-2153.jpg)](https://wiki.futureturtles.com/uploads/images/gallery/2025-03/L4igXk38BfXbAg8d-img-2153.jpg)

- Roll down the wall decorations. Try to keep the bungees attached to the metal mounting grates if they are already looped through them - the staples are not a great way to affix them.
- Find the large black plastic tub with the hanging decorations and lights. Place the hanging decorations using the photos below as a guide. Look for felt 'circles' on the ceiling that have hooks for hanging. The hooks are surrounding the ceiling LED loops: the marine decor should hang from the four hooks that are screwed through the LED loops.

<p class="callout warning">Be careful with the <span class="notion-enable-hover" data-token-index="1" style="font-weight: 600;">felt baffles </span>hanging under/around the LED loops, these are installed in additional hooks around the LED loops. If the felt baffles fall off they can be reassembled and installed, but be careful to not bend/rip them.  
</p>

<p class="callout info">The 2 black mesh bags with round plastic orbs are placed in the back. It's possible to hang them using only two points, so that they hang higher. You might have to temporarily remove the foam 'cuff' from the ceiling in order to hook them in.</p>

[![photo_6_2025-03-10_16-11-07.jpg](https://wiki.futureturtles.com/uploads/images/gallery/2025-03/scaled-1680-/GJ54nAGPp0YFNQmX-photo-6-2025-03-10-16-11-07.jpg)
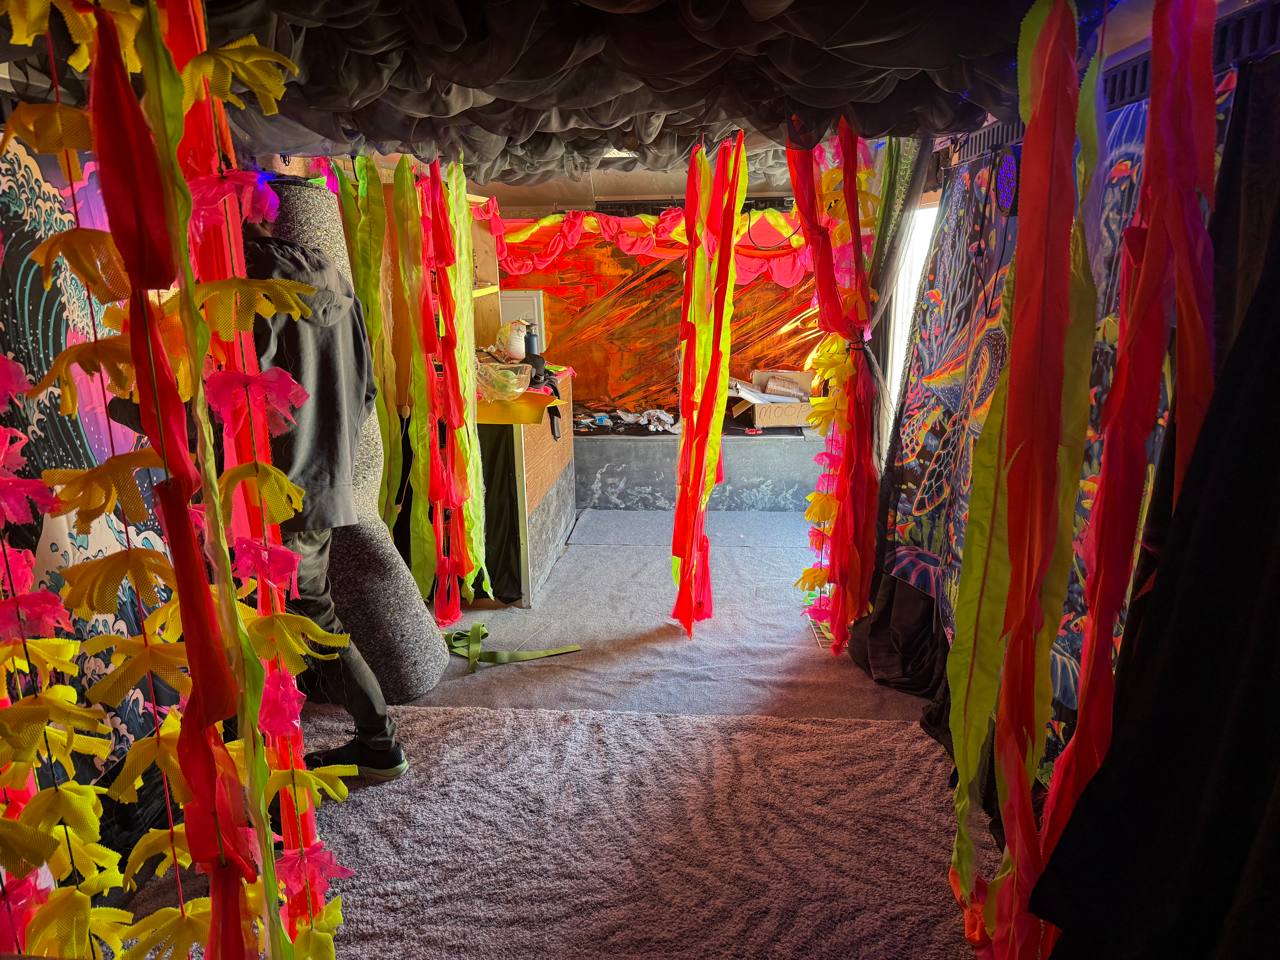
](https://wiki.futureturtles.com/uploads/images/gallery/2025-03/GJ54nAGPp0YFNQmX-photo-6-2025-03-10-16-11-07.jpg)

*[![photo_8_2025-03-10_16-11-07.jpg](https://wiki.futureturtles.com/uploads/images/gallery/2025-03/scaled-1680-/3jUhy8FPliwa29Fw-photo-8-2025-03-10-16-11-07.jpg)
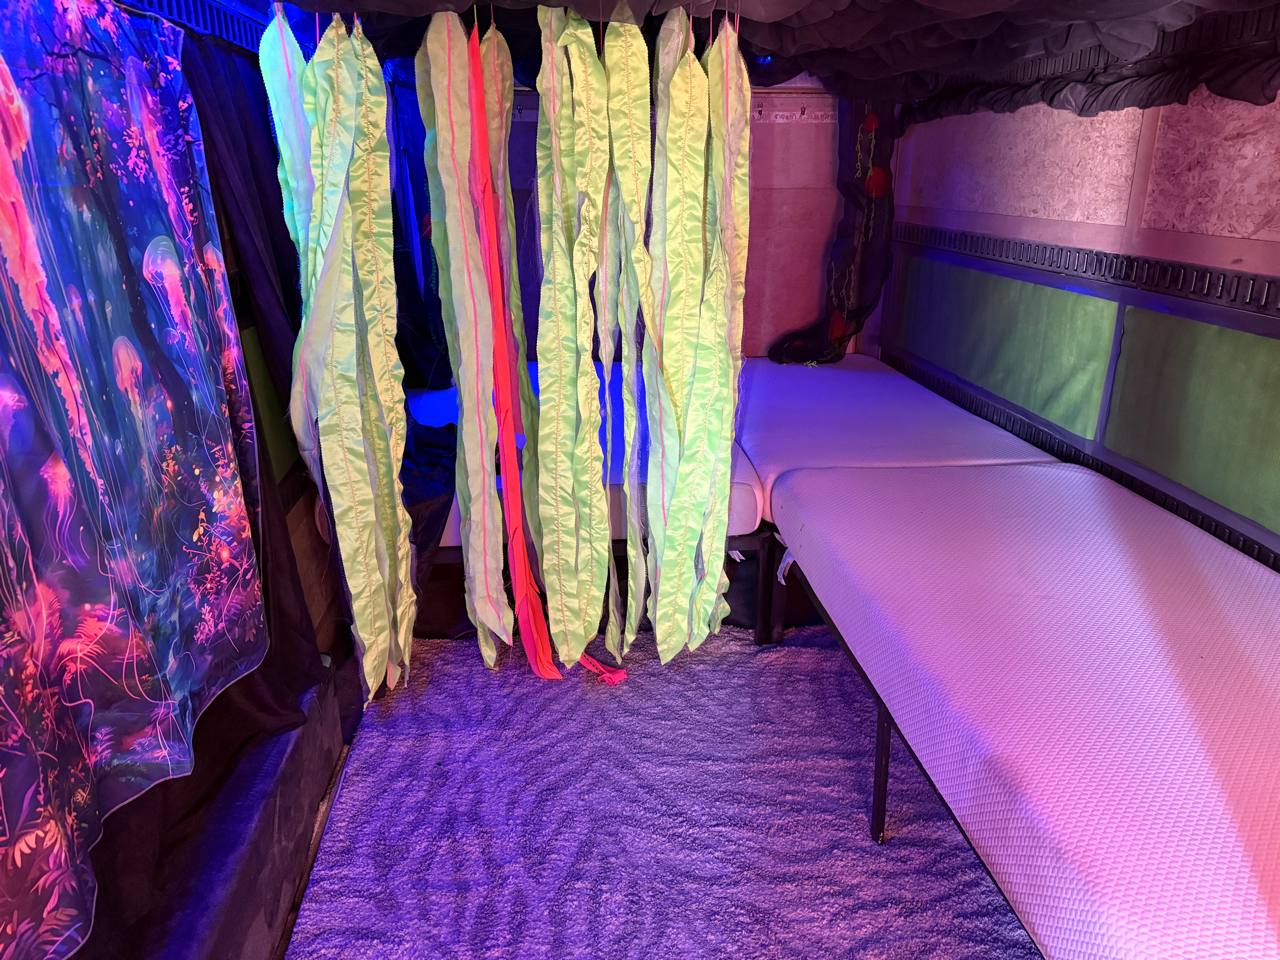
](https://wiki.futureturtles.com/uploads/images/gallery/2025-03/3jUhy8FPliwa29Fw-photo-8-2025-03-10-16-11-07.jpg)*

- Roll out three rectangular shag rugs. One looks like this:

[![rug3.jpg](https://wiki.futureturtles.com/uploads/images/gallery/2025-03/scaled-1680-/BfRKCo6QWeHYAx3G-rug3.jpg)
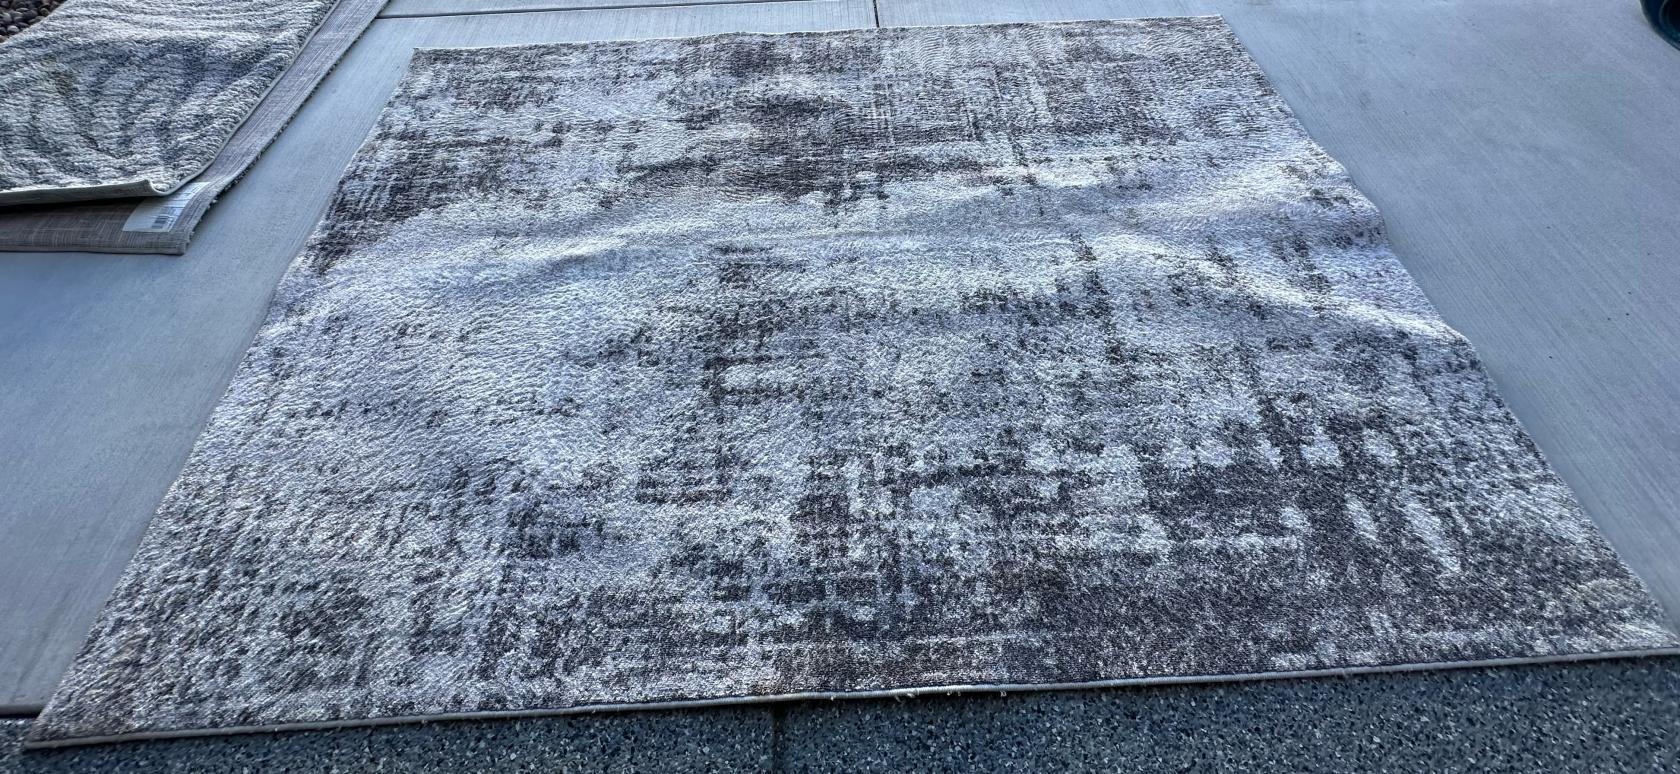
](https://wiki.futureturtles.com/uploads/images/gallery/2025-03/BfRKCo6QWeHYAx3G-rug3.jpg)

Two look like this:

[![rug12.jpg](https://wiki.futureturtles.com/uploads/images/gallery/2025-03/scaled-1680-/Gx6ftqaXIsXawRtC-rug12.jpg)
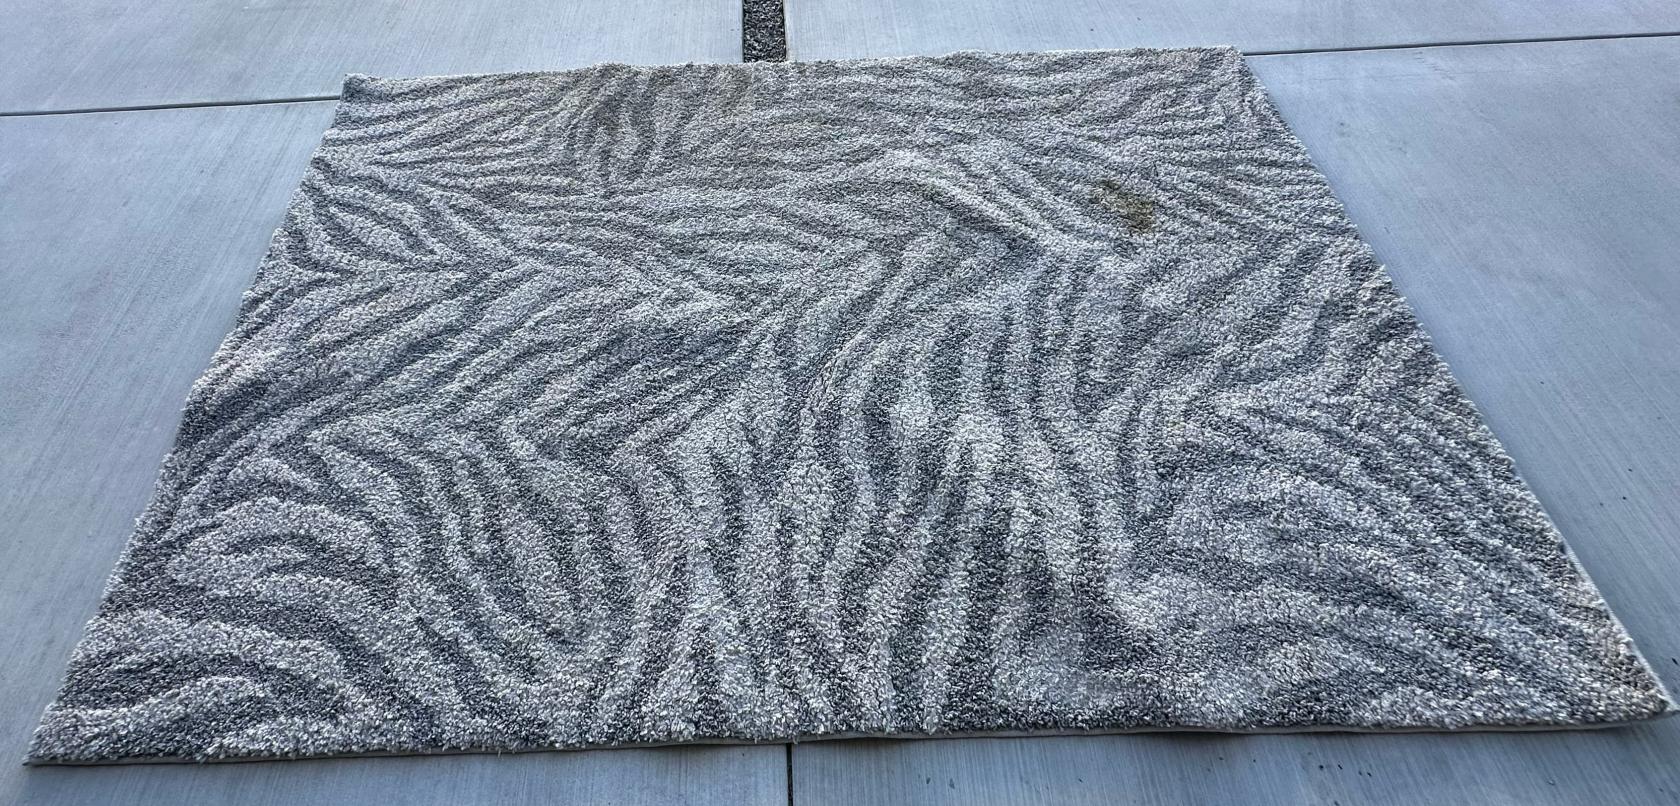
](https://wiki.futureturtles.com/uploads/images/gallery/2025-03/Gx6ftqaXIsXawRtC-rug12.jpg)

- Hang up the three medium sized black flood lights so that they are shooting ACROSS the trailer, on to one of the murals. There are extension cords going from the power outlets that should facilitate to this. Use a zip tie or a bungee to affix them to the top mounting rack. Try to keep the lights away from power cords or other sensitive items, as they do get hot over time.
- Turn on the USB blacklights; their controllers are to the right of the 'work table'. They should be plugged in to the controller on the top of the 'work table'.

[![photo_9_2025-03-10_16-11-07.jpg](https://wiki.futureturtles.com/uploads/images/gallery/2025-03/scaled-1680-/fscjKkyH8tzAwkib-photo-9-2025-03-10-16-11-07.jpg)
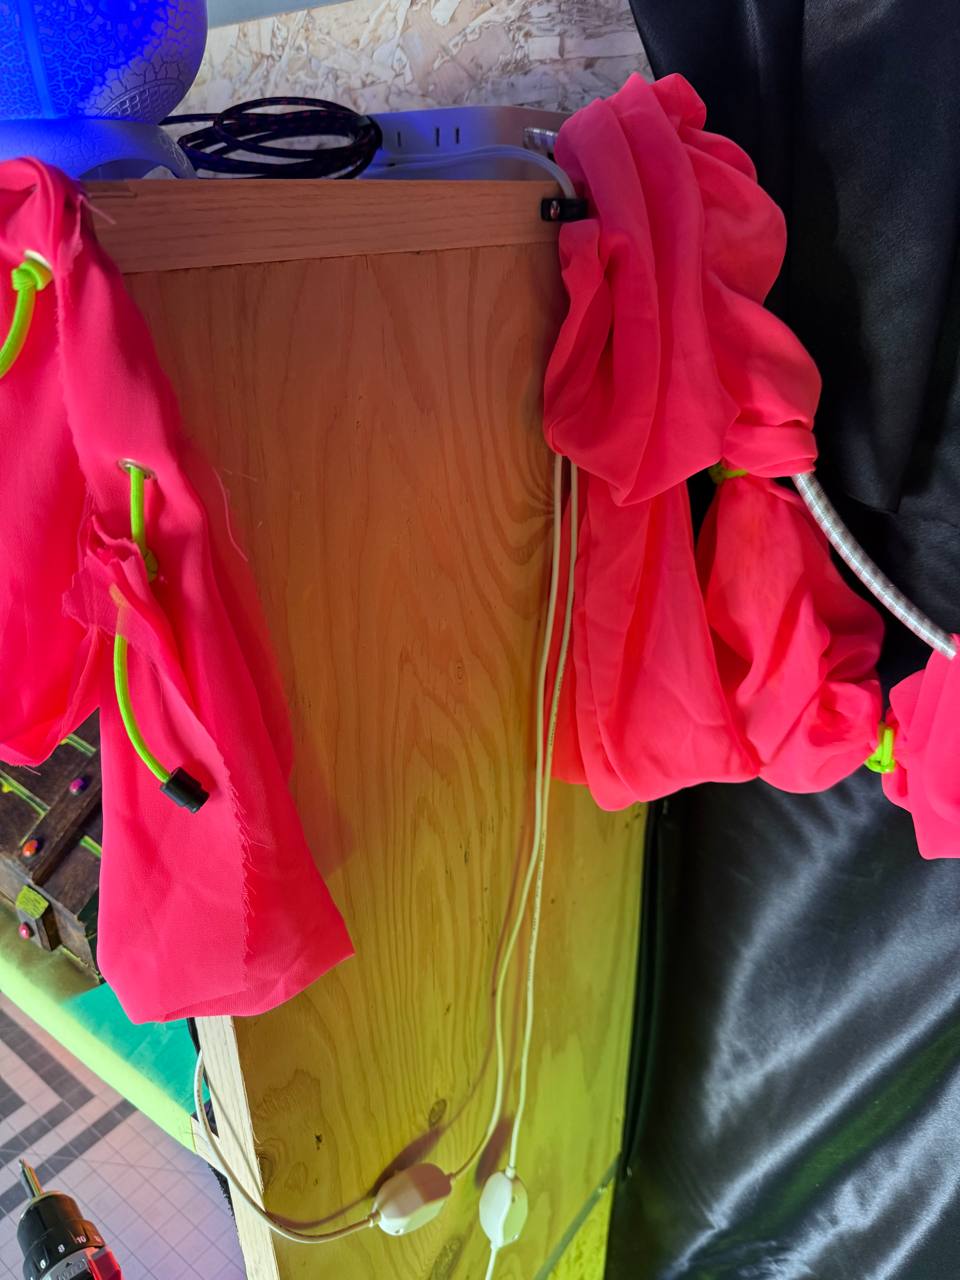
](https://wiki.futureturtles.com/uploads/images/gallery/2025-03/fscjKkyH8tzAwkib-photo-9-2025-03-10-16-11-07.jpg)

- Set up the entrance table exhibit.

<p class="callout info">The entrance exhibit is meant to evoke an underwater / seafaring vibe, as if you found the gear from an old sea captain's cabin that had sunk below the sea. It provides a lit focal point when you enter the trailer. It also provides intimate and cleanup supplies, like condoms, lube, wet-wipes, nitrile gloves, paper towels, a little trash can, and a flashlight to help people clean up, in a well-lit space so visitors see it and know to use it.</p>

- All the components are in one tote. Place the pink sheet on top of the work table; it should be inside one of the chests. Here's what it roughly looks like:

[![9de17528-151c-4c28-b44c-41a9a0e6be5e.jpg](https://wiki.futureturtles.com/uploads/images/gallery/2025-03/scaled-1680-/n0wk9dOlapMSWIj8-9de17528-151c-4c28-b44c-41a9a0e6be5e.jpg)
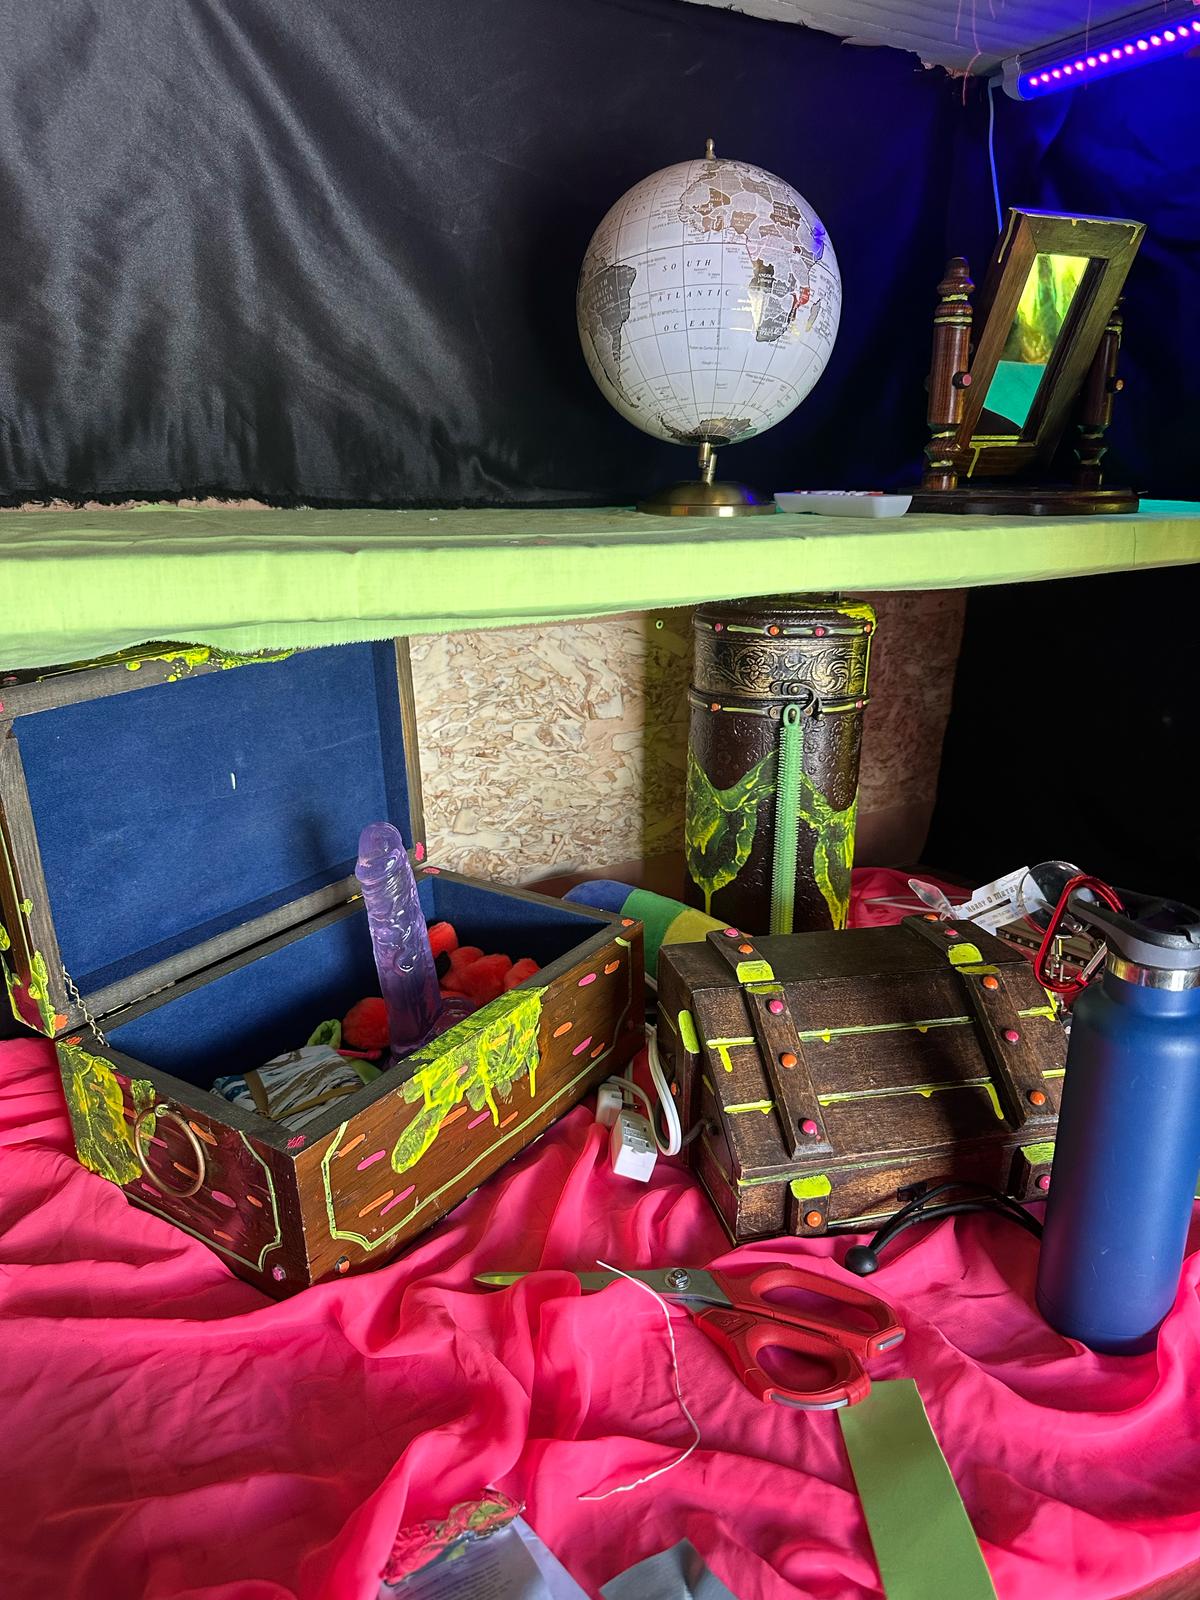
](https://wiki.futureturtles.com/uploads/images/gallery/2025-03/n0wk9dOlapMSWIj8-9de17528-151c-4c28-b44c-41a9a0e6be5e.jpg)

- Plug in the 'Turtle Egg' to the same USB port on top of the 'work table'. Position the base/projecter so that it projects on to one of the undersea murals for a 'wavy' effect. Optional: connect to the bluetooth and play some chill ambient music.
- Find three clear totes containing sheets - two for twin size and one for full size sheets. Each tote contains a waterproof mattress protector - install those on the mattresses now. Then make the beds with one fitted sheet each.
- Find the clear tote containing clean-up supplies. Put out the supplies in the entry exhibit area so they are clearly visible. Cleanup gear should be clearly visible and well lit so visitors use it!
- Open the two miniature wood chests and put some lube and condoms in the small one. Put some wet wipes and gloves in the larger chest. Sprinkle the little plastic fish around the display table.
- Turn on the installed lights. One plug should be in the door and one near the 'work table'. Here is what the cables near the door look like. Feel free to select a color; we typically go with blue or violet.

[![photo_1_2025-03-10_16-11-07.jpg](https://wiki.futureturtles.com/uploads/images/gallery/2025-03/scaled-1680-/zVbCpFZimNS0e6lb-photo-1-2025-03-10-16-11-07.jpg)
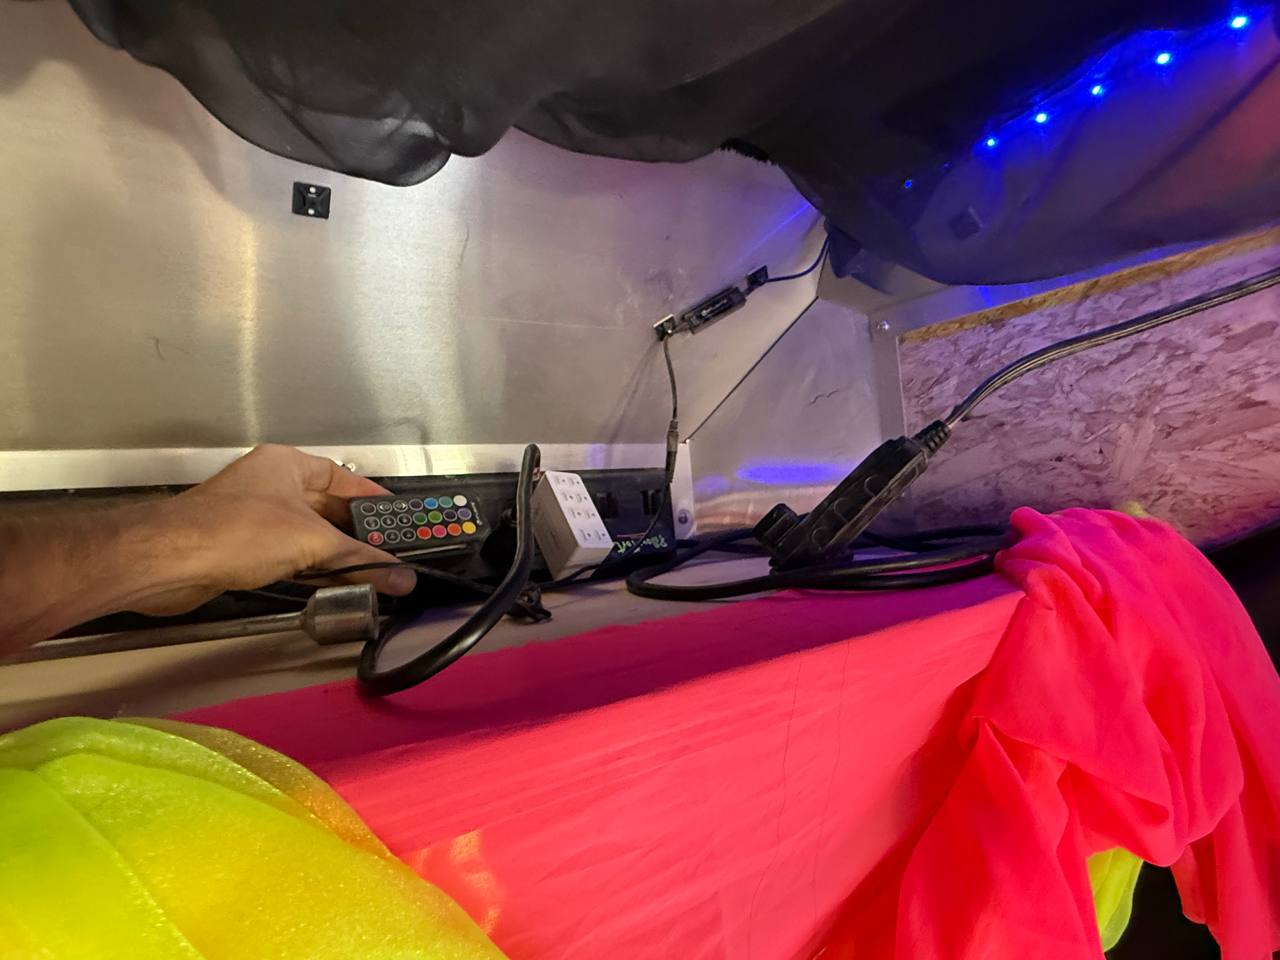
](https://wiki.futureturtles.com/uploads/images/gallery/2025-03/zVbCpFZimNS0e6lb-photo-1-2025-03-10-16-11-07.jpg)

- Store the sheet totes and the cleanup tote under the first bed so they are readily accessible by the cleanup team.
- There are four large trash bags containing rock-shaped pillows and other underwater plush toys like starfish. Distribute them artfully throughout.
- Turn on the A/C.

Congrats! You've set up the pillow fort and it is now ready for lounging. Invite others to nest when you decide to leave its cool embrace.

# Pillow Fort Technical Specs + Upgrade Ideas

*The Pillow Fort is an 8' x 28' tow trailer.*

It has a series of three rows of metal mount points on each side.

It has four power outlets along the floor, and ceiling level wiring in the bow.

It has two air conditioning units mounted on the roof.

It has thin strips of wood layered over a flimsy compressed wood backing.

Currently, yoga mats with insulation behind them are stapled on to the wood strips, with a duct layer surrounding the edges and staples.

The work table is 48 " width and the two shelves on top are 16" high x 16" deep.

So the back panels are 48" x 16".

Most of the panels are one yoga width length.

The two forward outlets are being used by the current wiring scheme.

The rear power outlets are not being used. It has 4? power outlets on the outside.

### Possible Upgrades / Renovations

Add some sort of lube/rag container to be placed next to the beds in the back, potentially next to the power outlet. Unsure how to make this not a tripping hazard but it would come in handy. Maybe a wall mounted kleenex box?

Add another strip of lighting to the left side of the trailer near the ceiling, to mirror the existing strip. An RGB strip that can provide blacklight would be ideal. It could be wired to some of the power at the top of the 'work table'.

Finish covering the exposed wood in a few places, like near power outlets. Fabric stapled has been the go to method.

Resealing the yoga mat padding with some sort of less toxic tape, after restapling the existing tape to the wood strips, would be one way to improve it. Tarping or upholstering or gorrila tape are all possible ways to seal this up.

Eventually, supports through the metal frame is probably the most durable solution to the padding problem.

A tapestry or art piece over the front of the work table when you first enter would be great. Remove the yoga matts from it if necessary.

Adding some sort of power bank for charging batteries/phones would be another easy upgrade.

# Miscellaneous Specs & Notes

**Pillow Fort Outside Paint Colors**

PPG1236-6 - Jamaican Sea

PPG1159-7 / Singing the Blues

Ppg 1205-7 Fall Gold

Ppg 17-22 / Dynamo

NAPOLEON / PPG1013-7

ROSE GLORY / PPG1181-5

MOONDANCE / PPG1043-2

RUM PUNCH / PPG1190-7

# Camp Rugs

<p class="callout info">These rugs can be power washed in a dry sunny place and air-dried.</p>

## 2025 Reserved for Pillow Fort

#### Qty 2 - 5x7 Grey / Grey Wave 

[![IMG_2160.jpg](https://wiki.futureturtles.com/uploads/images/gallery/2025-03/scaled-1680-/M5H7xuYrs3lhL43L-img-2160.jpg)
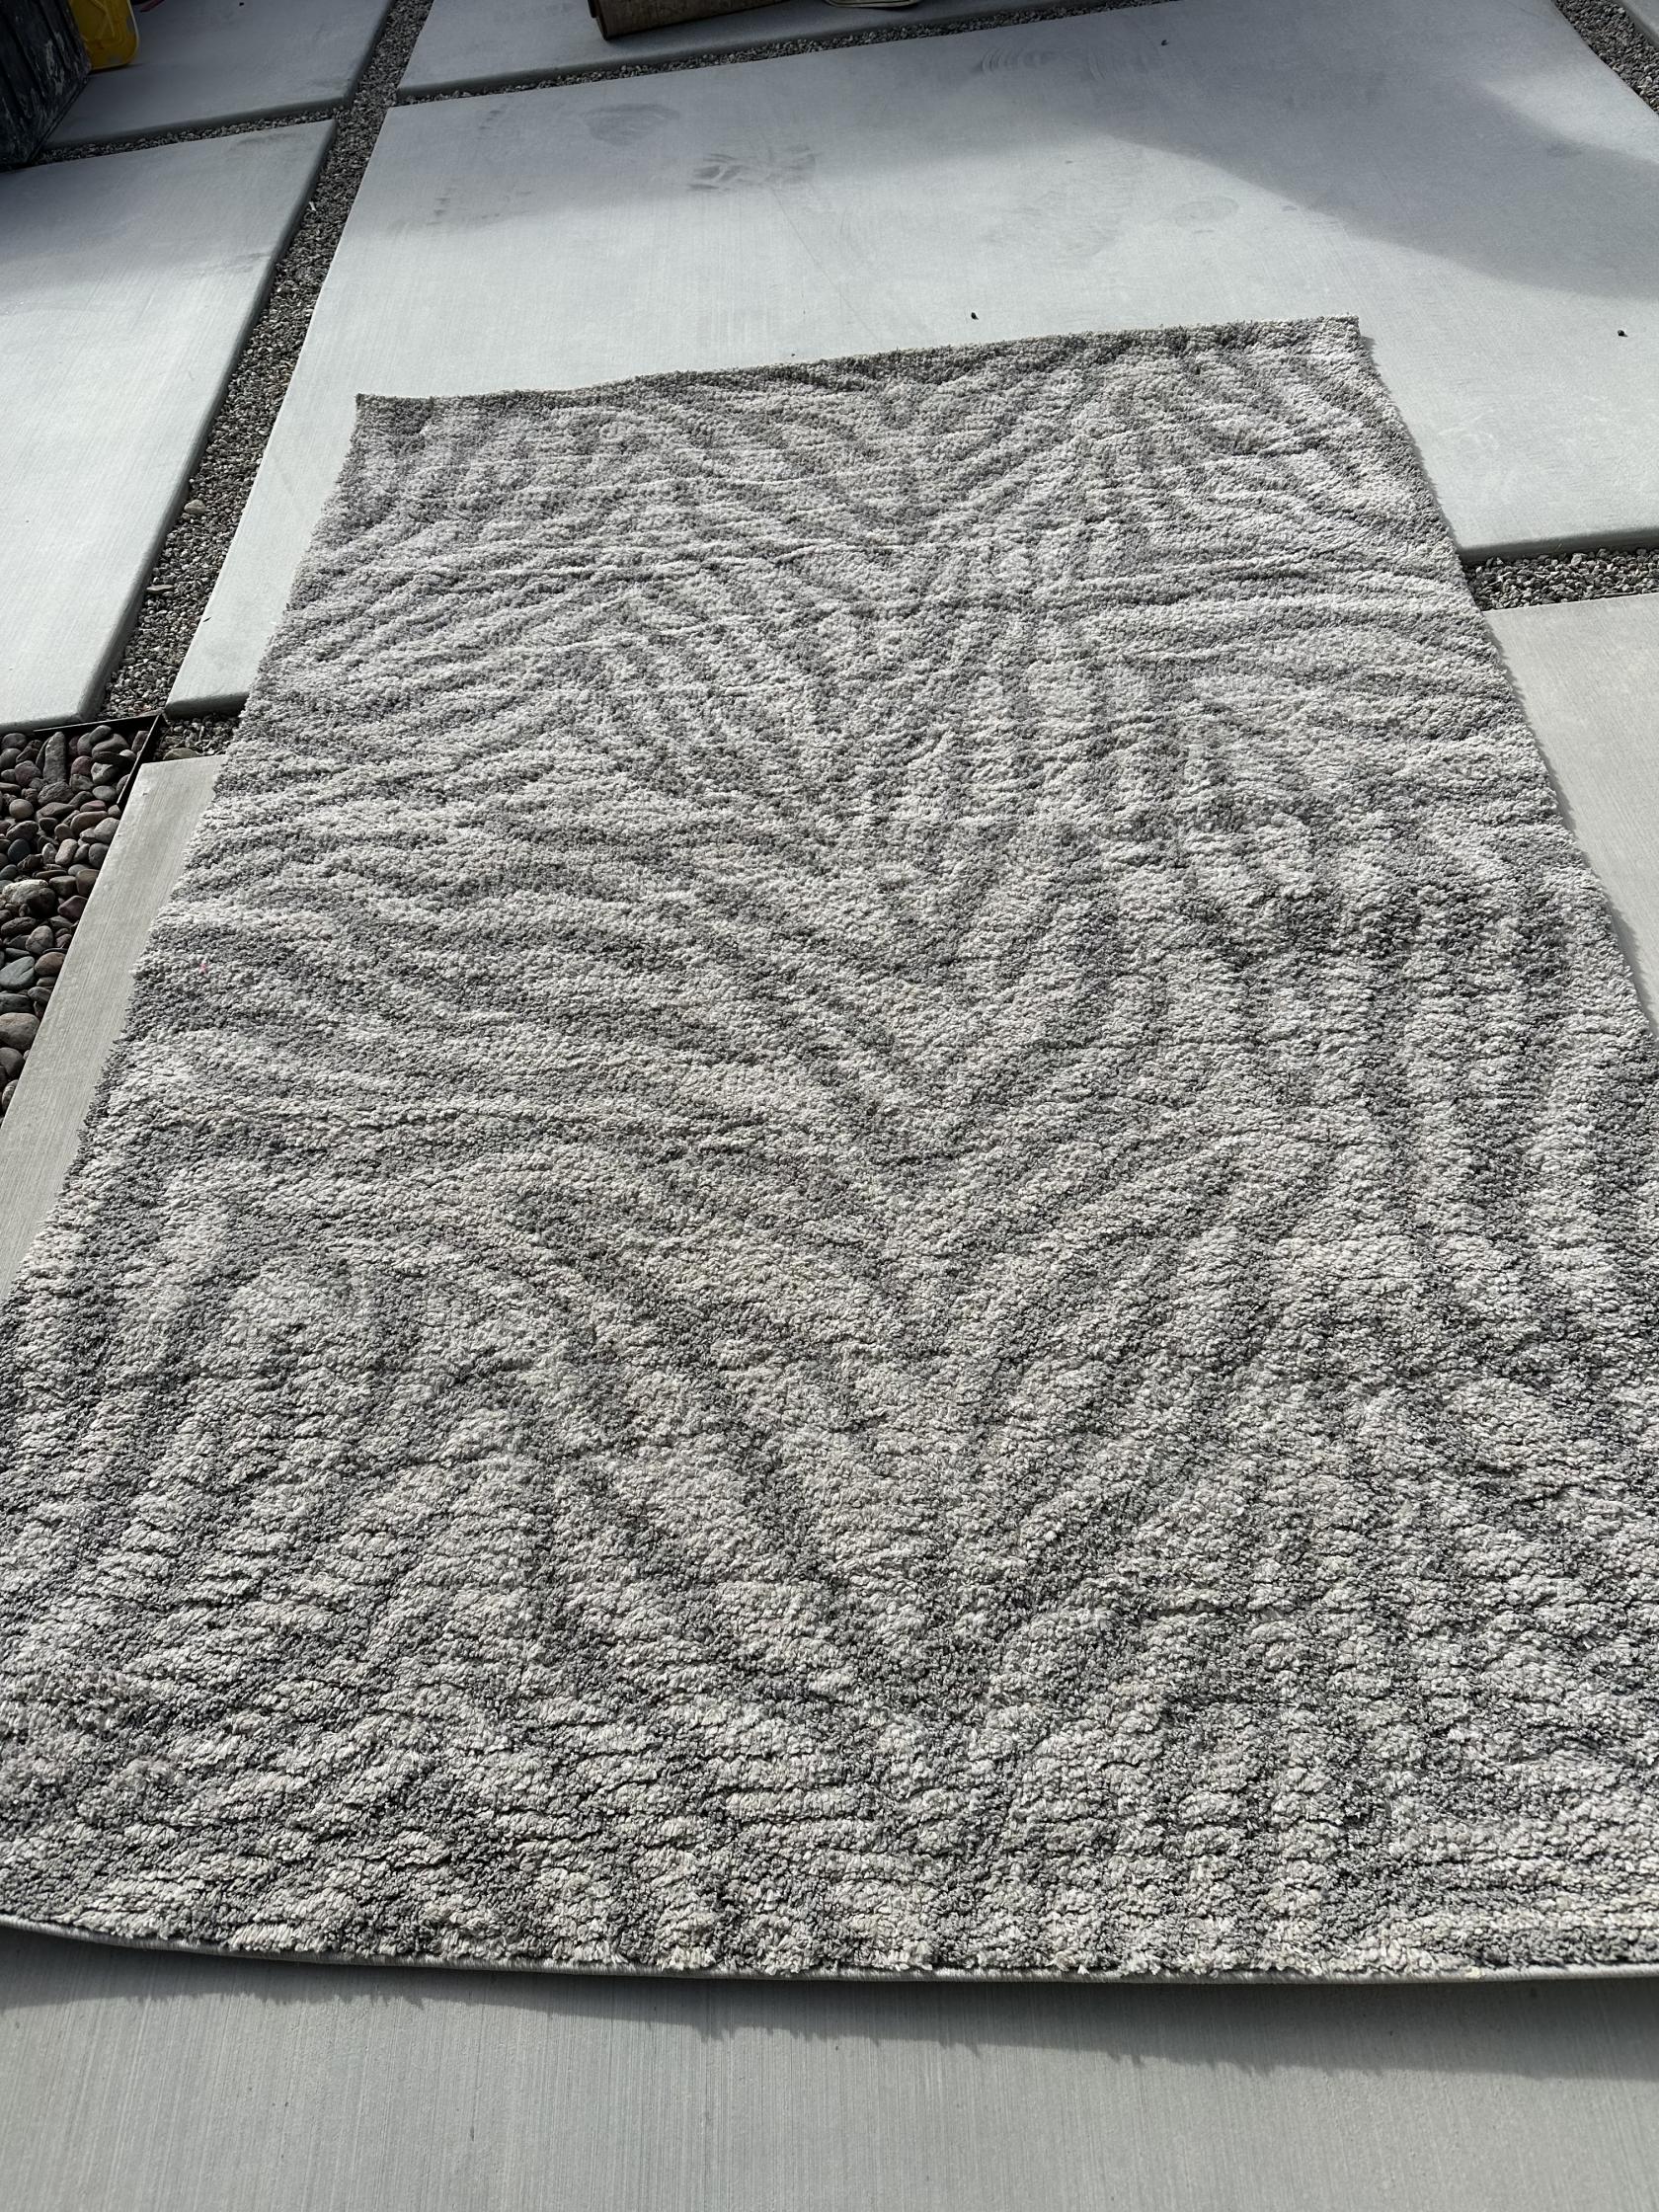
](https://wiki.futureturtles.com/uploads/images/gallery/2025-03/M5H7xuYrs3lhL43L-img-2160.jpg)

#### 5x7 Low Pile Grey Black Abstract Modern

[![IMG_2139.jpg](https://wiki.futureturtles.com/uploads/images/gallery/2025-03/scaled-1680-/Jfqme8e0hg7mwbrt-img-2139.jpg)
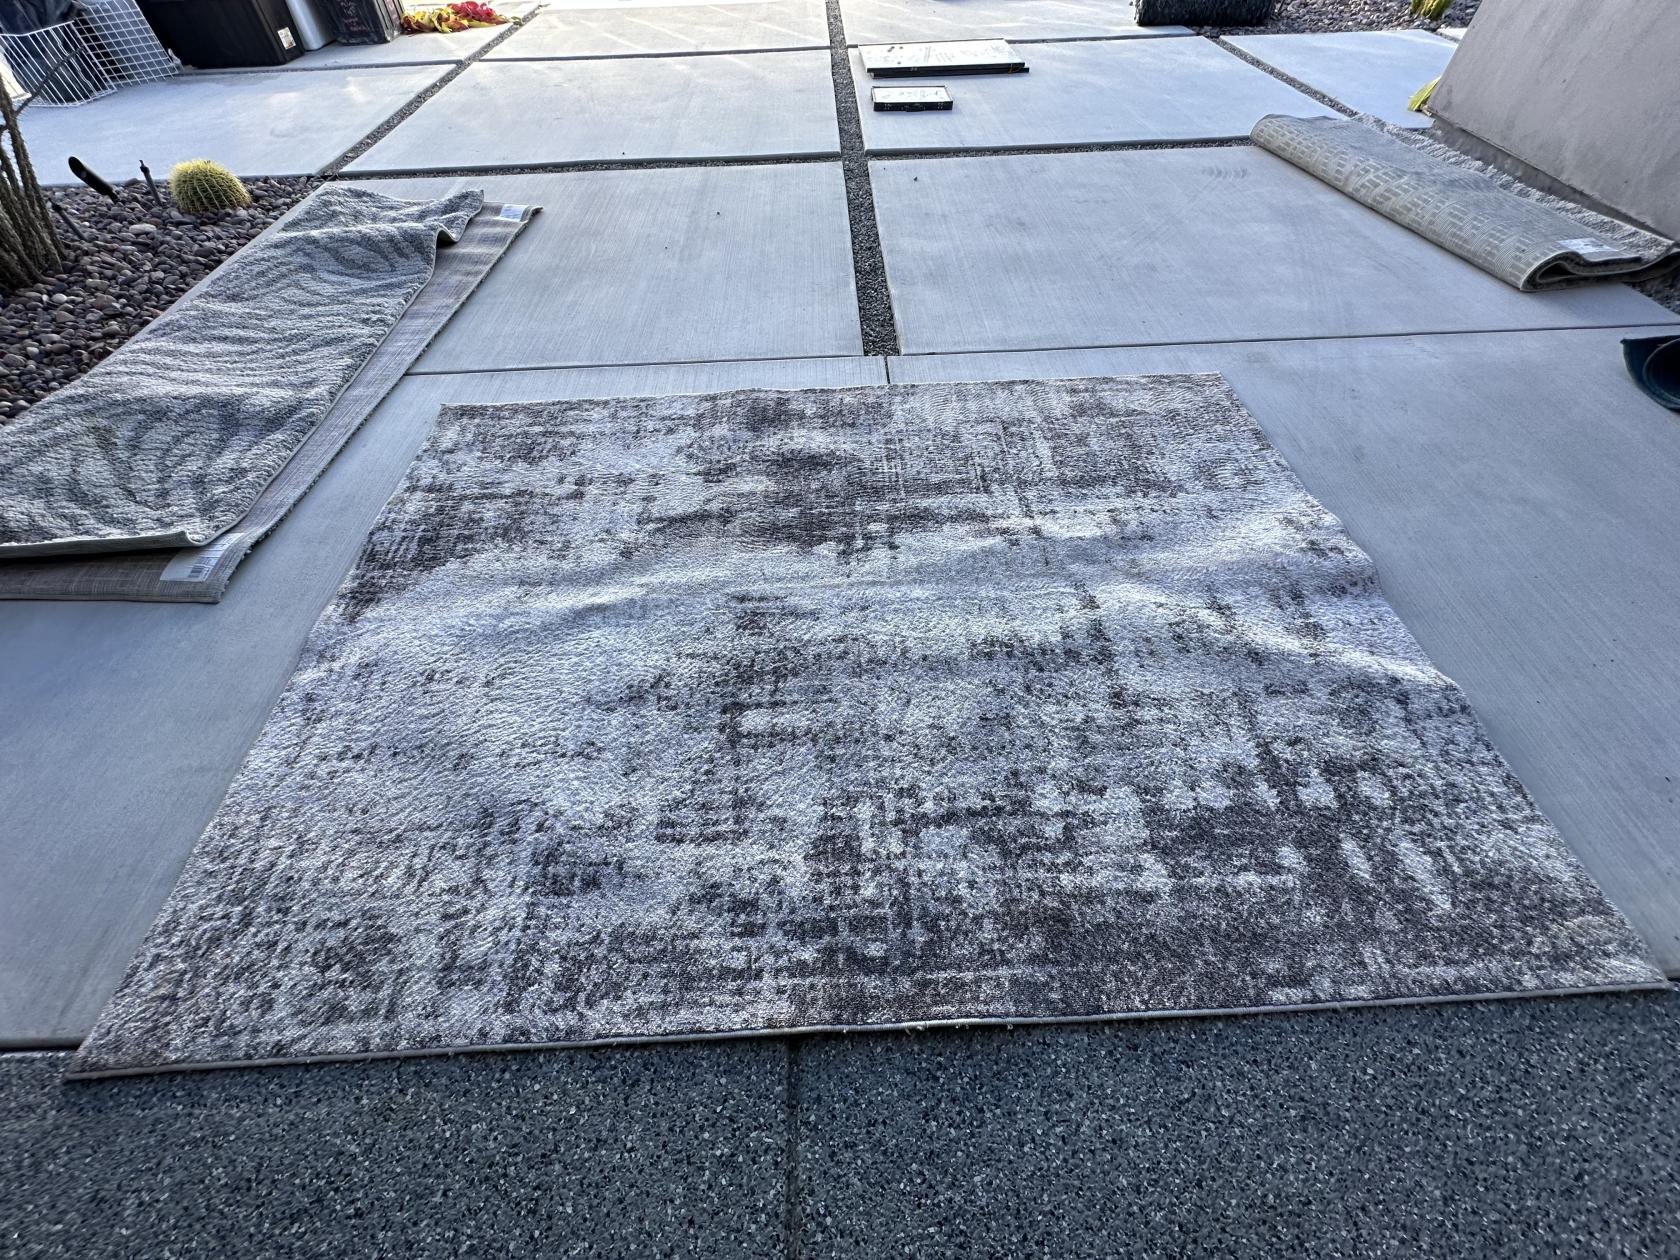
](https://wiki.futureturtles.com/uploads/images/gallery/2025-03/Jfqme8e0hg7mwbrt-img-2139.jpg)

## 2025 Reserved for Lotus Belle 16' Kink Fort

#### Qty 2 - 16' Radius Half Circle Sisal Base

[![IMG_2164.jpg](https://wiki.futureturtles.com/uploads/images/gallery/2025-03/scaled-1680-/8TGstPrUfSDgZh1w-img-2164.jpg)
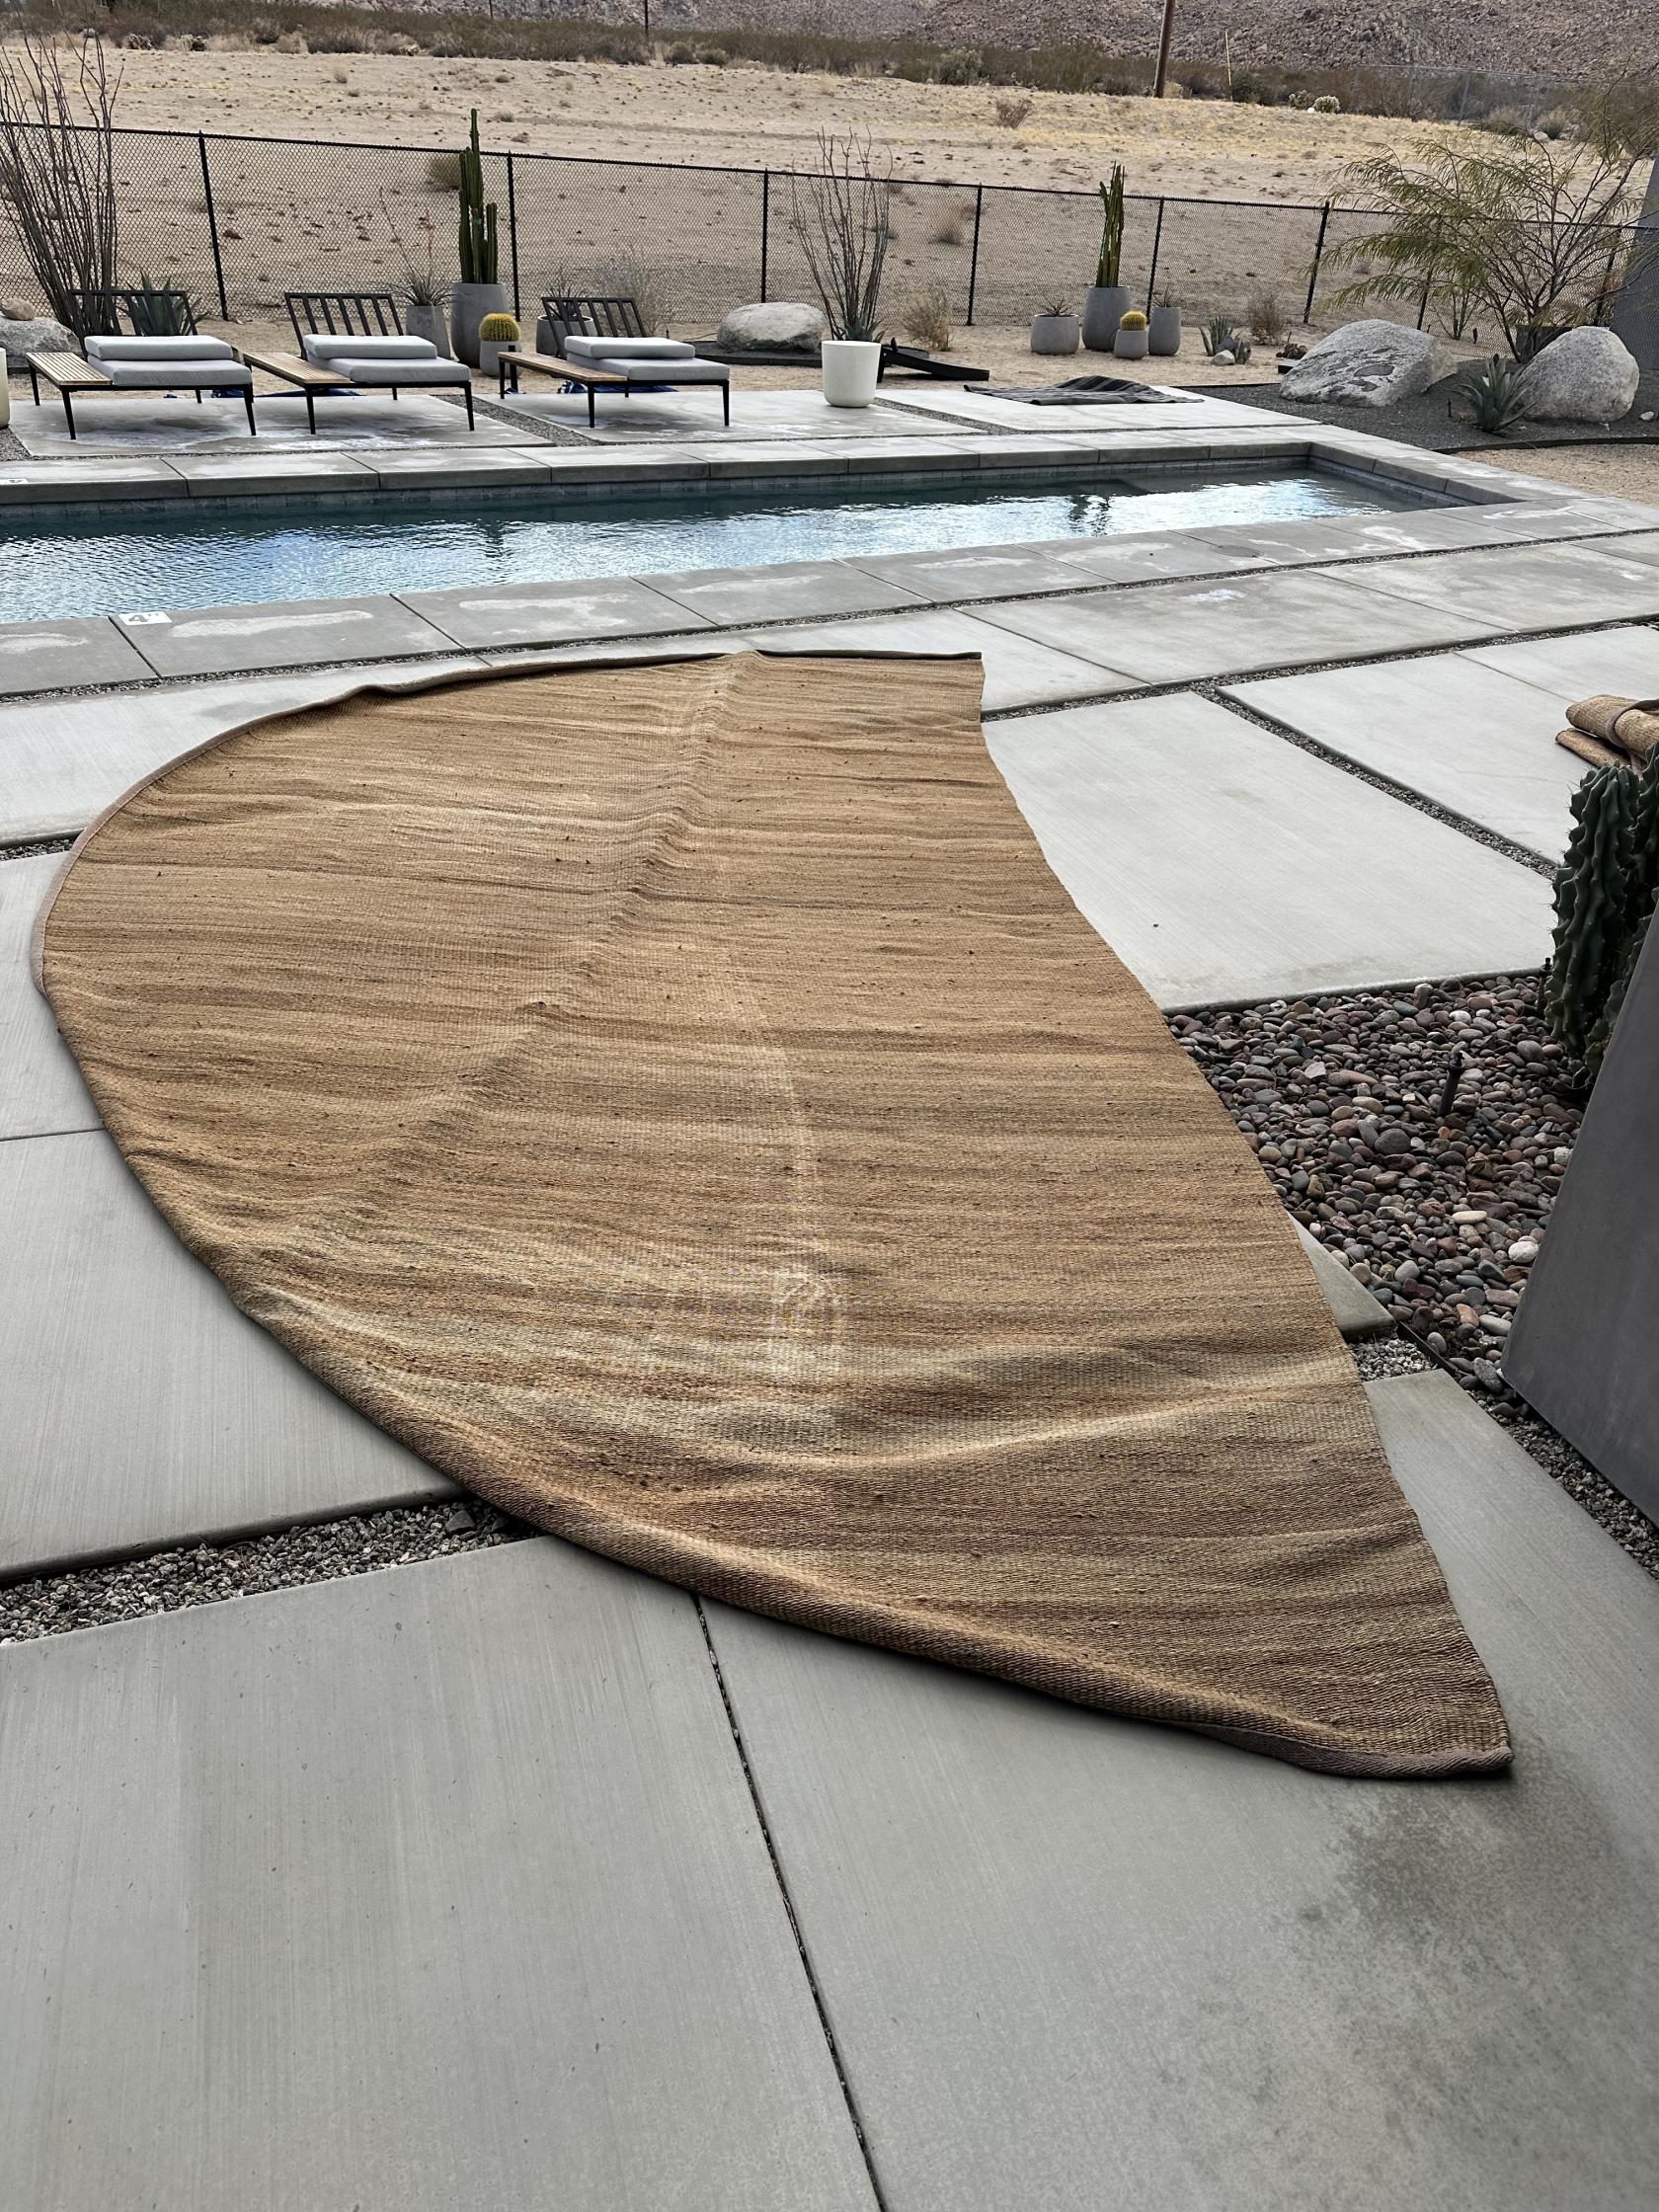
](https://wiki.futureturtles.com/uploads/images/gallery/2025-03/8TGstPrUfSDgZh1w-img-2164.jpg)

## 2025 Reserved for 20' Lotus Belle Tent

#### Qty 2 - 8x10 Thin "Ruggable" Red Persian

[![IMG_2130.jpg](https://wiki.futureturtles.com/uploads/images/gallery/2025-03/scaled-1680-/3GPphdg0iIHfMKOO-img-2130.jpg)
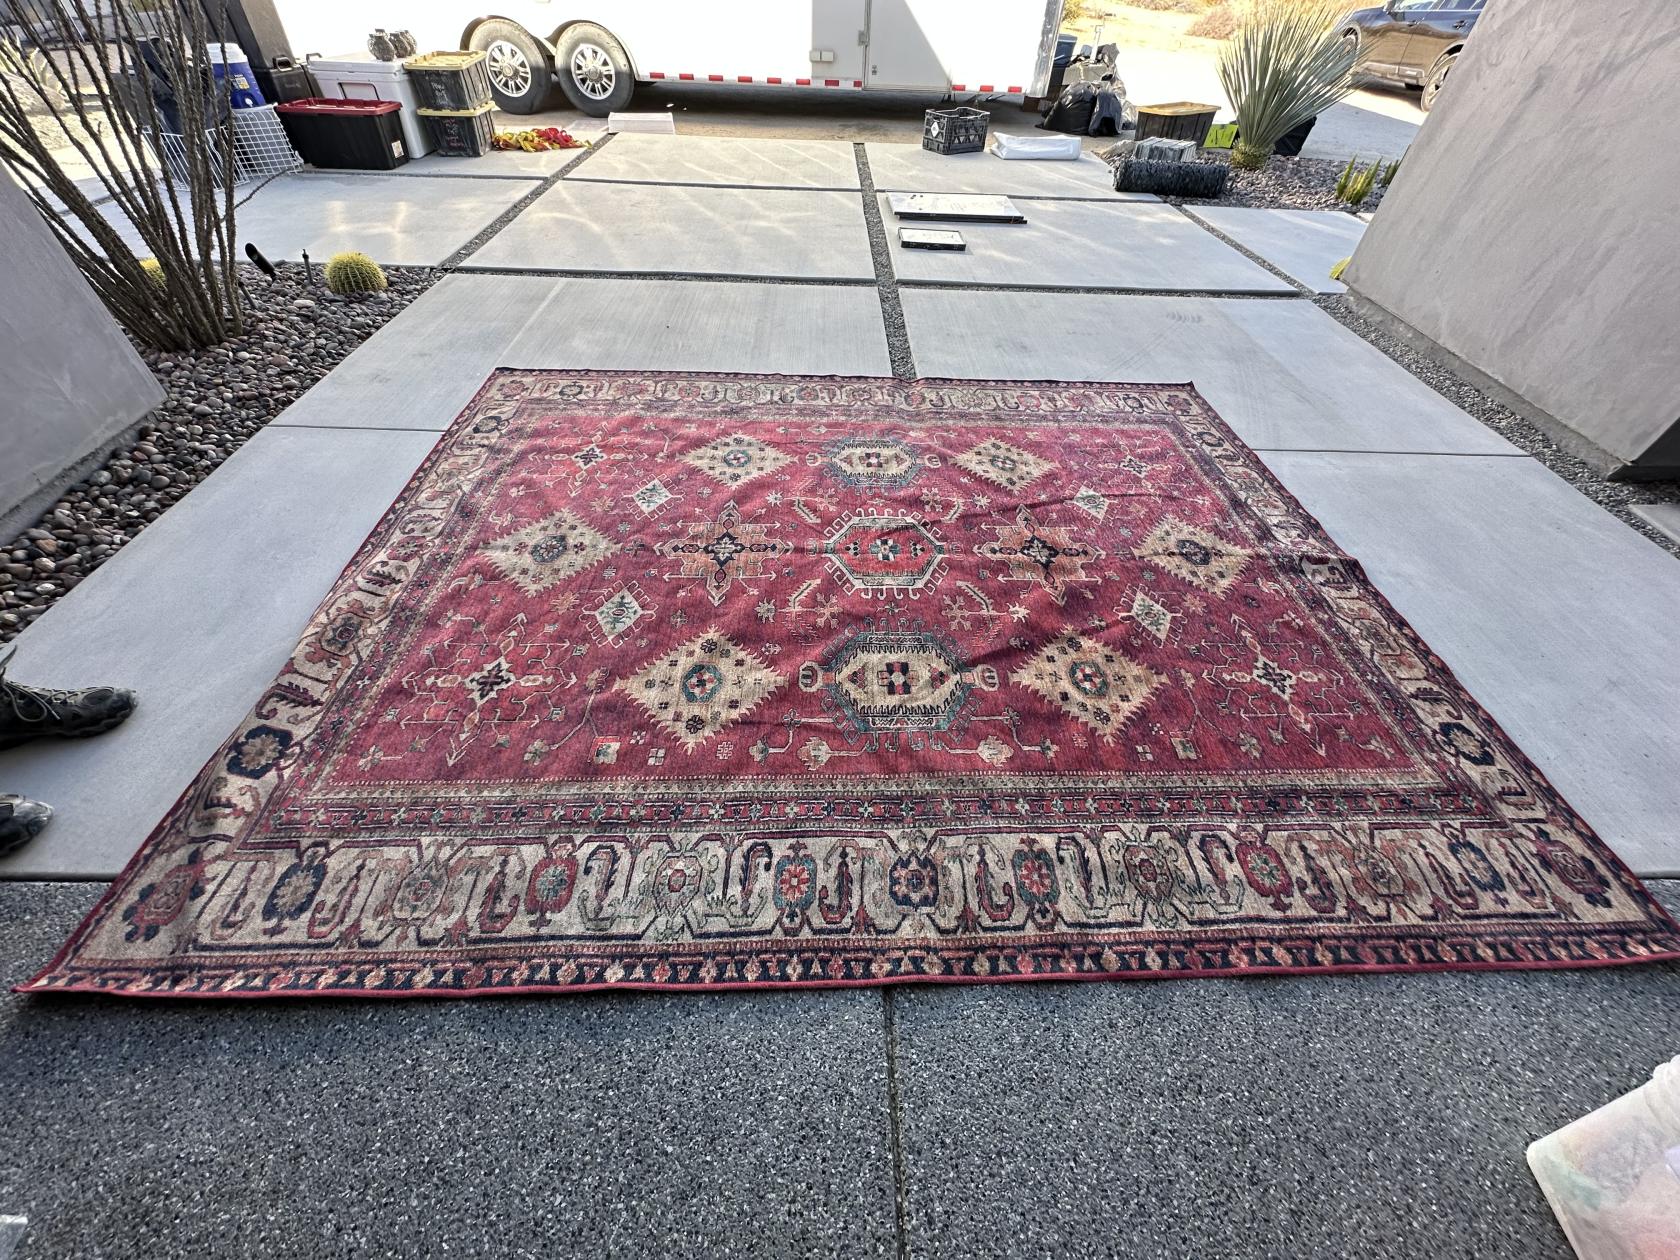
](https://wiki.futureturtles.com/uploads/images/gallery/2025-03/3GPphdg0iIHfMKOO-img-2130.jpg)

#### 6.5 x 8 Low Pile Pink &amp; Grey Persian

[![IMG_2132.jpg](https://wiki.futureturtles.com/uploads/images/gallery/2025-03/scaled-1680-/THsvo70TpPOF6Oau-img-2132.jpg)
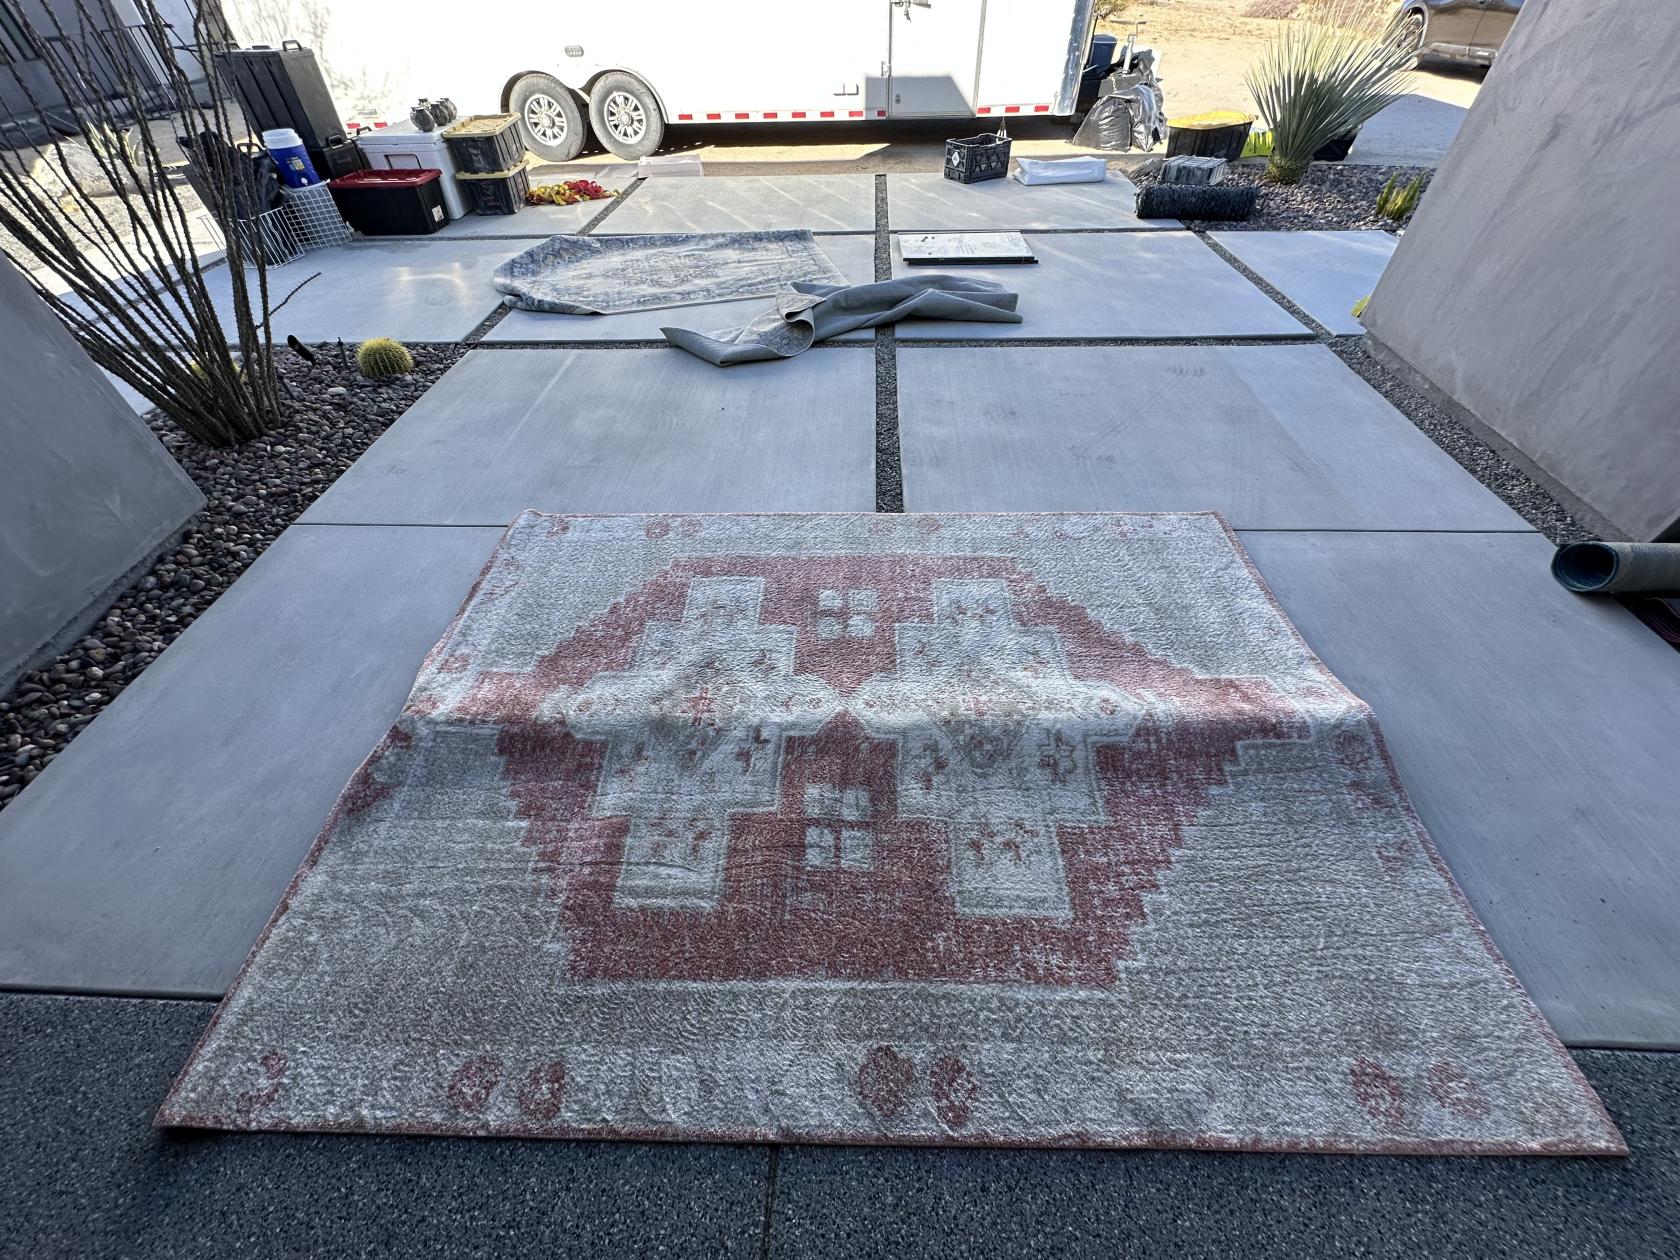
](https://wiki.futureturtles.com/uploads/images/gallery/2025-03/THsvo70TpPOF6Oau-img-2132.jpg)

#### 5x7 Thin Shag Persian

[![IMG_2161.jpg](https://wiki.futureturtles.com/uploads/images/gallery/2025-03/scaled-1680-/uOvpXJi9fEbJ2E1Q-img-2161.jpg)
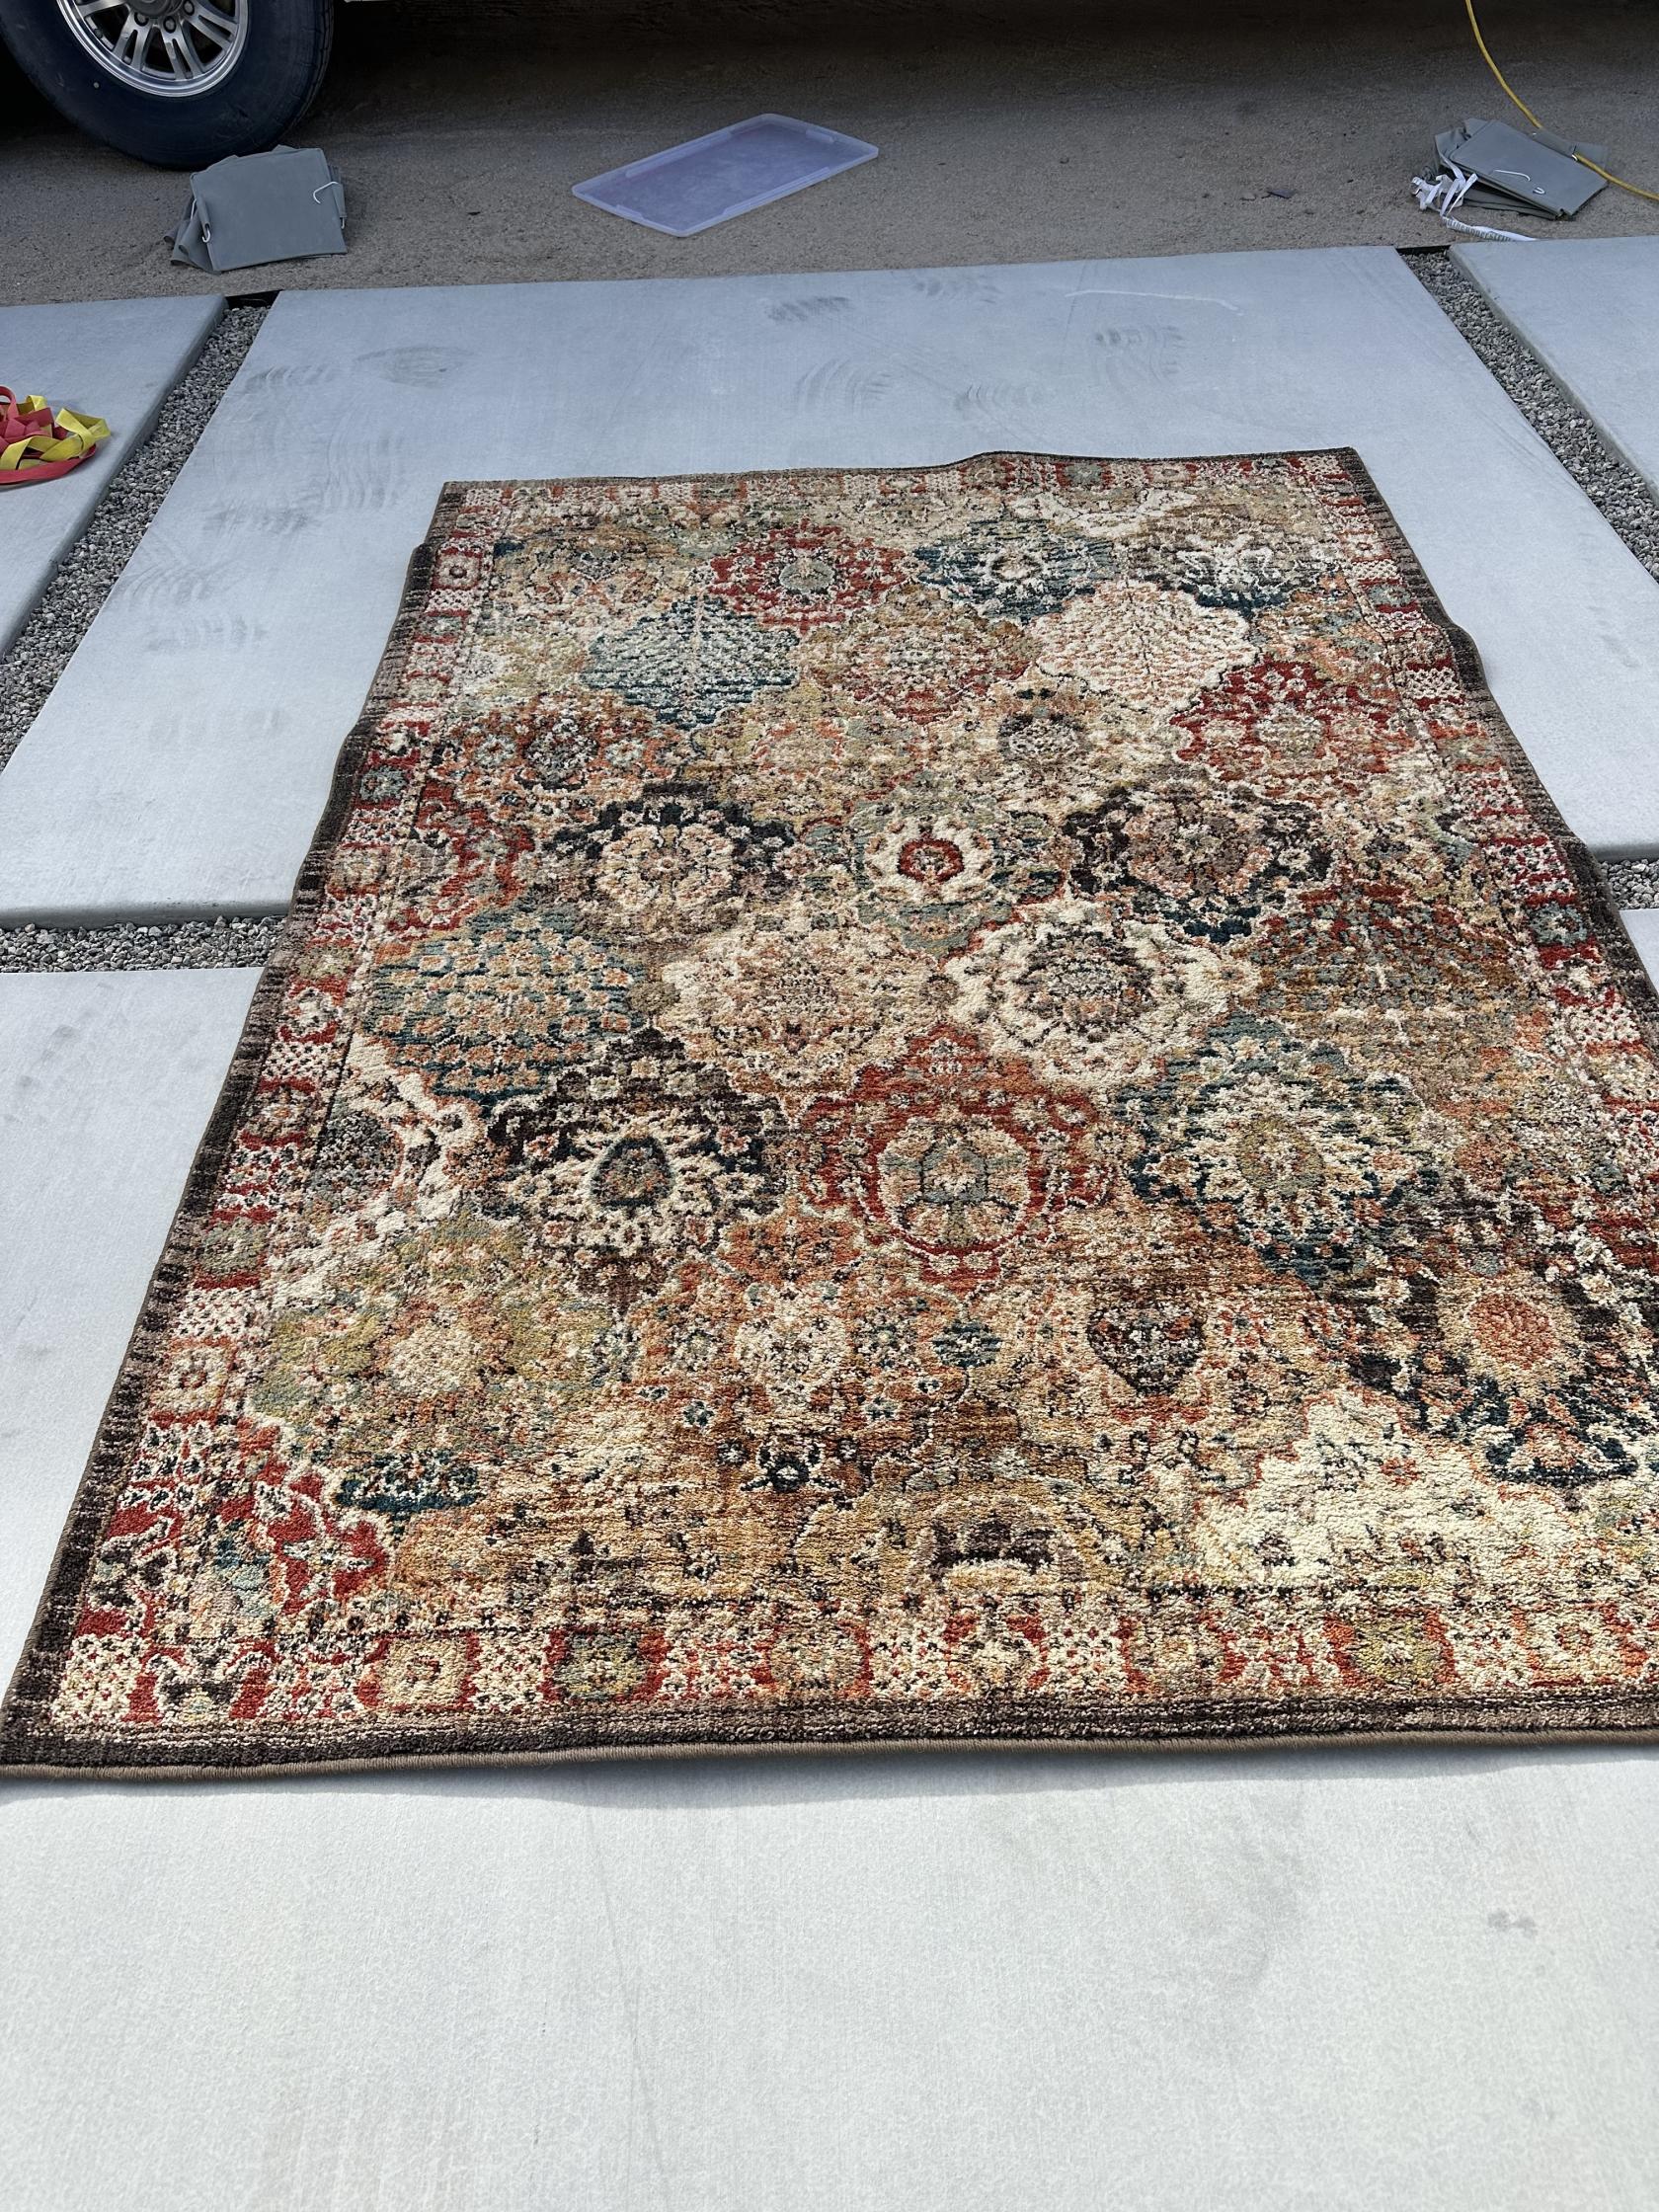
](https://wiki.futureturtles.com/uploads/images/gallery/2025-03/uOvpXJi9fEbJ2E1Q-img-2161.jpg)

#### Thin 63" x 87" Light Grey Persian

[![IMG_2136.jpg](https://wiki.futureturtles.com/uploads/images/gallery/2025-03/scaled-1680-/fFxwX5lqo2ekUNJS-img-2136.jpg)](https://wiki.futureturtles.com/uploads/images/gallery/2025-03/fFxwX5lqo2ekUNJS-img-2136.jpg)

## 2025 For Passage Between Lotus 16' and Pillow Fort

#### Qty 3 - Thin Black &amp; Grey Striped 4x6

[![IMG_2133.jpg](https://wiki.futureturtles.com/uploads/images/gallery/2025-03/scaled-1680-/gI5wKvcq193zabNH-img-2133.jpg)
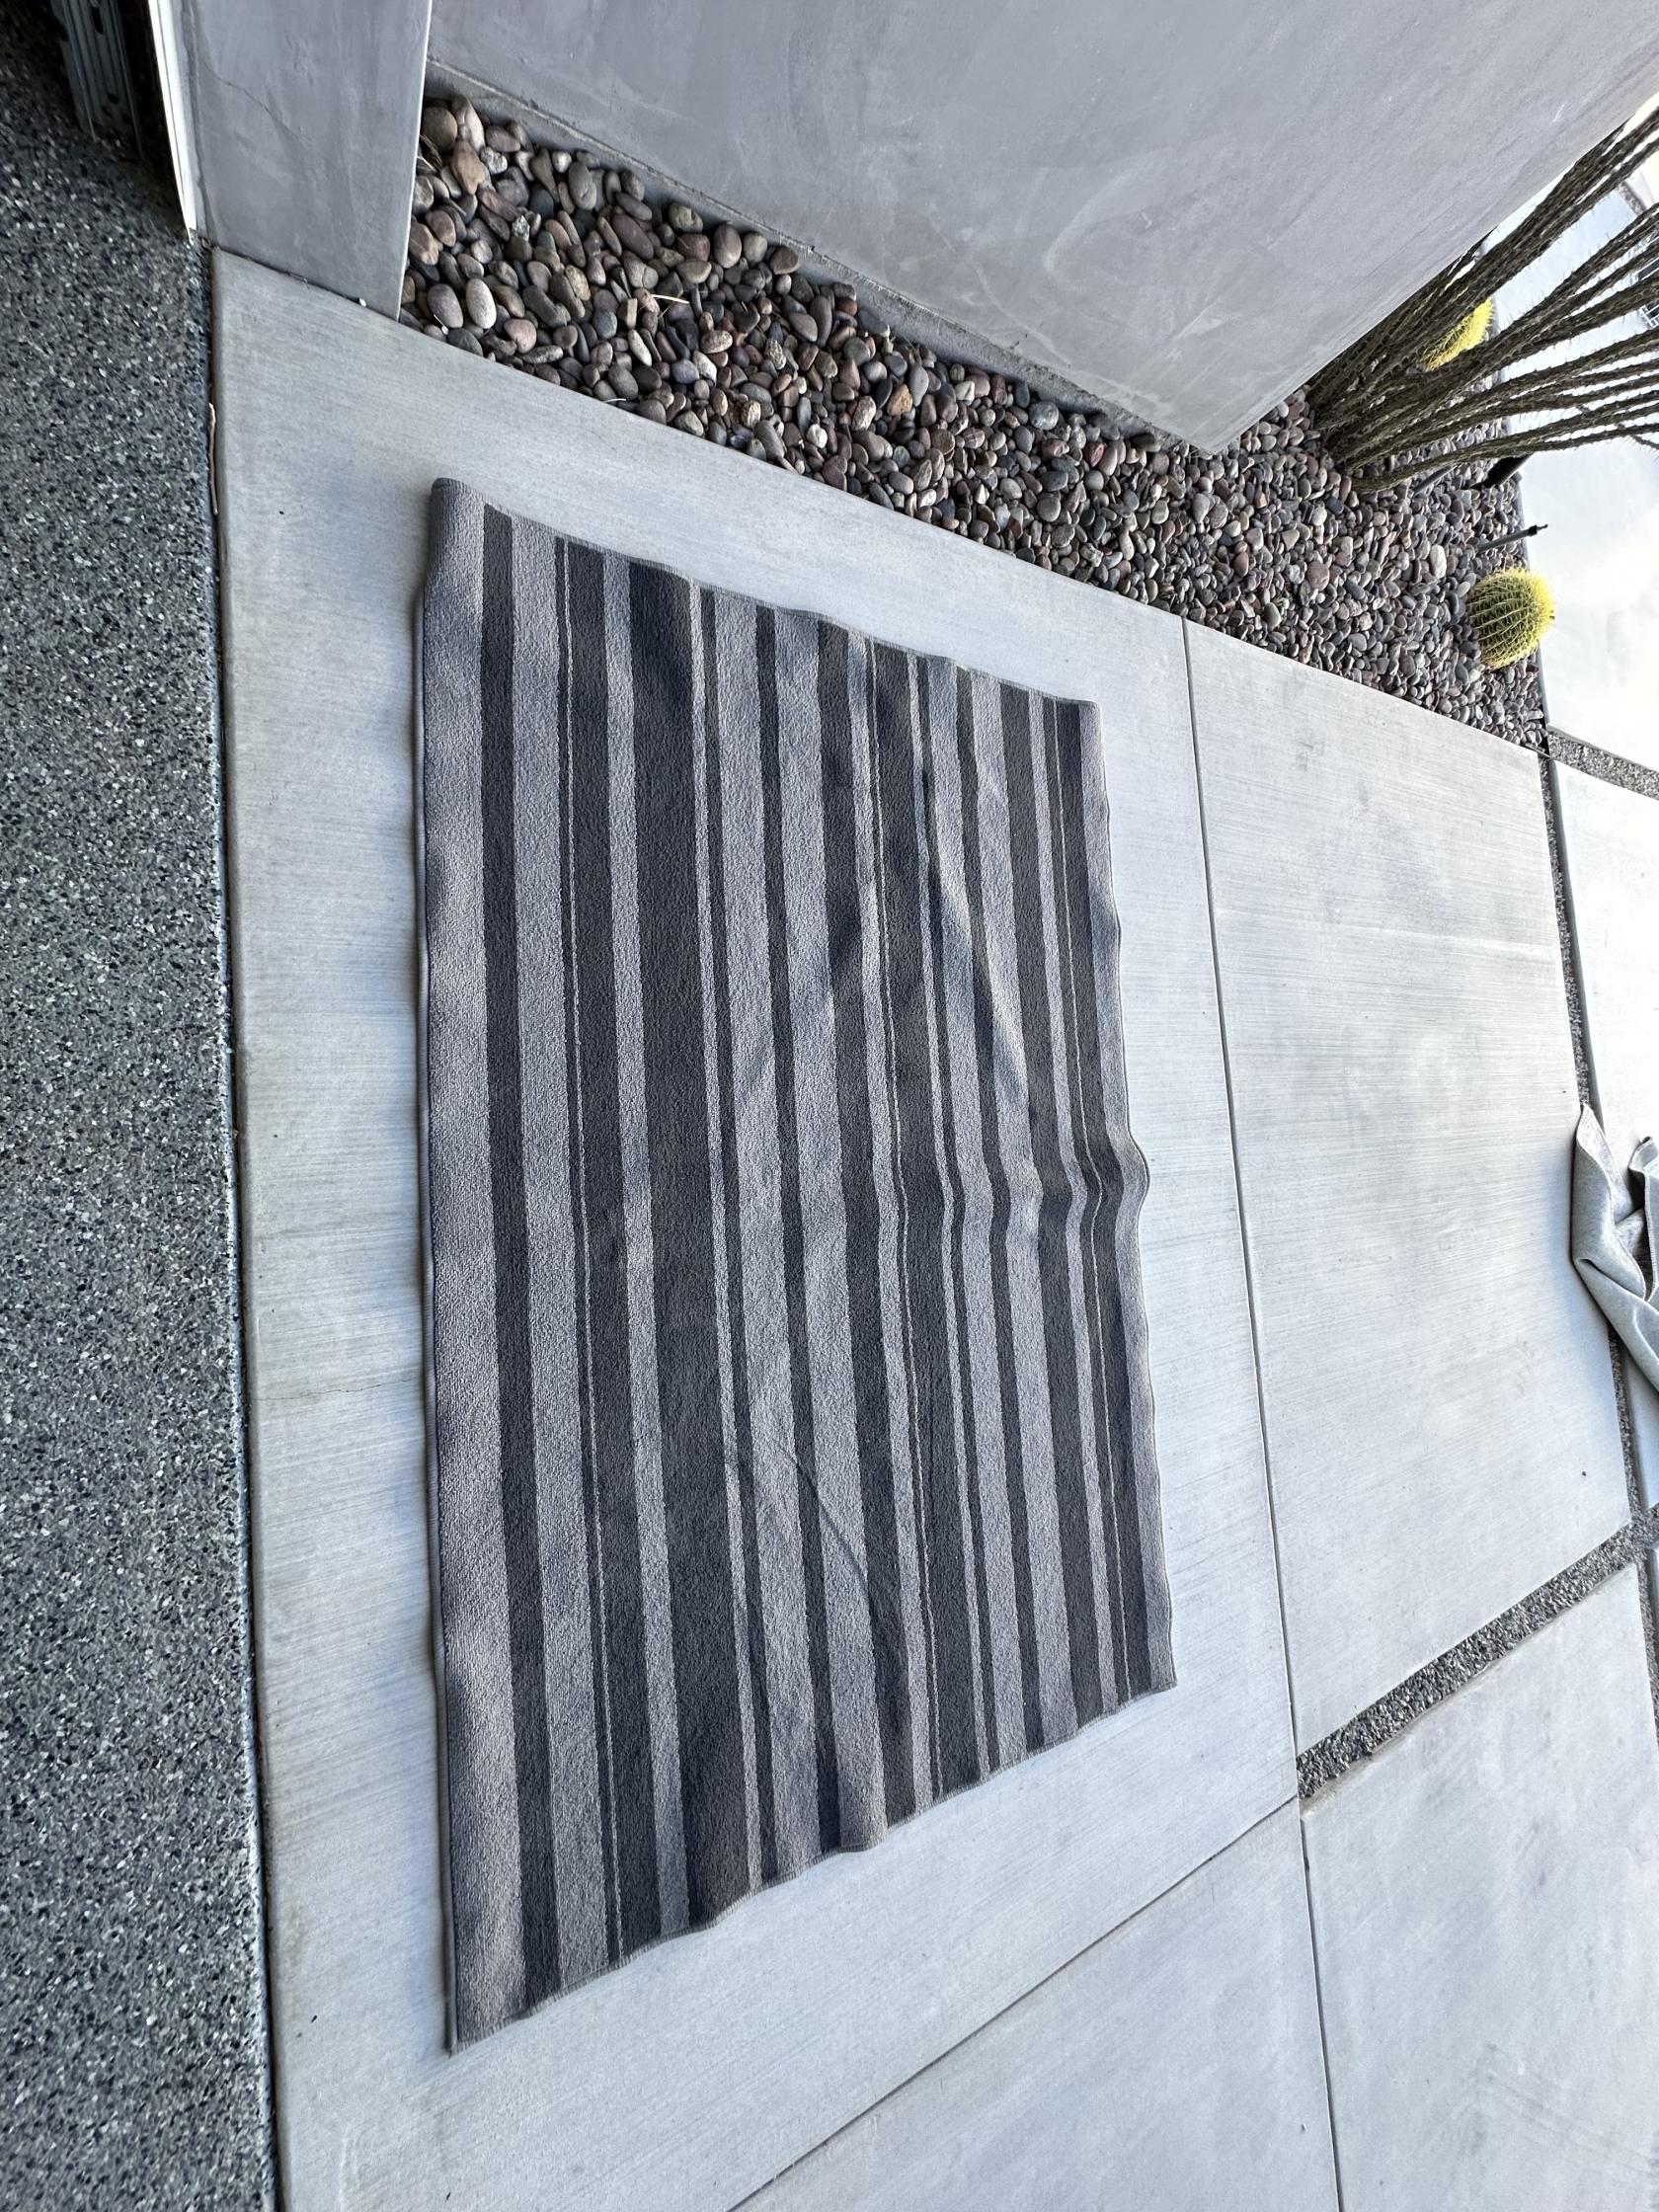
](https://wiki.futureturtles.com/uploads/images/gallery/2025-03/gI5wKvcq193zabNH-img-2133.jpg)


## 2025 Uncommitted

#### Qty 2 - 2.5' x 6' Very Pink Very Shag

[![IMG_2163.jpg](https://wiki.futureturtles.com/uploads/images/gallery/2025-03/scaled-1680-/k3fs5zkmN2iB47sQ-img-2163.jpg)
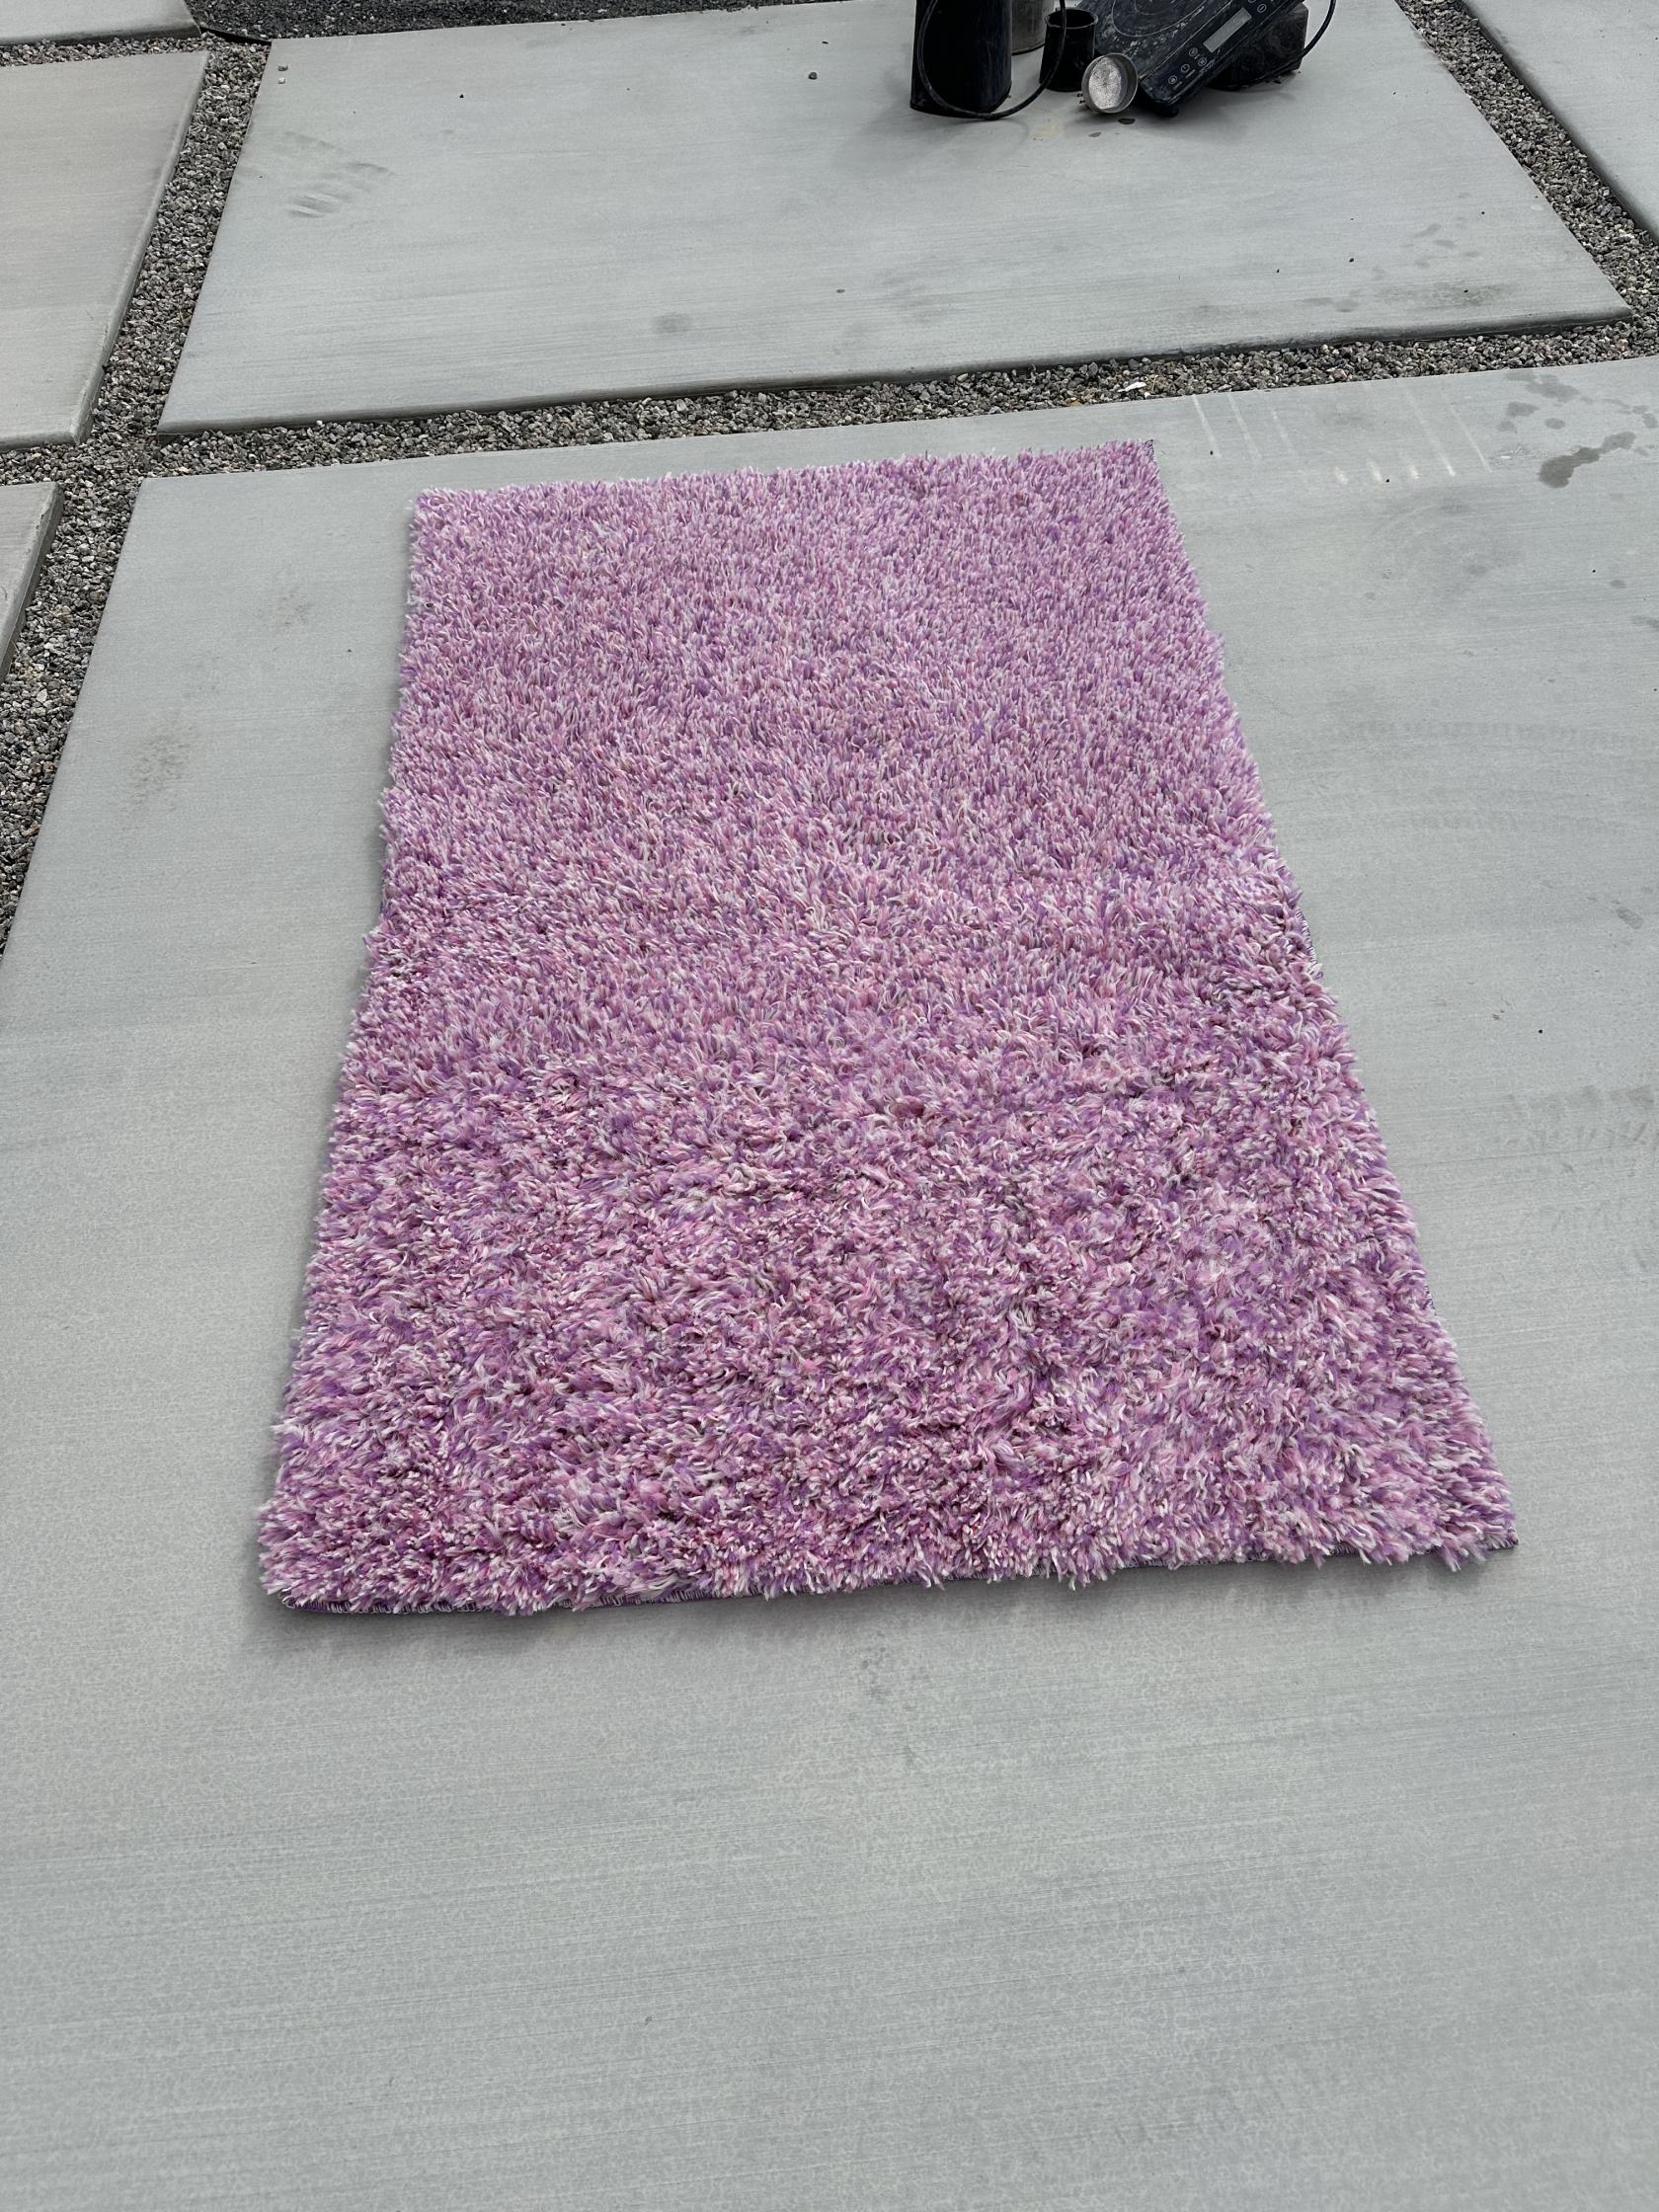
](https://wiki.futureturtles.com/uploads/images/gallery/2025-03/k3fs5zkmN2iB47sQ-img-2163.jpg)

#### Blue-Green Wave Outdoor Rugs (match container wave pattern)

We should have 3 large ones, about 8x10 and 1 small one, about 5x8. As of 2025 there is a large one in the Pillow Fort which has been washed, and the other ones appear to be in the Empire Fort and would not have been washed.

[![IMG_2131.jpg](https://wiki.futureturtles.com/uploads/images/gallery/2025-03/scaled-1680-/OAyZQOSn3EDkxpUX-img-2131.jpg)
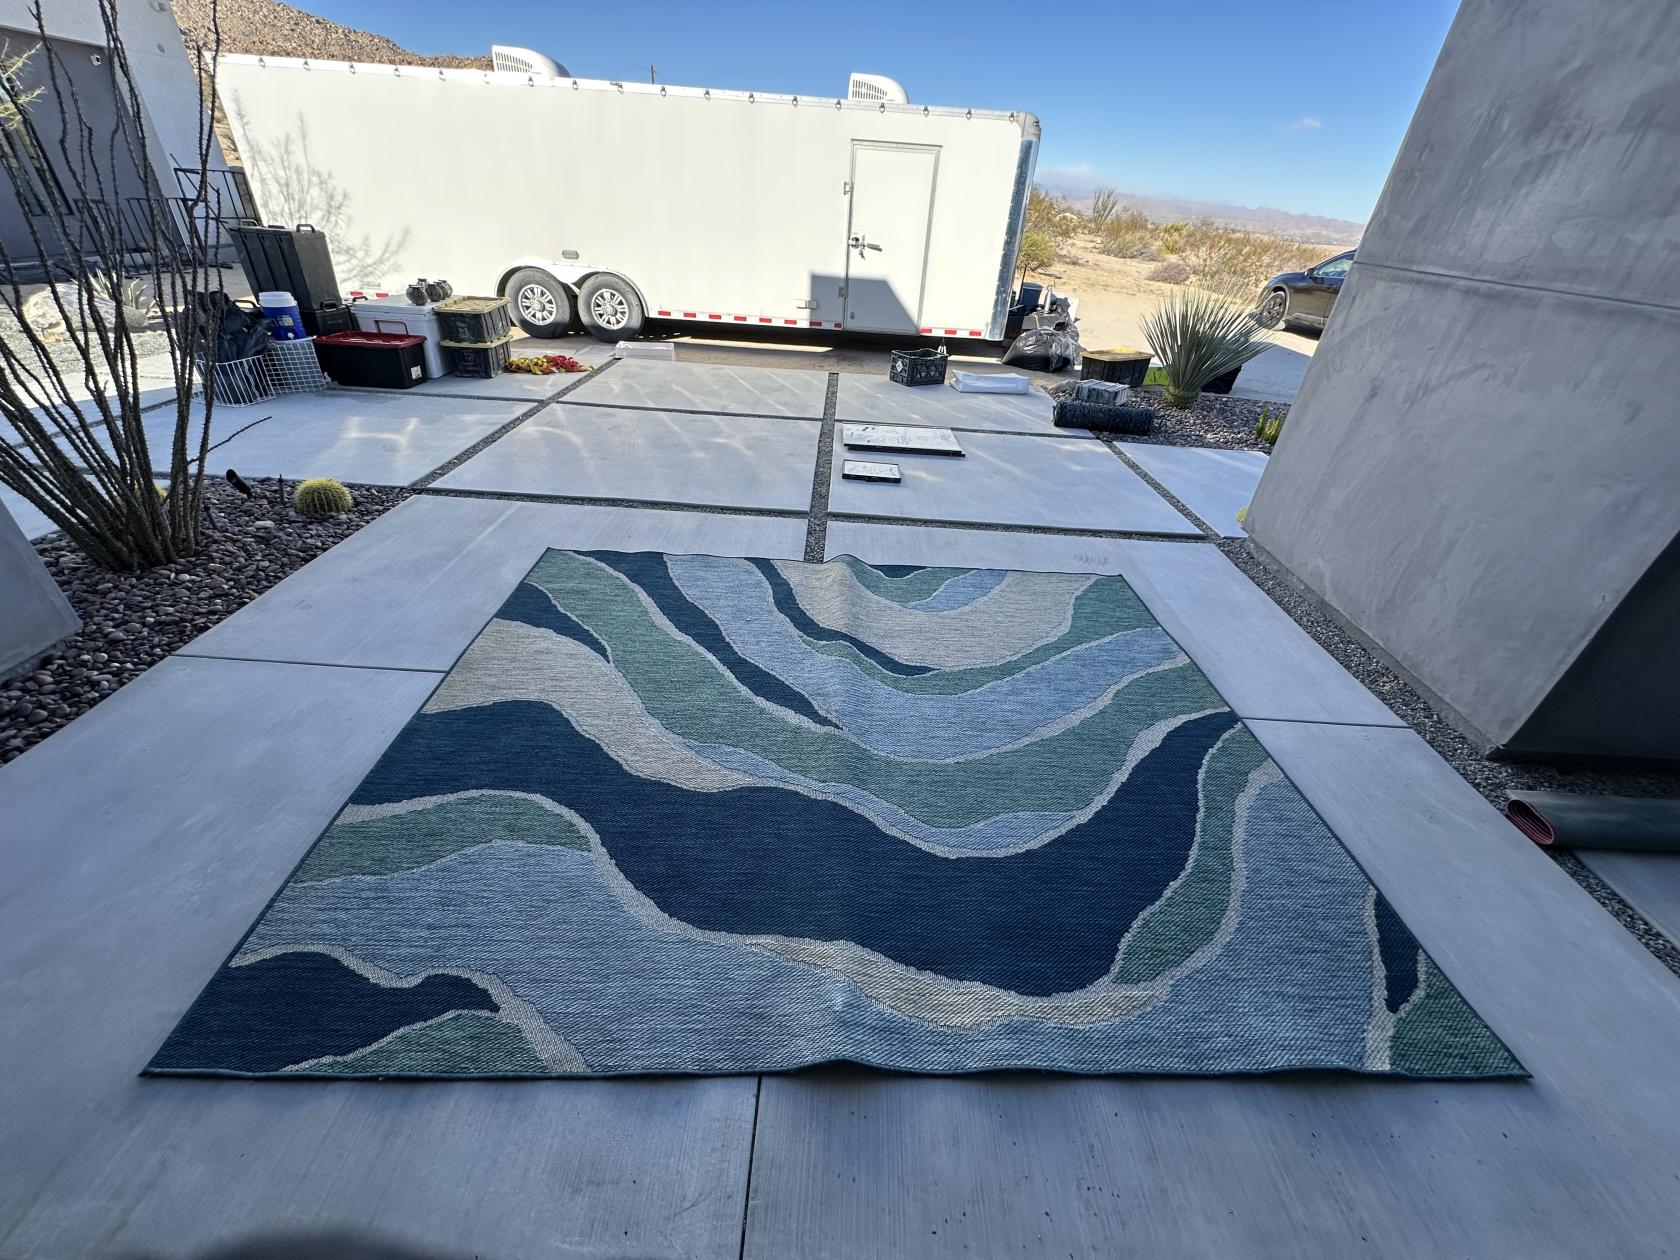
](https://wiki.futureturtles.com/uploads/images/gallery/2025-03/OAyZQOSn3EDkxpUX-img-2131.jpg)


#### 5 x 7 Shag Blue / Beige Persian

[![IMG_2138.jpg](https://wiki.futureturtles.com/uploads/images/gallery/2025-03/scaled-1680-/zTlWe6oK7IlvFcle-img-2138.jpg)](https://wiki.futureturtles.com/uploads/images/gallery/2025-03/zTlWe6oK7IlvFcle-img-2138.jpg)

#### 8x10 Beige on Beige Checker

[![IMG_2140.jpg](https://wiki.futureturtles.com/uploads/images/gallery/2025-03/scaled-1680-/fnAYHC4CNVzr2UKZ-img-2140.jpg)
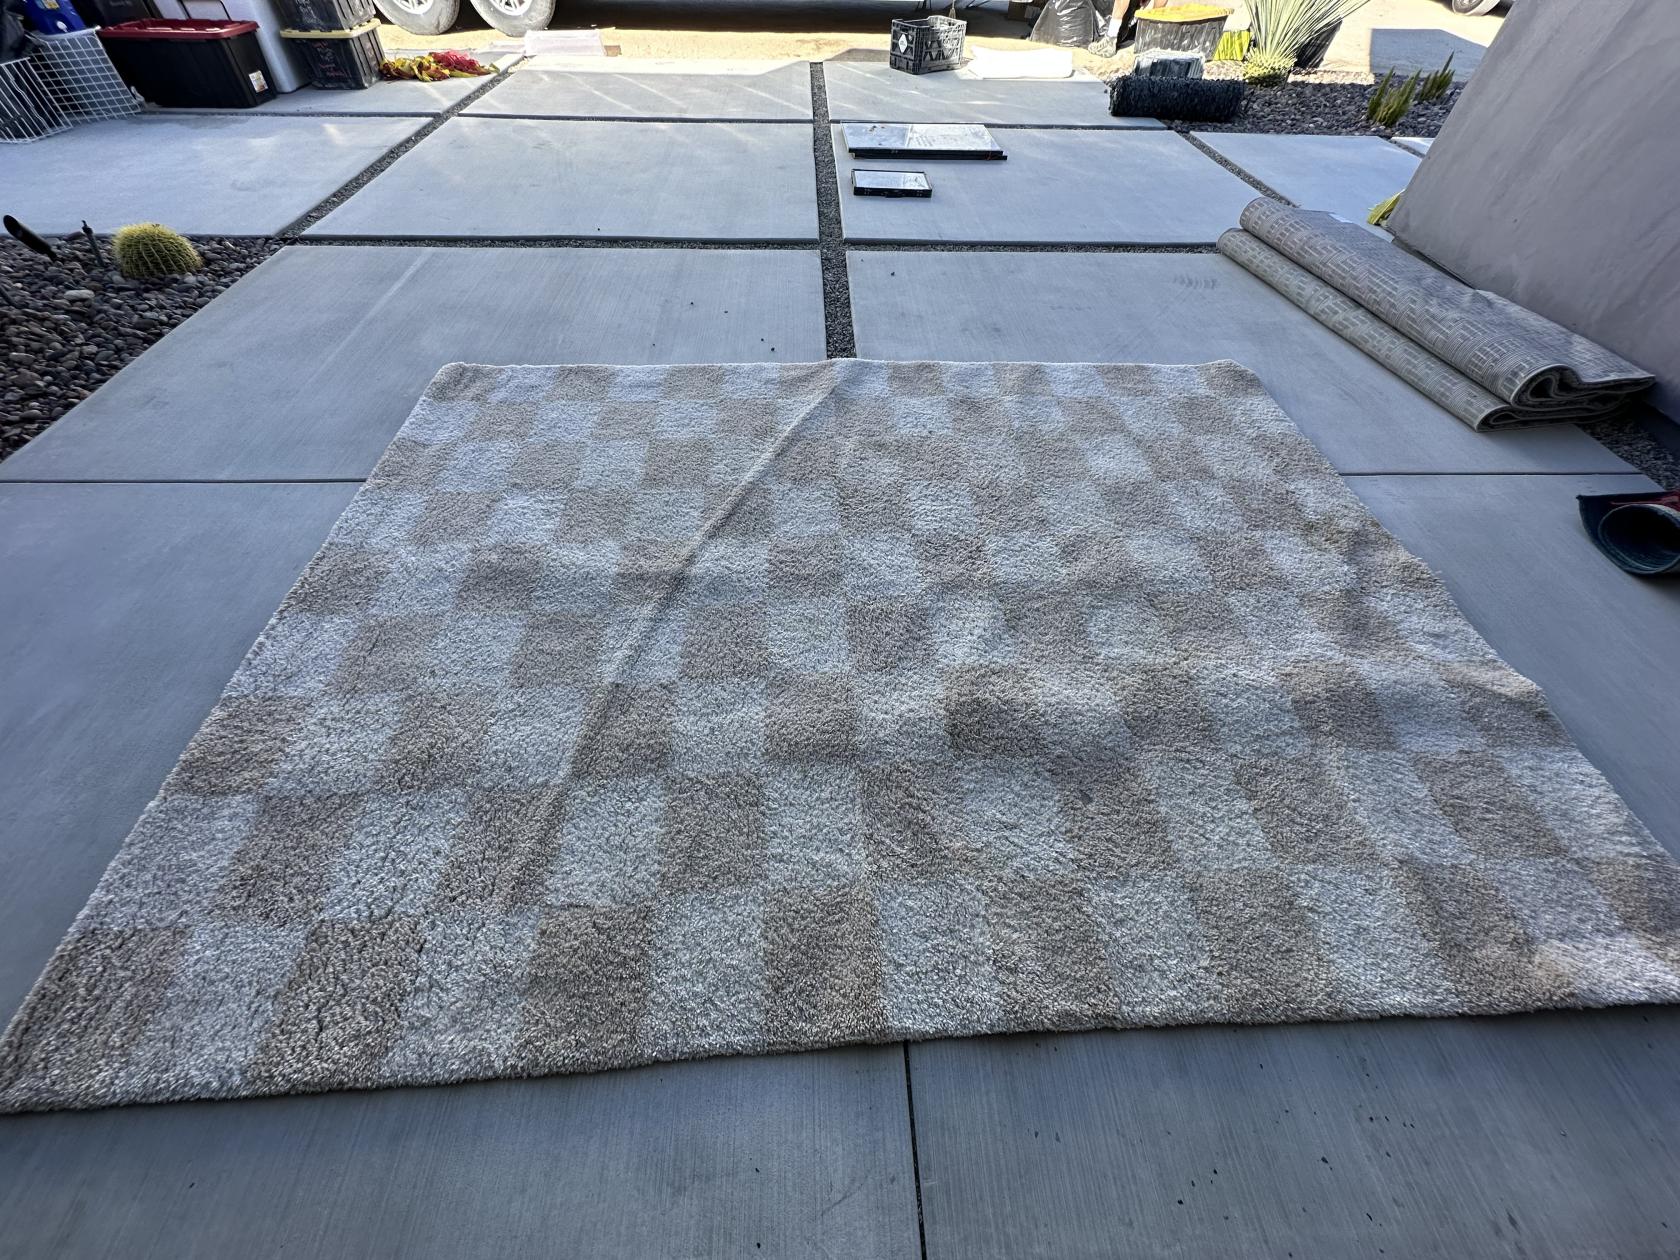
](https://wiki.futureturtles.com/uploads/images/gallery/2025-03/fnAYHC4CNVzr2UKZ-img-2140.jpg)

#### 5x7 Grey Shag Checkers

[![IMG_2141.jpg](https://wiki.futureturtles.com/uploads/images/gallery/2025-03/scaled-1680-/BiHwej1M2tEEIu5H-img-2141.jpg)
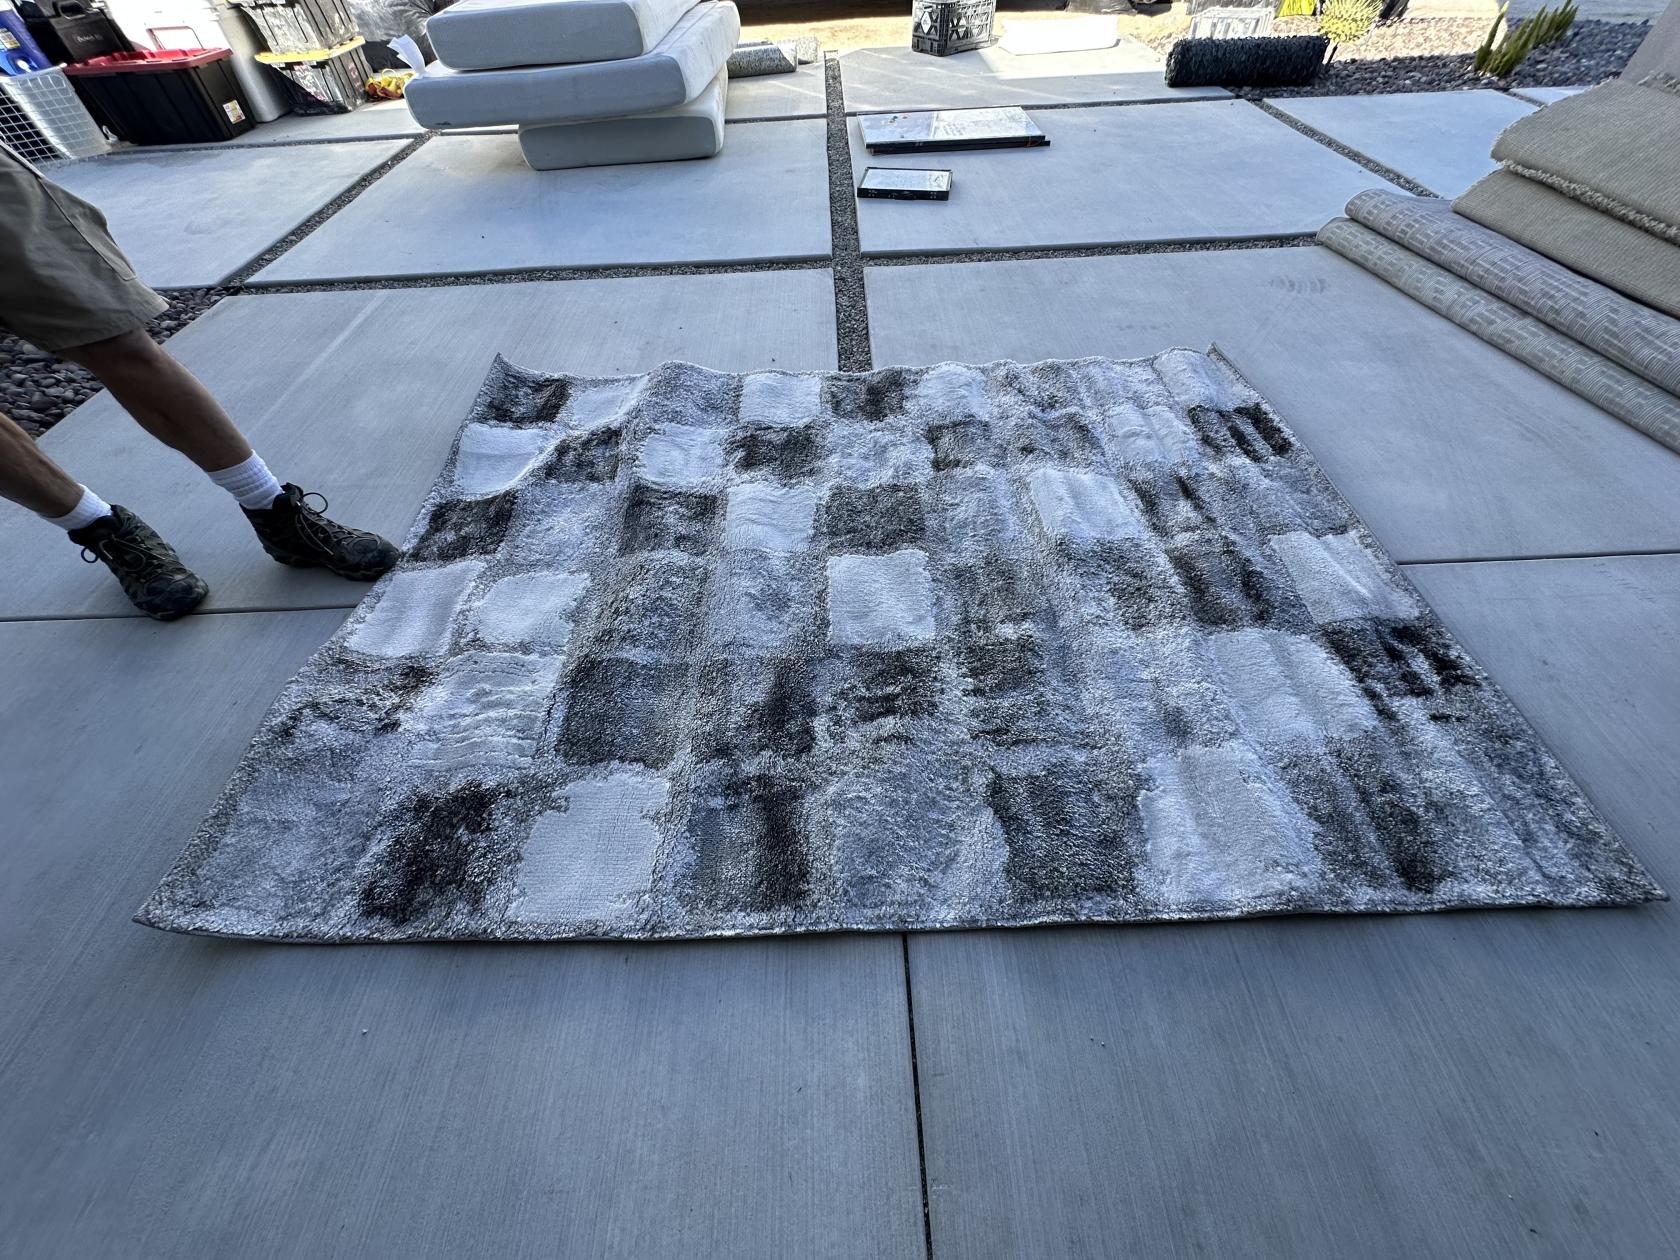
](https://wiki.futureturtles.com/uploads/images/gallery/2025-03/BiHwej1M2tEEIu5H-img-2141.jpg)

#### 5x7 Beige Shag Diamond Pattern

[![IMG_2159.jpg](https://wiki.futureturtles.com/uploads/images/gallery/2025-03/scaled-1680-/BSVz3X4bQ2rOzjNN-img-2159.jpg)
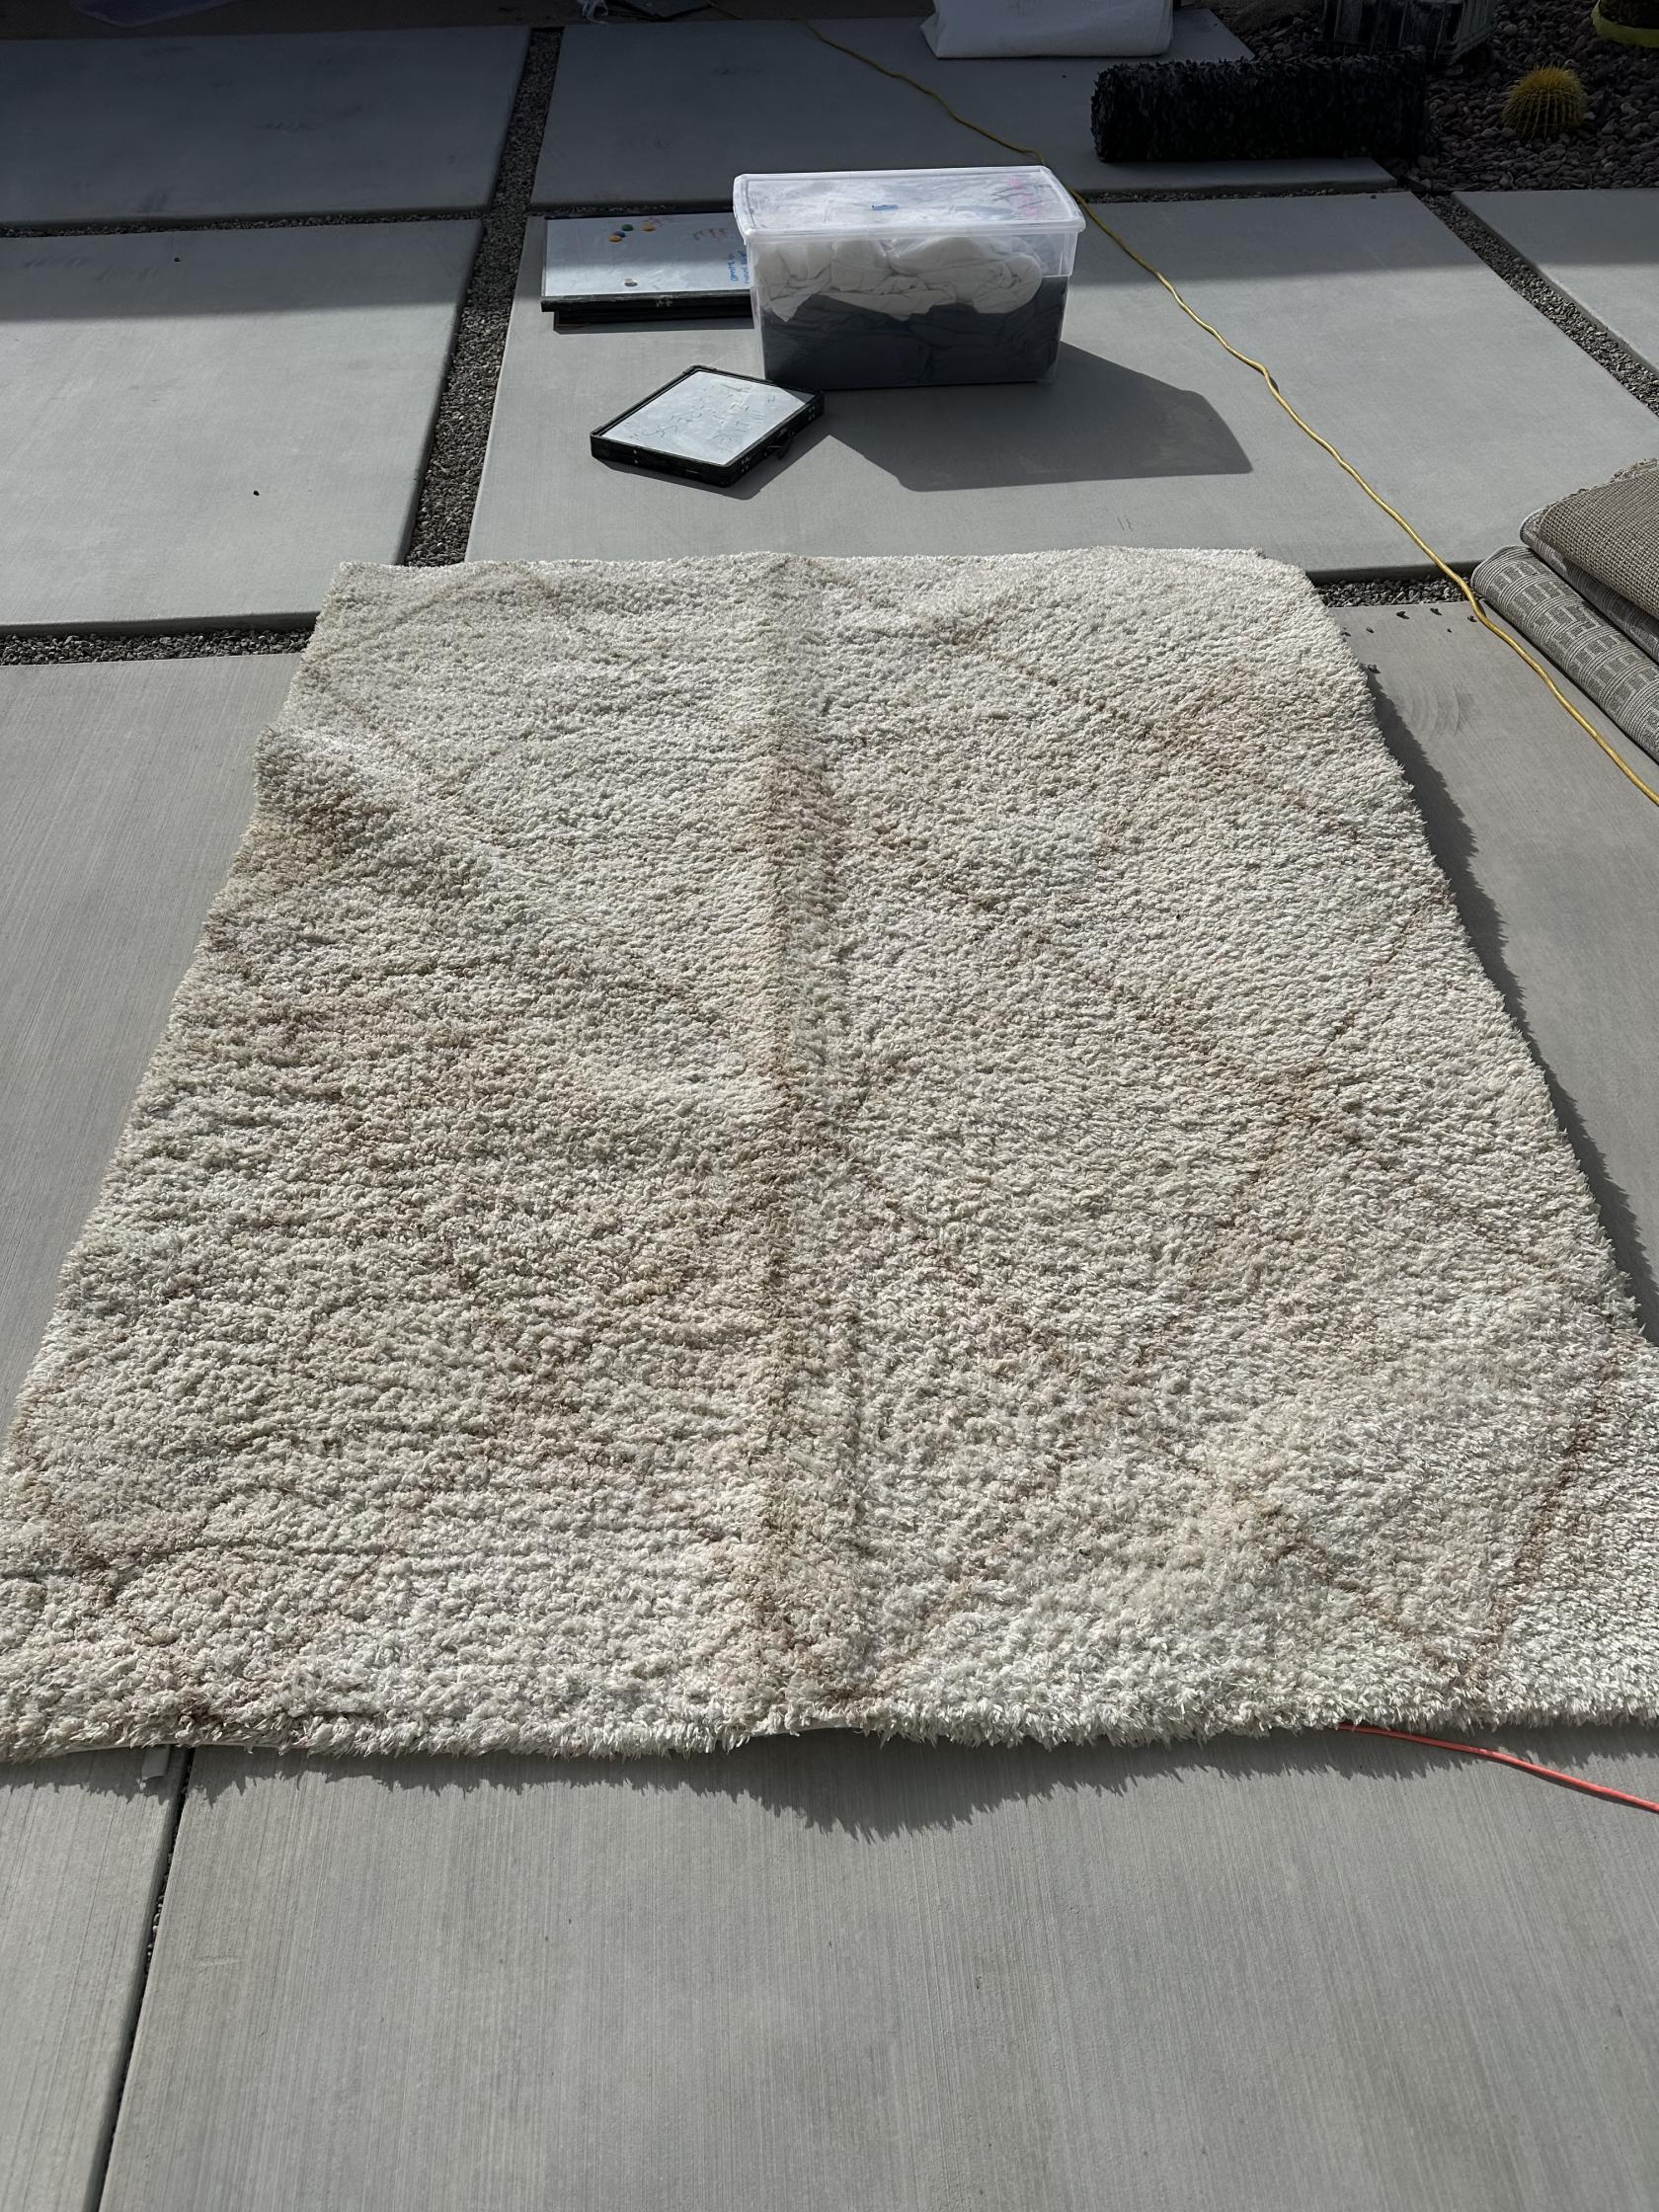
](https://wiki.futureturtles.com/uploads/images/gallery/2025-03/BSVz3X4bQ2rOzjNN-img-2159.jpg)

# Habitat (2026)

[![IMG_2591.jpeg](https://wiki.futureturtles.com/uploads/images/gallery/2025-11/scaled-1680-/36FdzEoDYYN4RTf7-img-2591.jpeg)](https://wiki.futureturtles.com/uploads/images/gallery/2025-11/36FdzEoDYYN4RTf7-img-2591.jpeg)In 2026 we're going to move everything we need to create **camper shade and tents for up to 50 campers into one 20' container.

Goals:

- Decommission the Empire Fort, which is on its last legs and stored in the wrong part of Nevada
- Simplify build and strike by having needed for the camper shade area in a single organized container (including some things which were in the tool fort before)

We will bring together:

1. EMT, tarps, and all connectors needed to build the shade
2. Shiftpods
3. Shiftpod furnishings like cots and fans
4. Lighting and extension cords needed for shade area
5. Tools, from impact wrenches to stepladders and spare parts, needed to build

In theory you could plop the Habitat container down in the middle of the playa and have everything you need to construct housing for 50 people, without reliance on any other infrastructure or tools. This also makes it very easy during strike for random campers to know how to disassemble and put away everything.

This is the [spec](https://futureturtles.com/2026/Guide%20to%20Burning%20Man%20Shade%20Structures.pdf) for how we build shade (PDF).

### What's Included

A detailed, comprehensive, up-to-date, canonical [parts list](https://docs.google.com/spreadsheets/d/1lk9rTBhz5S9zQsZBZfVBd9uLi5uOZ-PVDatuwNXotRY/edit?gid=1559734400#gid=1559734400) describes exactly what the Habitat container contains!

#### Container

- A new 20' shipping container

#### Shade Structure Specs

Basically, the same shade structure we set up every year.

Dimensions:

- 8' height
- Grid with spacing 10' x 12'
- Depending on camp size, we can set up:

<table id="bkmrk-grid-size-dimensions" style="margin-left:40px;border-collapse:collapse;width:57.0238%;"><colgroup><col style="width:18.8726%;"></col><col style="width:26.2255%;"></col><col style="width:28.4314%;"></col><col style="width:26.4706%;"></col></colgroup><thead><tr><td>**Grid Size**</td><td>**Dimensions** (without side slopes)</td><td>**Dimensions**

(footprint including slopes)

</td><td>**Shiftpods**</td></tr></thead><tbody><tr><td>5 x 7</td><td>50' x 84'</td><td>64' x 100'</td><td>19</td></tr><tr><td>5 x 8</td><td>50' x 96'</td><td>64' x 112'</td><td>22</td></tr><tr><td>5 x 9</td><td>50' x 108'</td><td>64' x 124'</td><td>25</td></tr></tbody></table>

Full Spec:

- 1"-diameter EMT system
- couplers to connect 10' + 2' EMT for 12' spans
- All corners use 5-ways for standardization
- Every footer has one climbing hanger (for ratcheting) and one 14" lag screw
- Every vertical post is ratcheted to the ground
- Two diagonal (internal cross-brace) ratchets at each corner
- Roof tarps are 10'x12', 100% shade
- Angled side tarps, 10'x12', are white mesh 
    - anchored to the ground with bungee + hanger + lag screw at every grommet
- No ground tarps
- See also [Early Build Team Orientation](https://wiki.futureturtles.com/books/the-future-turtles-camp/page/early-build-team-orientation "Early Build Team Orientation") for more tips on shade construction

#### Shiftpods

- Camp should have 26 Shiftpods
- Each Shiftpod will be screwed to the ground with **4** lag screw + washer combination at its corners to hold it down. 
    - Where Shiftpods are adjacent, they will share 2 of those lag screws.
- We will preinstall Shiftpod wall anchors (using 1 lag screw, supplied cord, and climbing hangers) on any walls that face the outside.

#### Furnishings

- 50 cots
- 25 welcome mats
- 25 fans?
- Assorted camp chairs (existing)
- 4 Hammocks

#### Lighting

utility lighting, extension cords

- String patio lighting throughout
- Necessary extension cords
- Camper utility outlets (Sockitboxes with multiple outlets)

#### Construction Tools (small)

Stored in the same container:

- 4 of the high-power Milwaukee impact wrenches
- Chargers and spare batteries 
    - Mounted in container for convenient access
- Small storage drawer toolbox with: 
    - spare eyebolts
    - tarp repair clips
    - washers
- Home depot buckets for rain events
- Reusable Zip Ties (for attaching lighting etc to EMT)

#### Construction Tools (large)

- two short step ladders
- drywall stilts
- one folding table

### Container Setup

- Through-wall power port
- Shelving perfectly sized for everything we're storing with an aisle!
- Set up lag screw + hanger + chain + carabiner architecture so that the doors can be anchored open
- Easy ratchet strap setup with e-track mounting points for anchoring things on shelves

#### Storage

The old storage philosophy of using extra large milk crates for everything was well-intentioned but there are are a few cases where it's not ideal.

- Tiny, heavy parts: climbing hangers, eyebolts, washers. Better to use a Milwaukee Packout style tool box
- Lag screws: don't fit in crates, slip out the holes, and are too heavy. For these I think using Harbor Freight APACHE 3800 would be ideal
- Bungees - can slip through the holes and cause tangling. Standard 27gal Home Depot totes should be better.

We would still want to use milk crates for five ways, couplers, footers, and extension cords.

We will adopt a philosophy of Extreme Overlabelling so everyone putting things away is impressed by how easy everything is to find.

# Turtle Whips

An art project in camp since 2022, getting better every year!

[Turtle Whips Tech Ref.pdf](https://wiki.futureturtles.com/attachments/58)

[![image.png](https://wiki.futureturtles.com/uploads/images/gallery/2026-04/scaled-1680-/MjldO5NGehAblw0y-image.png)](https://wiki.futureturtles.com/uploads/images/gallery/2026-04/MjldO5NGehAblw0y-image.png)

# Inventory Manifest

Keywords include inventory equipment directory manifest where is it

[https://docs.google.com/spreadsheets/d/1lk9rTBhz5S9zQsZBZfVBd9uLi5uOZ-PVDatuwNXotRY/](https://docs.google.com/spreadsheets/d/1lk9rTBhz5S9zQsZBZfVBd9uLi5uOZ-PVDatuwNXotRY/)

# Reno Resources

# Logistics and Heavy Equipment

**Playa Integrated Support Services**

Jordan

<Playa.integrated@gmail.com>

775-560-9239

Camps with NYC Deli

“Needs a break for a bit”

# Refrigerator / Freezer Repair

**Burney’s Commercial Service**

(775) 355-9111

[https://www.burneyscommercial.com/](https://www.burneyscommercial.com/)

<sparks@burneyscommercial.com>

We do not have an account with them, but other burners use them. Will go to the yard, but kinda annoying. Will readily charge overtime.

**Cool Breeze Environmental**

[https://www.coolbreezenv.com/](https://www.coolbreezenv.com/)

775-535-7192

We have an account with them. Will go to the yard. Reasonably priced.

**Hi-Tech Commercial**

[https://www.hitechnv.com/](https://www.hitechnv.com/)

(702) 649-4616

(877) 924-4832

Specialize in commercial kitchen appliance repair

We have an account with them. But they are somewhat expensive compared.

**Buffo’s**

[https://buffos-refrigeration.com/commercial-refrigeration-repair-reno/](https://buffos-refrigeration.com/commercial-refrigeration-repair-reno/)

775-782-8204

We have not used them, listing as a backup

# AC Repair

**M+S Heating and Air**

[https://ms-ac.com/](https://ms-ac.com/)

(775)843-7930

Recommended by Brian Konash of NYC Deli

Importantly, they will come to us!