DJ and Lighting
DJ Information
 To keep the people dancing, the Future Turtles camp includes a complete set of DJ gear and powered speakers which provide excellent sound for our camp parties.
So you wanna be a DJ...
Here are a few things to know…
- To DJ on playa, there’s a fair amount of work to do ahead of time.
- We use a Pioneer controller (XDJ-RX3) which requires you to prepare your music ahead of time.
- You’ll need to:
- Buy music - YOU MUSIC FILES (MP3s)
- Learn Rekordbox https://www.youtube.com/watch?v=pfcB95NHUbk
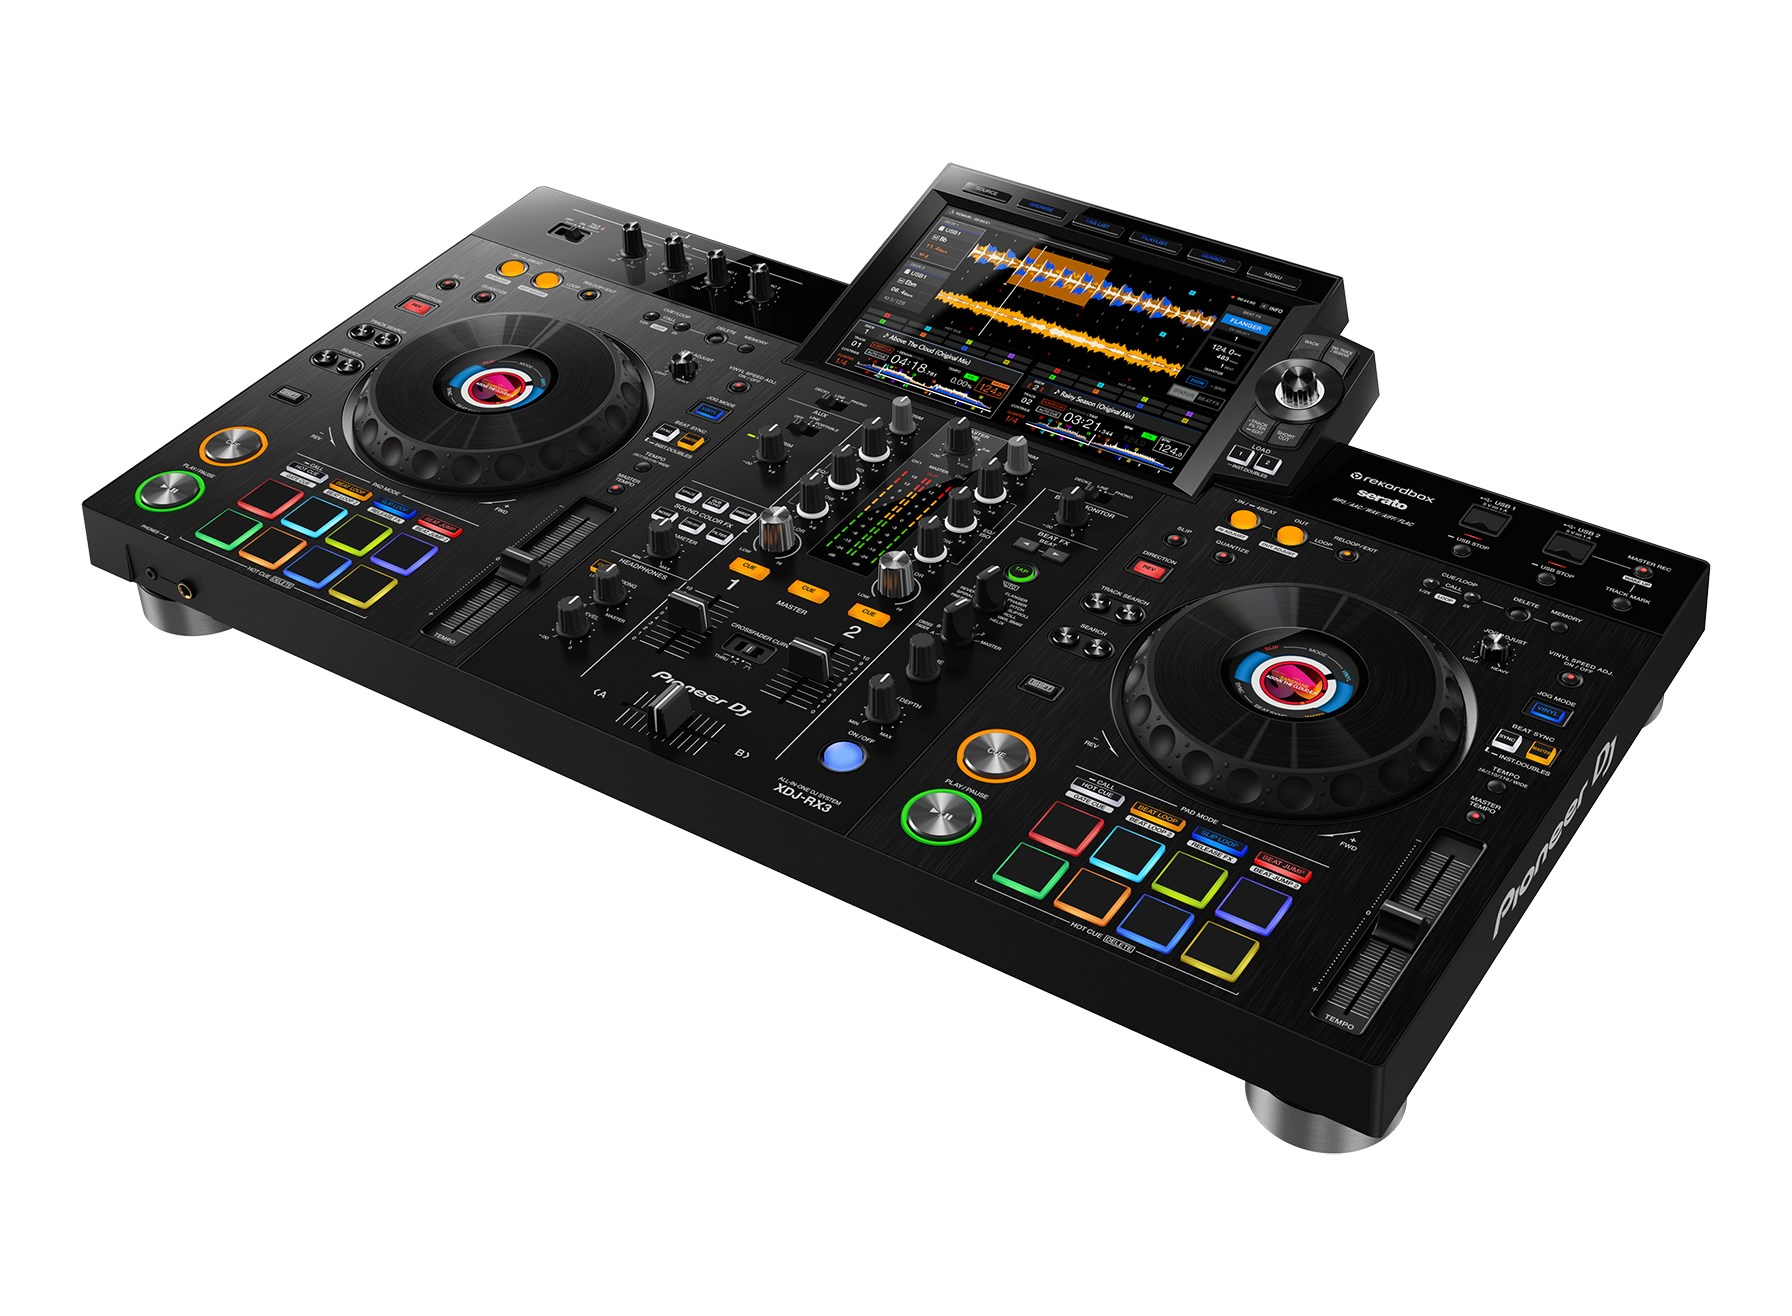
Our Audio Setup
DJ Controller: Pioneer DJ XDJ-RX3
Powered Speakers:
- Three Bose F1 Subwoofers
- Five Bose F1 Model 812 Loudspeakers (1000 watts each)
- Three Alto Pro TX315 Loudspeakers (700 watts each)
Yamaha MG10XU Mixer (not currently used)
Furman PL-PRO DMC Power Conditioner (important to plug all equipment into this to avoid damage from flaky electrical grid!)
We have a bluetooth -> XLR adapter for streaming through the audio system or through one speaker.
A detailed inventory of the audio equipment we own is on the camp manifest Google Sheet, in a tab called DJ Gear.
DJ Tutorial
DJ curious? Let’s get you on the decks!
Best beginner deck: DDJ FLX 4
- If someone is looking for a cheaper alternative to see if they’re interested in DJing then get the DDJ 200, but most people find after a short period of time they outgrow it and want to move to the DDJ FLX 4
Music library: Beatport Streaming and/or ZIPDJ
- Beatport Streaming makes it easy to access a large music library in the Rekordbox software, but note that we won’t be able to access Beatport Streaming on the playa so they’ll likely want to use a website like ZIPDJ to download the song files onto a USB
- When registering for ZIPDJ, they ask for you to prove that you are a DJ, but they don’t seem to be that strict, if you create a SoundCloud profile and include “DJ” in your SoundCloud profile name you should be fine
Quick tutorial on how to load songs onto a USB using rekordbox:
Lighting Equipment
This is the equipment we have for lighting the dance floor.
It is all DMX controlled.
DMX Controllers
- ADJ DJ WMX1 Controller - a powerful, compact standalone DMX controller that is used to control lights in the dance area
- Our DMX Setup page has setup details.
- Manufacturer's home page
- Visit wolfmix.com/activate for activation and help getting started
- ADJ Airstream Bridge (plus iPad to control it) - An older device that works reasonably well as a simple, backup DMX controller
DMX controlled lights
- 6 (six) ADJ 7P HEX IP with 3pin DMX plugs and Neutrik True1 for power - daisy chainable
- 10 (ten) ADJ 7P HEX IP with 5pin DMX plugs and Neutrik True1 for power- daisy chainable
- 4 (four) ADJ Saber Spot RGBW LED Pinspot with 3pin DMX plugs and Neutrik PowerCon for power - daisy chainable
- 8 (eight) DJXFLI 120W Moving Head DJ Lights (cheap amazon random stuff) with 3pin DMX and Neutrik PowerCon for power - not daisy chainable
Power cables
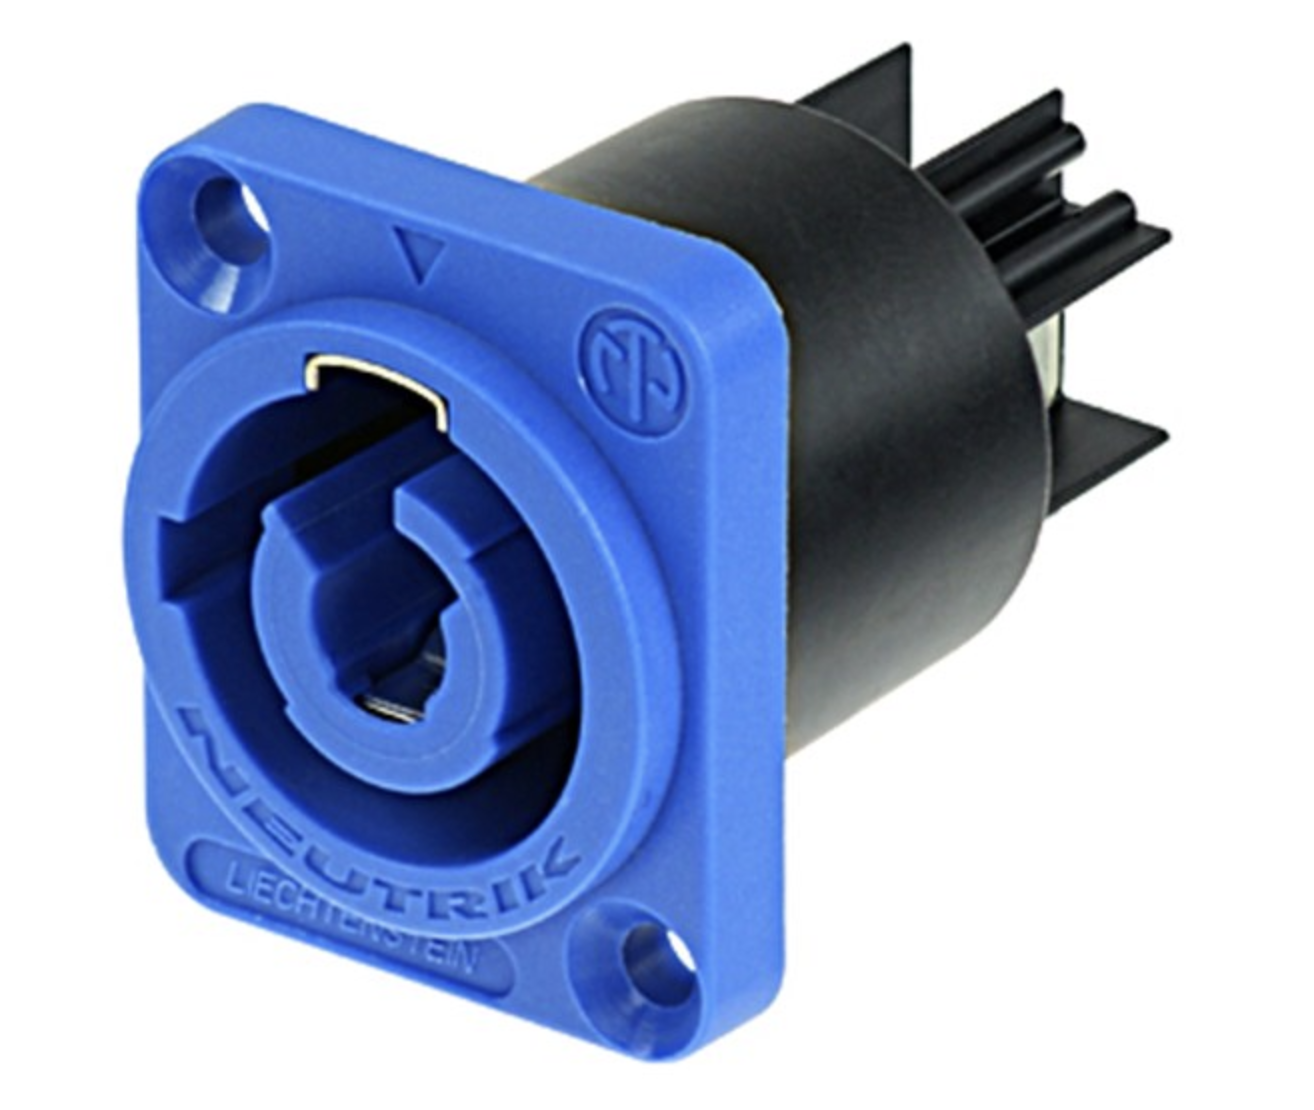
Note there are two kinds. Neutrik PowerCon is the old kind("blue and grey"), shown here on the left -- it is not designed to be unplugged under load. Neutrik True1 is the new kind which can be unplugged under load and is therefore safer.

Inventory
|
Description |
Length |
Inventory 2024 | New for 2025 |
| Nema 5-15P to True1 (plugs PAR lights into normal outlet) | 6' | 16 | 0 |
| True1 Daisy Chain (plug one PAR light into neighbor) | 10' | 0 | 5 |
| True1 Daisy Chain (plug one PAR light into neighbor) | 15' | 7 | 0 |
| True1 Daisy Chain (plug one PAR light into neighbor) | 25' | 6 | 0 |
| Nema 5-15P to PowerCon (plug spots and moving heads into power) | 6' (?) | 12 (?) | 0 |
| PowerCon Daisy Chain (plug one spot into neighbor) | 6' | 0 | 2 |
|
Nema 5-15R to PowerCon (plug DMX TX and RX into PinSpot) |
1' | 0 | 2 |
DMX cables
DMX cables come in 5-pin and 3-pin variations. Note that ten of our PAR lights use 5-pin and everything else is 3-pin.
Did you know - DMX cables, used for lighting control, look the same as XLR cables, used for speakers, but they have a different impedance, so don't mix them up.
The last "output" in a chain of DMX cables must have a terminator on it.
|
Description |
Length |
Inventory 2024 | New for 2025 |
| 3-pin DMX | 6.5' | 0 | 13 |
| 3-pin DMX | 10' | 8 | |
| 3-pin DMX | 15' | 3 | |
| 3-pin DMX | 25' | 15 | |
| 3-pin DMX Terminator | 0 | 2 | |
| 5-pin DMX | 6.5' | 0 | 7 |
| 5-pin DMX | 15' | 8 | |
| 5-pin DMX | 25' | 9 | |
| 5-pin DMX | 50' | 4 | |
| 5-pin DMX Terminator | 0 | 2 | |
| 3-pin F to 5-pin M adapter | 6 | ||
| 3-pin M to 5-pin F adapter | 6 |
DMX Lighting Setup 2025
See also: Lighting Equipment
This spreadsheet has the detailed lighting schedule, including the address of every fixture and an analysis of all DMX and power cables and connectors needed.
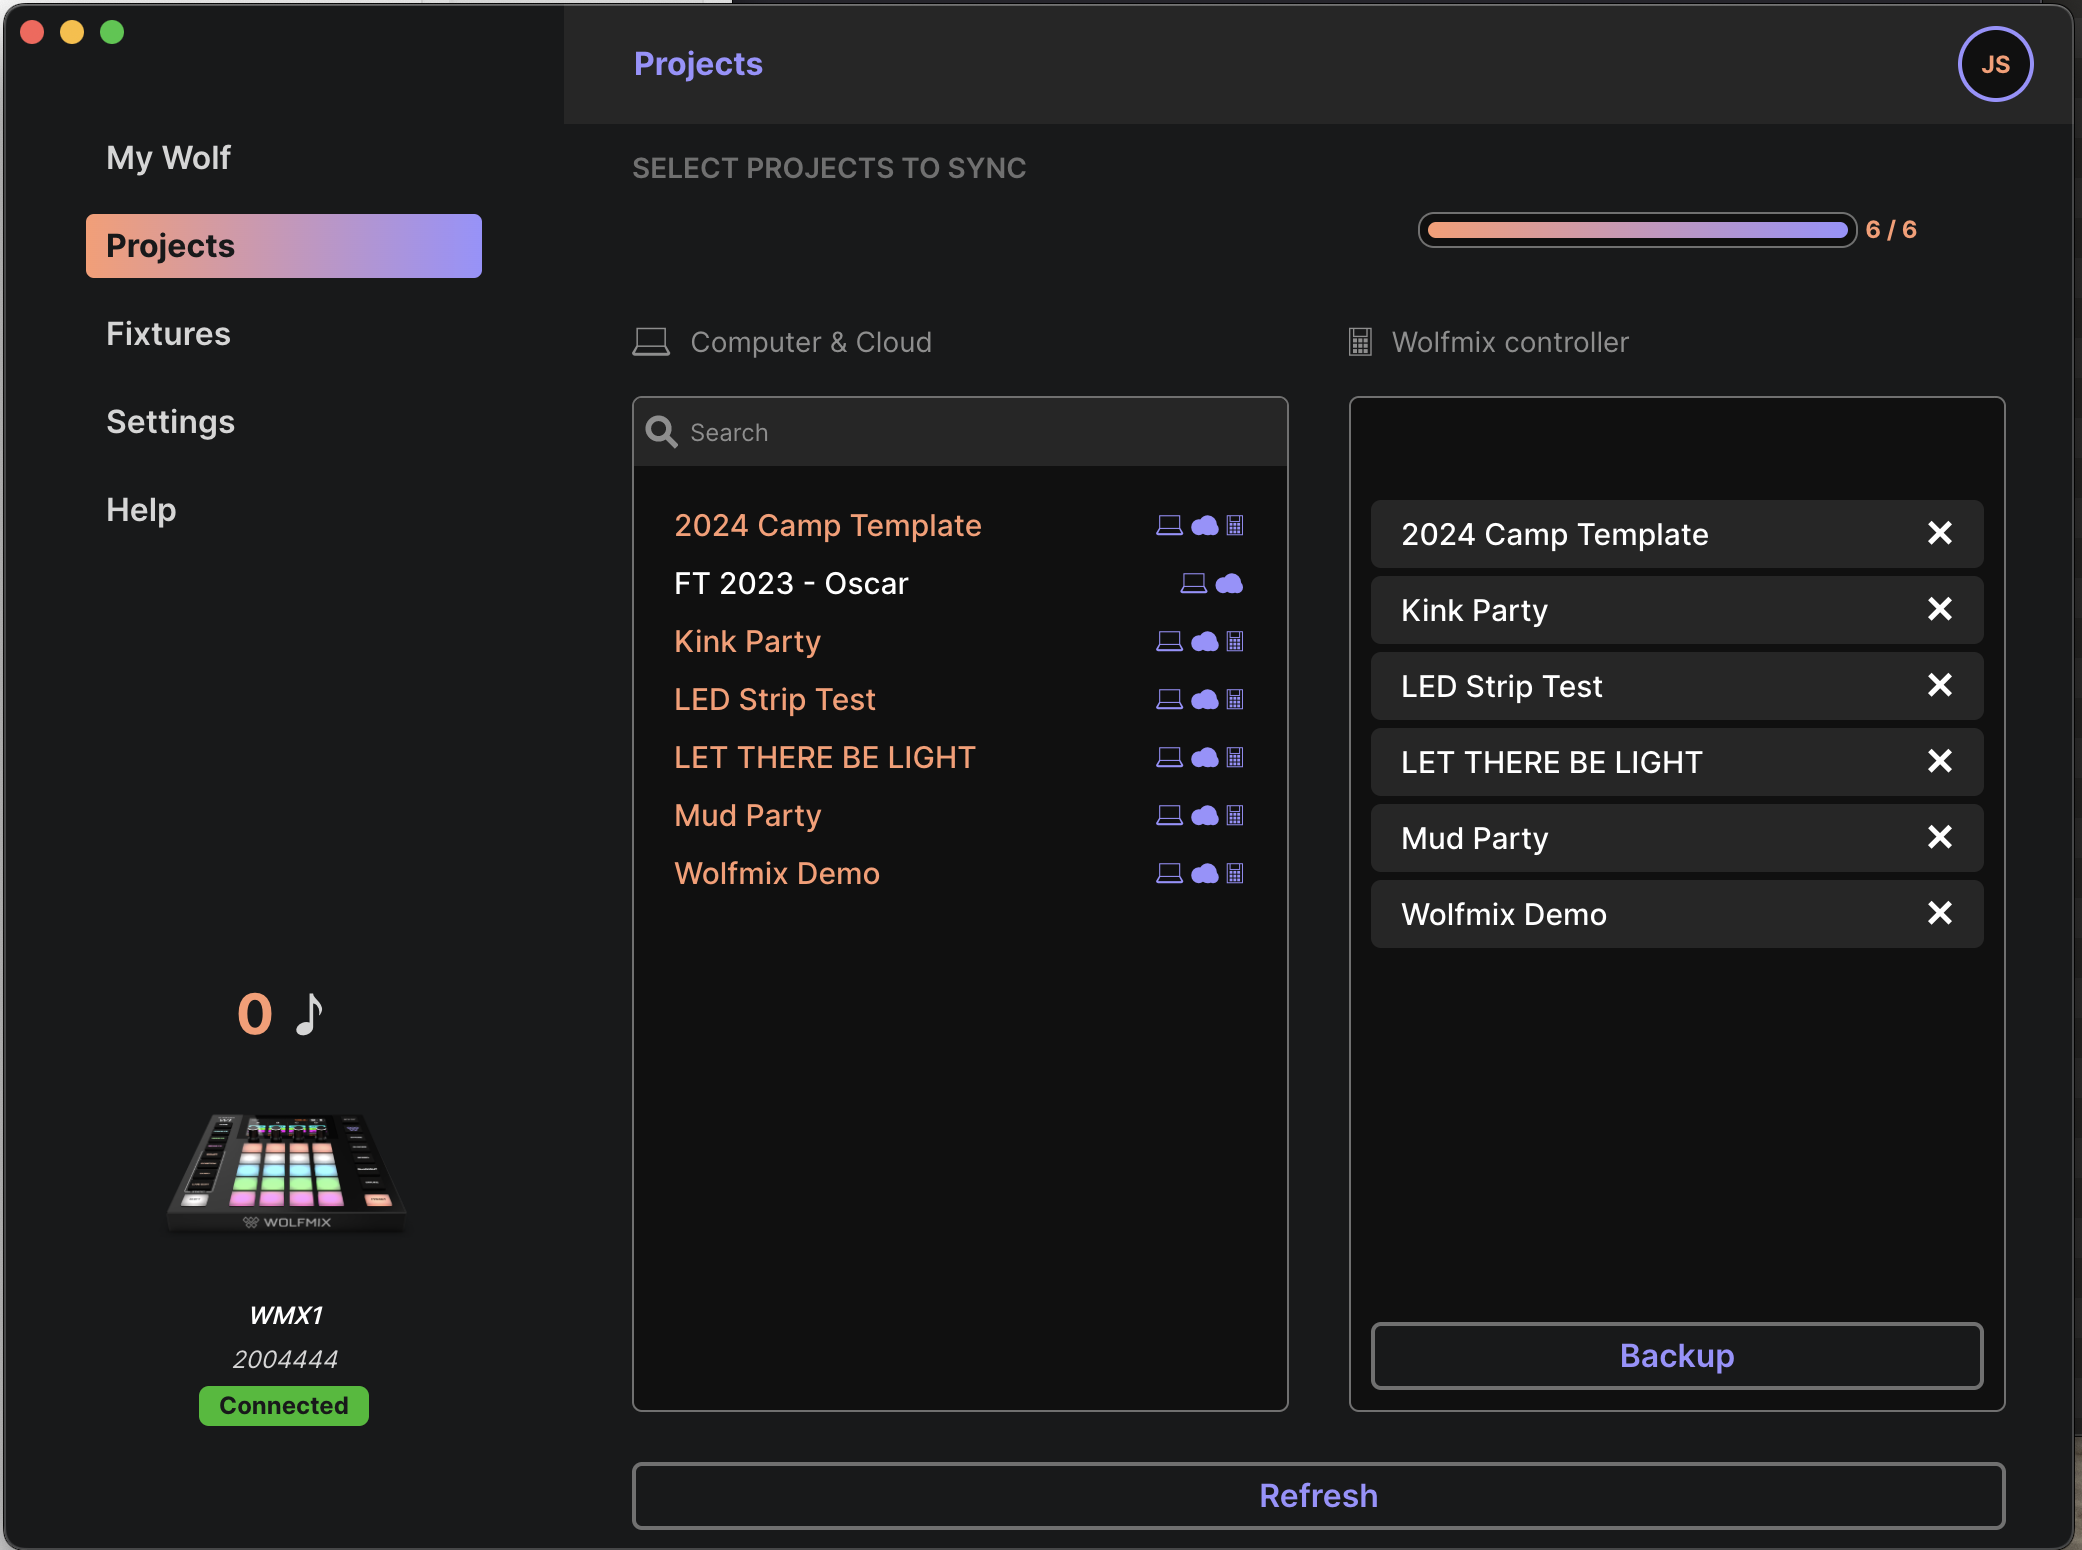
Our primary lighting controller is a ADJ / Wolfmix WMX1.
It can control 1 universe of DMX512 via DMX cables. (You can pay extra to unlock a second universe)
Ask Joel for the password to the online account on Nicolaudie Connect (https://cloud.nicolaudiegroup.com/#) which is a cloud service that lets you sync and save projects. Only 6 projects can be saved on the controller, but you can store more on the cloud. There is a Mac app called WTools that lets you move projects between the cloud and the controller:
Fixture Setup 2025
Par Floods
Fixtures 001-016: ADJ 7P HEX IP PAR Floods set up in seven channel mode. The 7 channels will be Red, Green, Blue, White, Amber, UV, Master Dimmer.
Some have 3pin connections and some of 5pin connections. The plan for 2025 is designed so there is only one transition from 3 to 5.
These fixtures are well supported by the WMX1.
Instructions for setting up each PAR light
When the PAR flood lights wake up, the LCD screen shows you their settings for the two most important things.
- The number of channels should be 7
- Each flood light has a DMX address (1, 8, 15, 22, etc)
If the screen is locked, press and hold Mode to unlock it.
If a flood light is not set up correctly, follow these exact instructions to get it set up:
1. Factory Reset
-
Mode (hold if necessary to unlock)
-
Press Down until you see Menu Function then Enter
-
Press Down until DFSET then Enter UP Enter
-
Mode
2. Disable the screen autolock feature
-
Mode (hold if necessary to unlock)
-
Press Down until you see Menu Function then Enter
-
Press Down until LCD.SET then Enter
-
Press Enter until Key Lock
-
Press Down until Off
-
Press Enter until LCD.SET
-
Press Mode
3. Set this flood light’s address
First light’s address is 1, then add 7 for each subsequent light, i.e., 1, 8, 15, 22, etc.
-
Press Mode until Menu Set Addr then Enter
-
Use Up/Down to set address then Enter
4. Set to 7-channel mode
-
Press Mode until Menu User Mode then Enter
-
Press Up to set CH: 07 then Enter
-
Press Mode
Still flummoxed? Here's the ADJ 7P Hex IP - User Manual.pdf.
Pinspots
ADJ Saber Spot RGBW LED Pinspot set up in five channel mode. The 5 channels will be Red, Green, Blue, White, Master Dimmer.
These fixtures are well supported by the WMX1.
Instructions for setting up each pin spot
1. Press the either the MENU, UP, or DOWN buttons until “DMX MODE” is displayed, press ENTER.
2. The current address will now be displayed and flashing.
Press the UP or DOWN buttons to find your desired address.
Press ENTER to set your desired DMX address (113, 118, 123, and 128).
CHANNEL - This will let select your desired DMX
channel mode.
1. Press the either the MENU button until “CHANNEL” is dis-
played, press ENTER. The current DMX channel mode will be
displayed.
2. Press the UP or DOWN buttons to set the DMX
channel mode to 5 and press ENTER to confirm and exit.
Here is the manual: ADJ Saber Spot RGBW Manual.pdf
Moving Heads
DJXFLI 120W Mini SPOT LED Moving Heads. These have 12 channels each: X, X Fine, Y, Y Fine, Speed from fast to slow, Dimming, Strobe, Color, Gobo, Prism, Reset.
These fixtures require a special fixture on the WMX1 called DJXFLI 120W Moving Head Light. We have downloaded the profile for this fixture to the cloud account so it should show up under Cloud in the WMX1 fixture library. If you don't see it there, you can sync it using the WTOOLS app.
Instructions for setting up each moving head
Sorry buddy you are on your own with this one.
DJ and Bar LED Strips
Joel is building a setup with three Alitove SP201E Decoders which control LED strips.
DJ Booth Front - Set up as a generic RGBW four channel
Bar Front - Set up as a generic RGBW four channel
DJ Desk - shines a light on the DJ, with RGBWV five channel (V is Ultra Violet so you can make the DJ glow)
Layout
Par Floods are on the ground around the edge of the pavillion, pointing up at the sails. They are positioned to give even light to illuminate the sails:
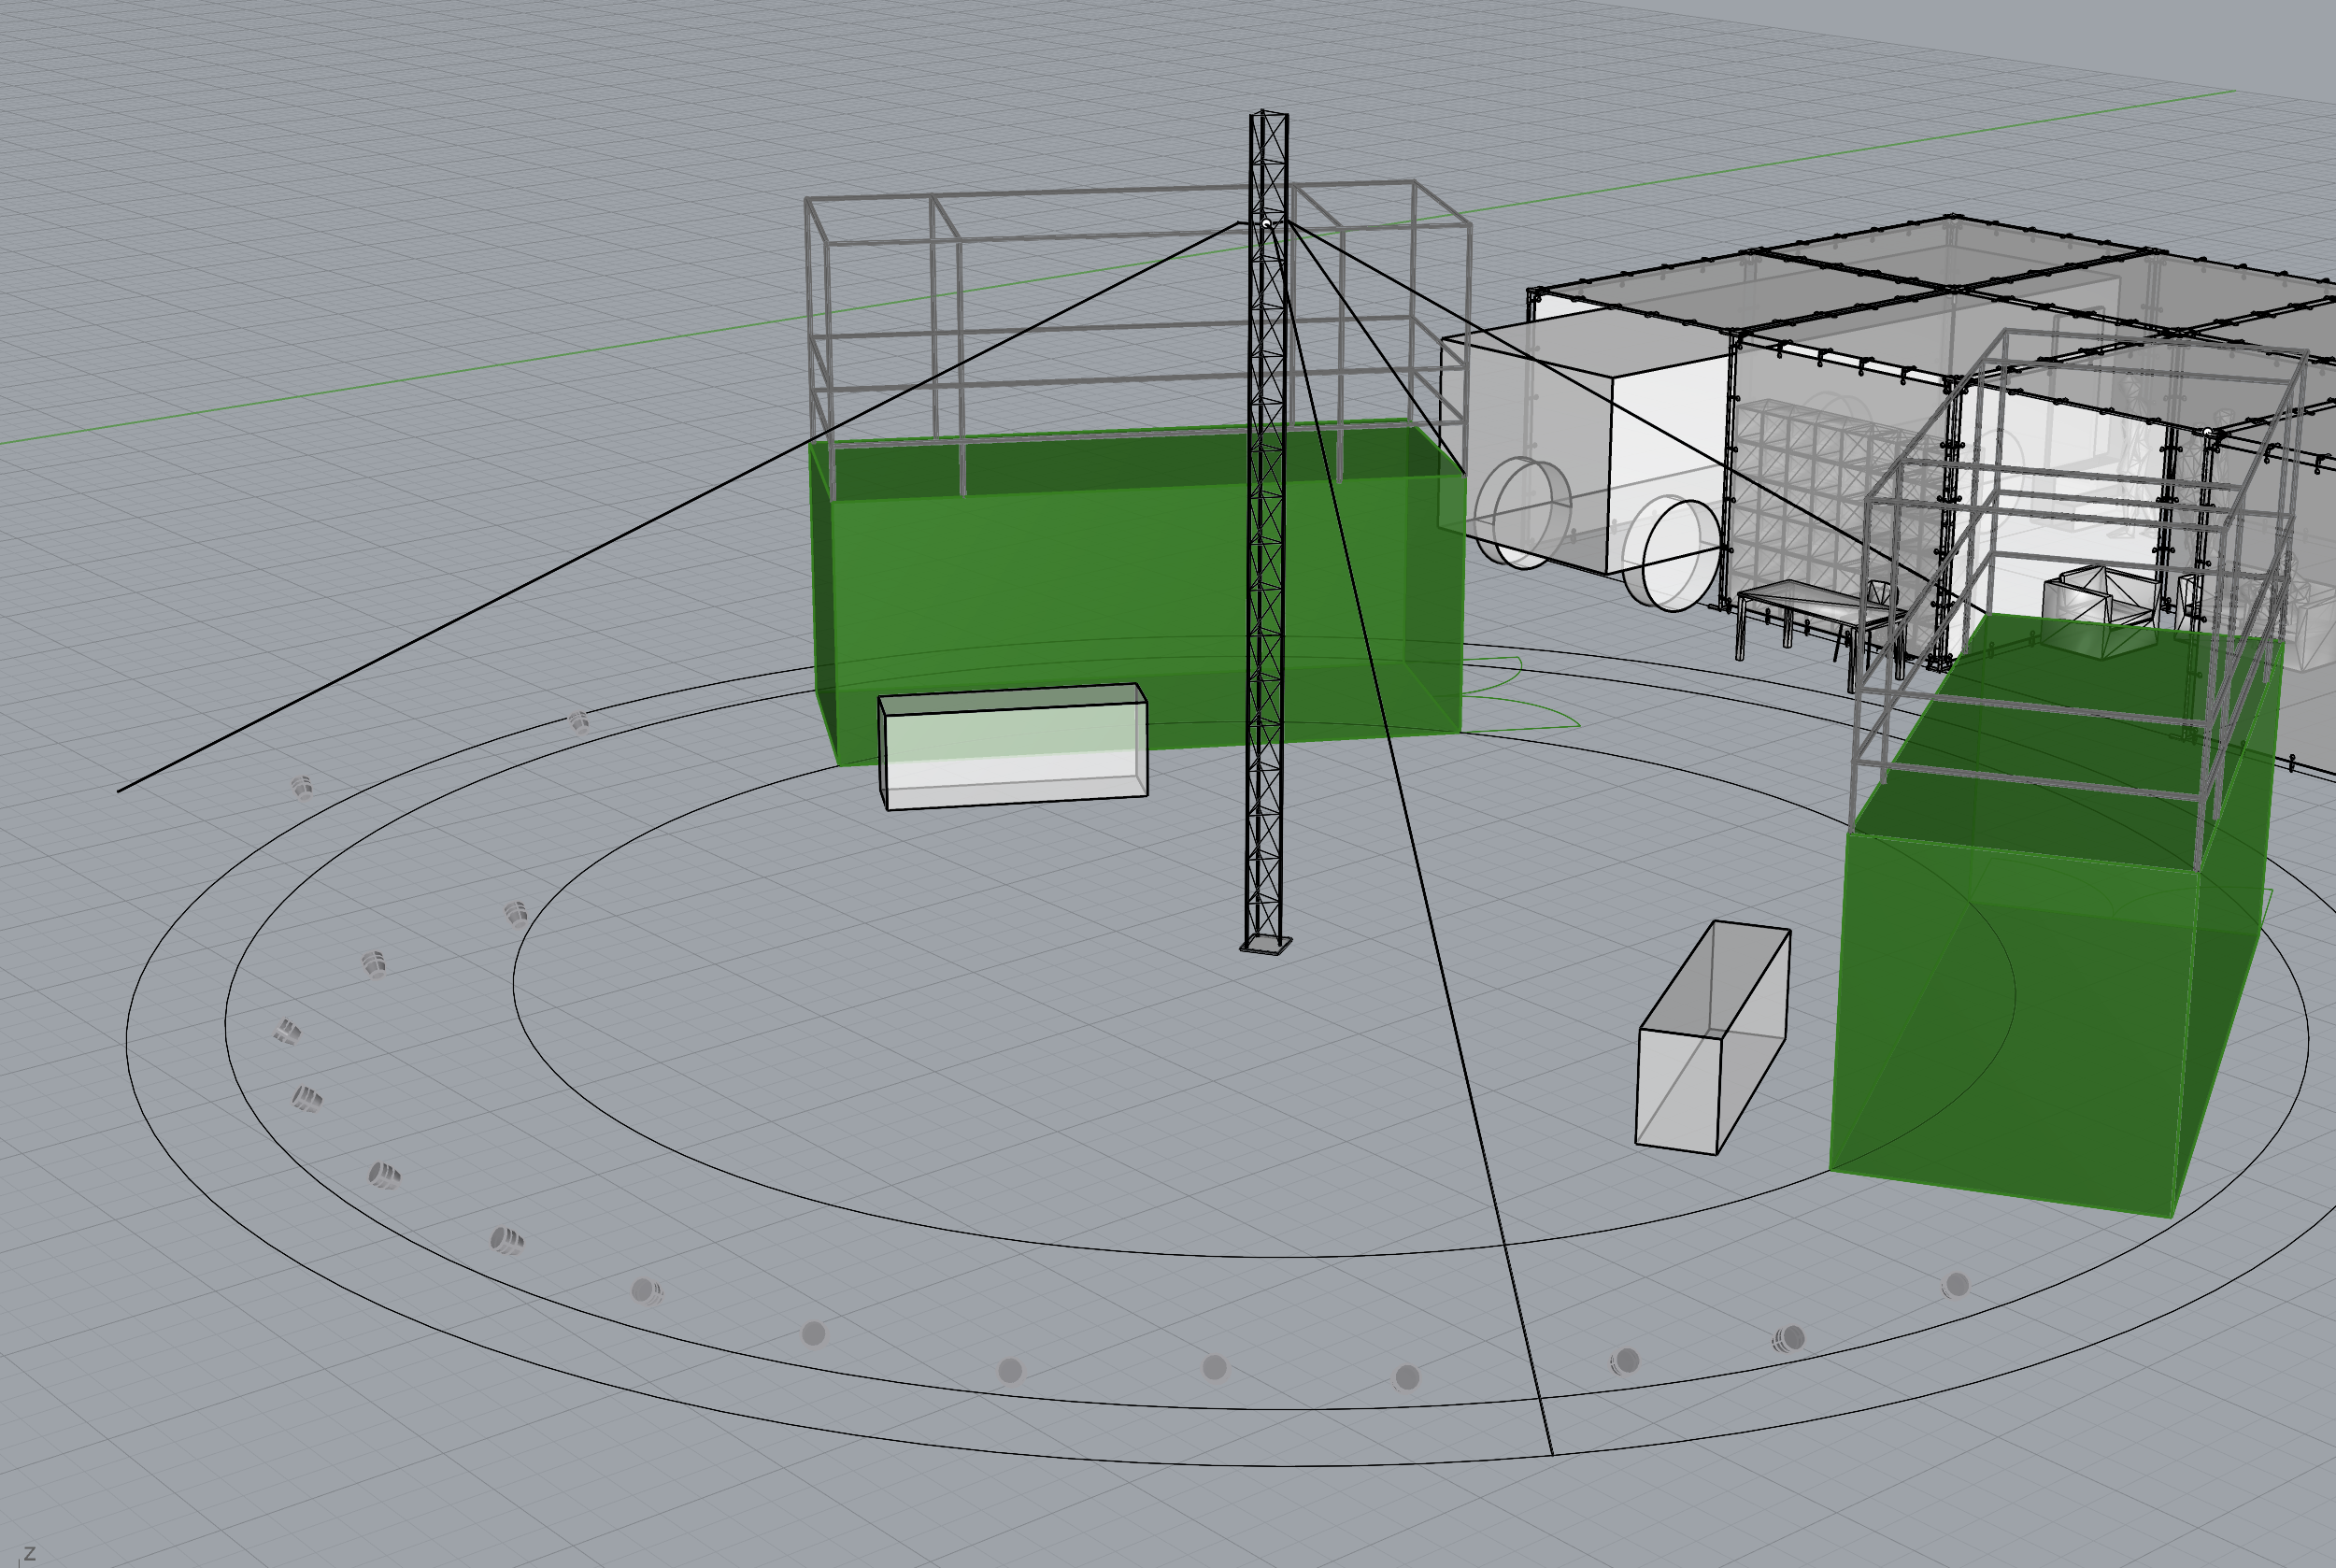
The four Saber Spot Pinlights will be used for the rear sails.
Moving lamps will be clamped to the top, inner guardrail, with four on each shipping container:
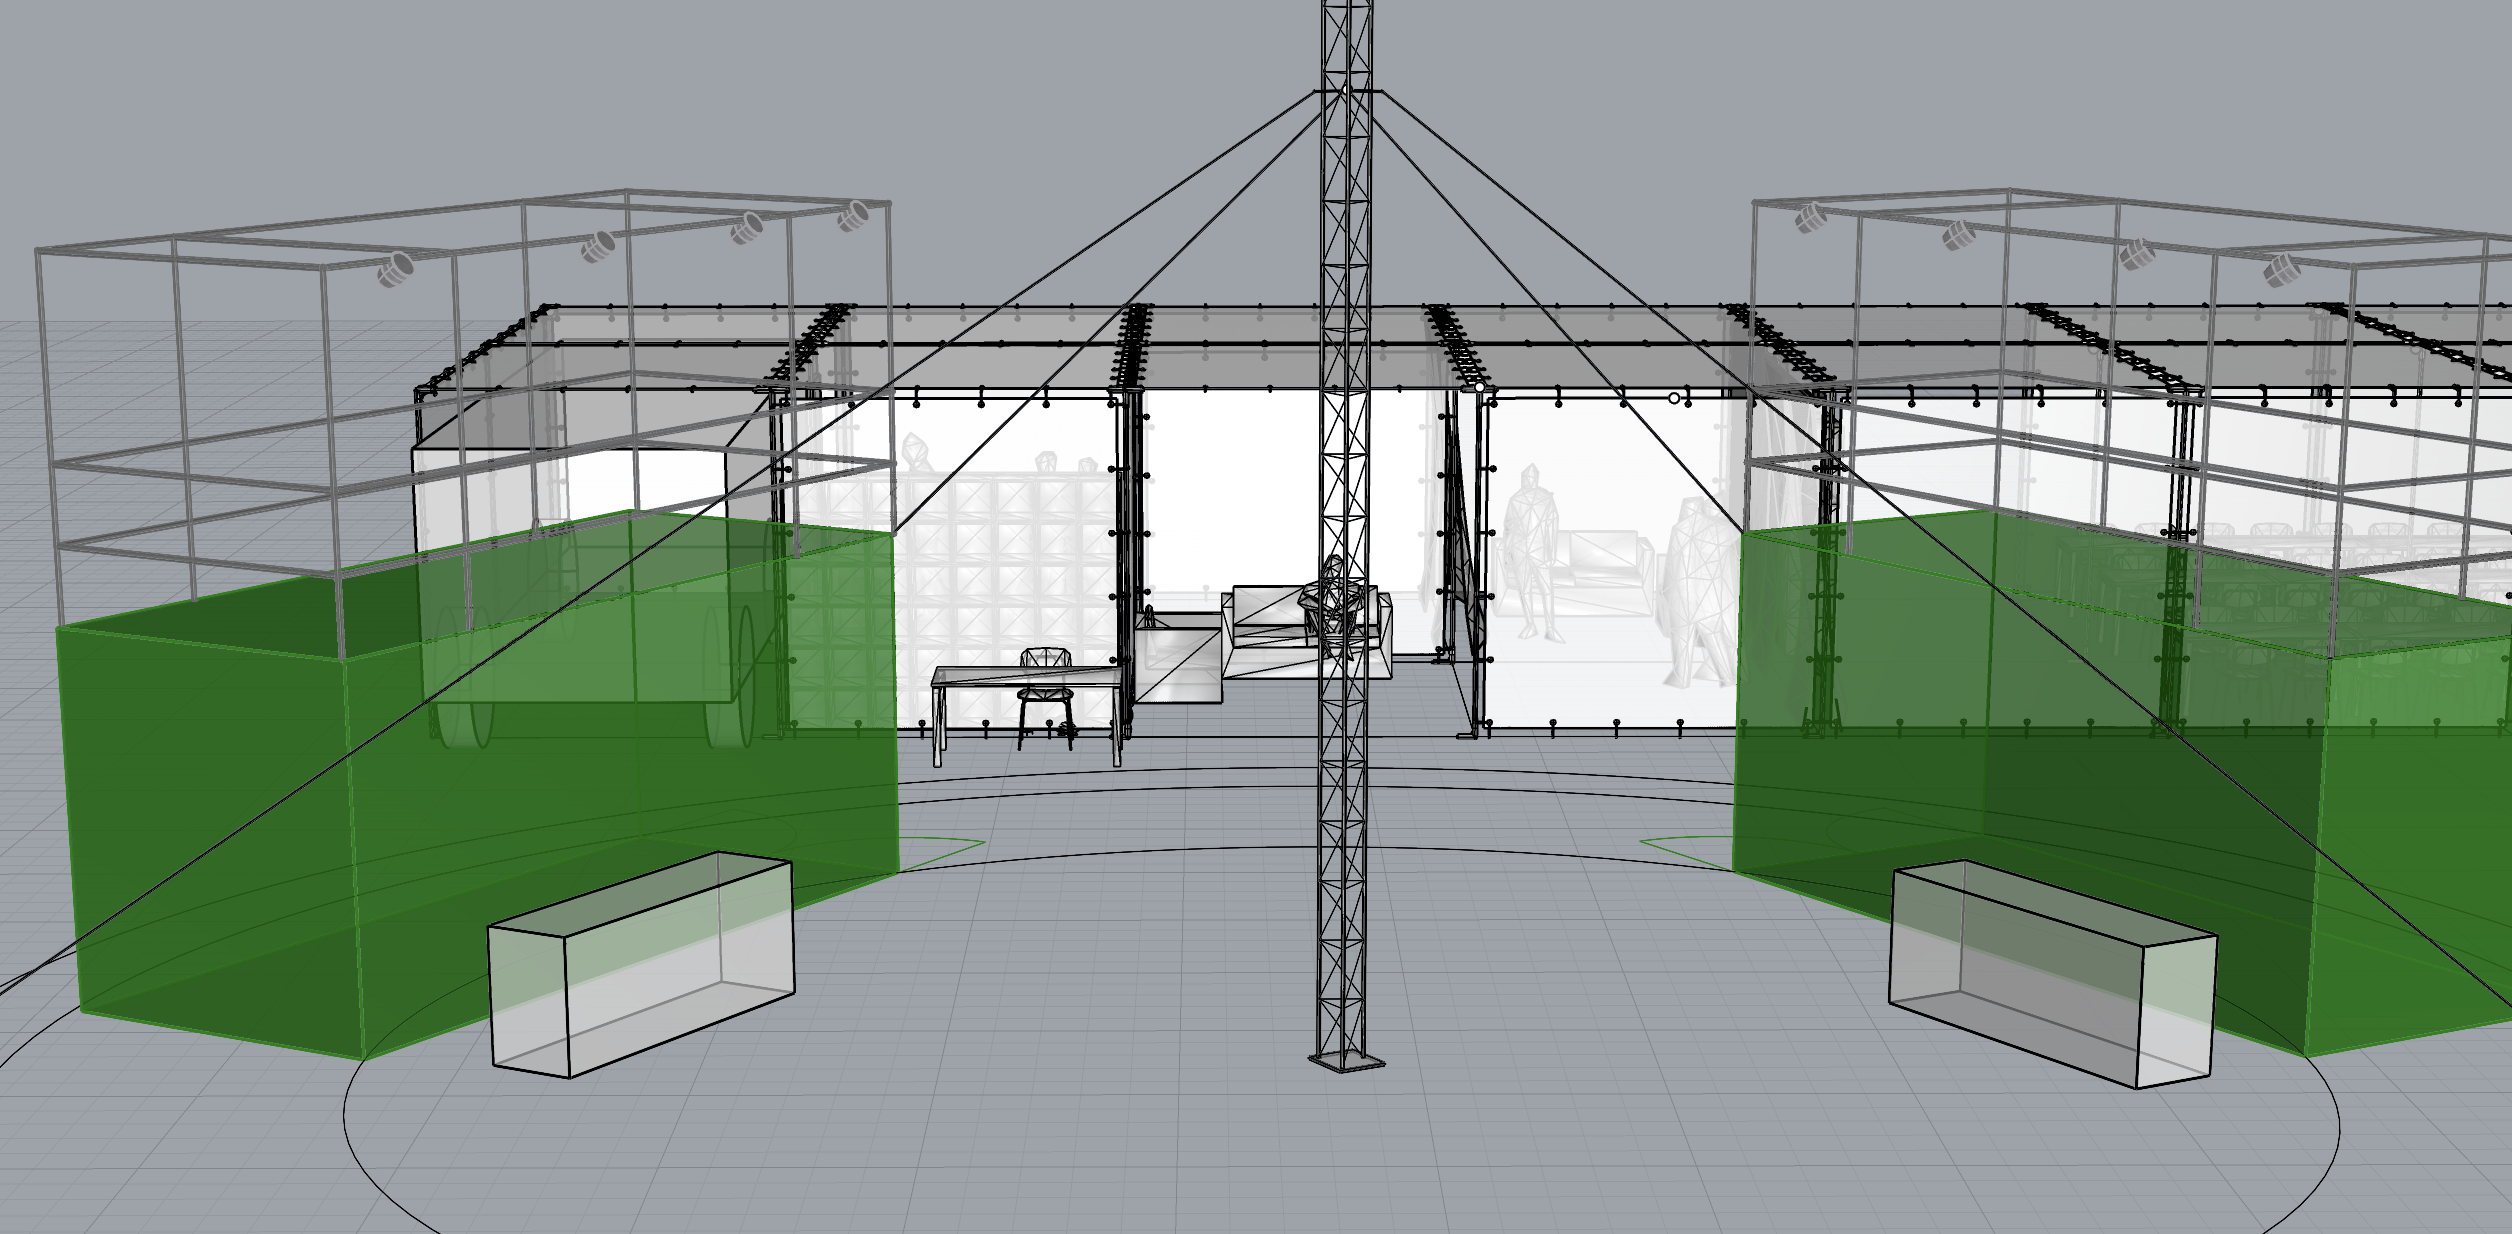
Here's how it all looks:

Cabling
The DMX path will be clockwise. It starts at the DJ booth (to the right of the Tool Fort), then goes first to fixture #02, then proceeds strictly clockwise to fixture #03. This way there is only one spot where it has to cross a walking path, which is between fixtures #18 and #17. At this point we will use a DMX transmitter and receiver. If that fails, we can pull an DMX cable up and over the entrance to the lounge.
Power cables are daisy chained wherever possible. There are spider boxes at the DJ booth and bar which get their power from separate cables so no power cables have to cross the dance floor or passageways.
WMX1 Presets
The Wolfmix (WMX1) Controller allows us to program up to 10 pages of 20 presets (200 total) to easily control lights (press the big "Preset" Button to access). Before the burn, we'll have the following pre-programmed in the controller
- Pages 1-5: "Smart presets" that were built by the software that have some default scenes
- Pages 6-8: Specific presets built by Turtles to provide quick access to scenes for parties
- Pages 9-10: Scenes to be played during non-party nights that will look cool from far away and will not be distracting to people in the common space. They will be played on a slow loop